Skip to content

Posts tagged ‘food photography’

what? another take on hummus?

We have this favorite little Japanese maple out back. This past week, its finely pointed leaves began to wave then drop in sweet clusters of beet red.

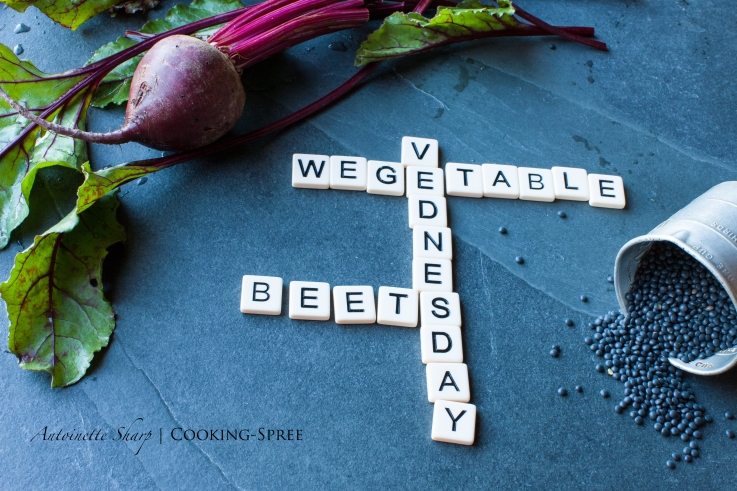
It was quite impossible to say no to the urge that hit me…so,  with that…Wegetable Vednesday makes a comeback!

BeetBelugaLentilHummus-8

With the crimson and scarlet, burnt orange, rust and gingko gold of fall flying,  suddenly I craved the taste of color.

BeetBelugaLentilHummus-1

I’m in school and everything I do in the  kitchen for months will need to be simple. So, for a while simple is all I have to offer you.

…and a hope and a toast to your very good health!

__________

(Though the following recipe calls for black beluga lentils, they may be somewhat difficult to find. You can order on line if you like, or substitute with small, dark green Puy Lentils. Both these varieties will make a more luxuriously textured and  dramatically colored hummus.)

_______

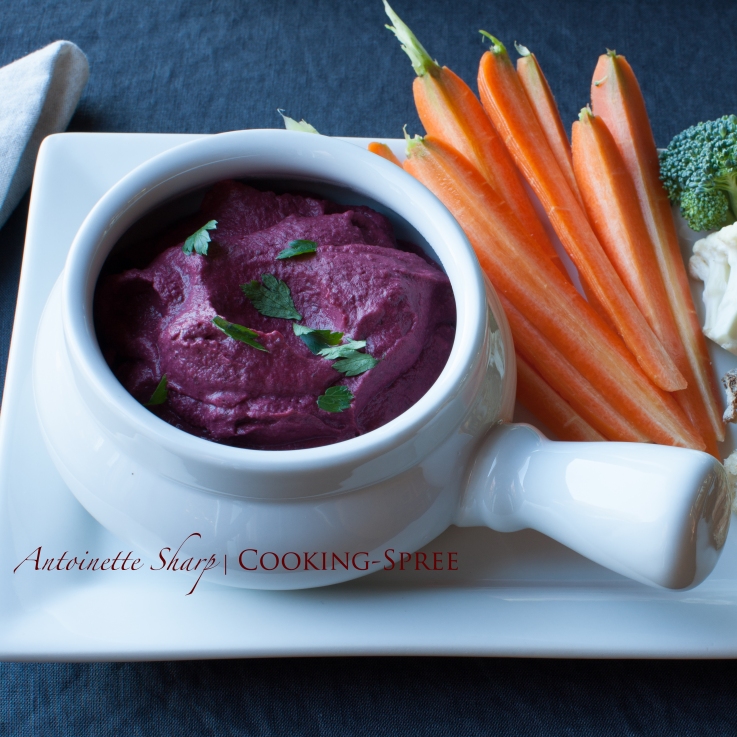
Red Beet & (Black Beluga) Lentil Hummus

 Black  Beluga Lentils, rinsed – ½ cup

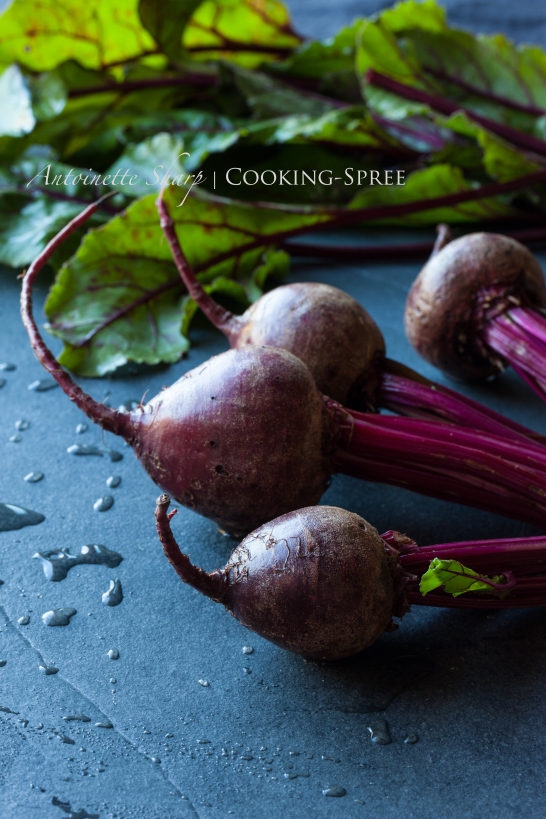
2 medium Beets or 3 small – peeled and cut into chunks

garlic – 2 cloves, peeled

Tahini Paste – 2 Tablespoons

Olive Oil – 2 Tablespoons

Fresh Lemon Juice – 2 Tablespoons

Lemon Zest – 2 teaspoons grated (minimum)

sea salt – 1 teaspoon (to start)

__________

NOTE: Sometimes lentils off the shelf are rather old and will benefit from a little soaking. Nothing extravagant here, but it wouldn’t hurt to allow them to soak an hour or two before draining and cooking. If your package says no need to soak, then no need to soak.)

BeetBelugaLentilHummus-13

Rinse the lentils and add to a medium size pot. Peel the beets and cut into chunks about 1½ inches in size. Add to the pot with the lentils and add 1 cup of water. Bring to boil and reduce temperature to simmer. The beets should be fork tender and the lentils soft when done.  (About 20 minutes or so.) Read more

pasta that stands out in a crowd

Several years ago, three of us went to a newly-opened restaurant here in Portland by the name of Fin. Great name for a (primarily) fish restaurant, no? One plate after another was brought to us, bearing exquisite-tasting and exotic-looking creations, works of culinary art, in very small portions…each with just a few bites to share. We saw one on this tasting menu using “Squid Ink Pasta” and our eyebrows went up and our eyes grew wide and we looked at each other with question marks across our foreheads that read, “Dare we?” We did! And what a good move that turned out to be!

About a year later, Fin closed its doors…lost its lease, through no fault of its owners…the landlord just wanted another and quite different use for the property. We have so many very good restaurants in Portland, but we were sad to see Fin go.

How I’d like to thank them for first introducing us to this intoxicatingly delicious, love at first bite, pasta. The one thing I know to do is to share the good noodle news with you’s!

This wasn’t the way it was prepared for us the first night we dined at Fin, but I’ve been thinking of preparing it like this for quite some time. And, turns out, it was as good as a very good food dream can be.
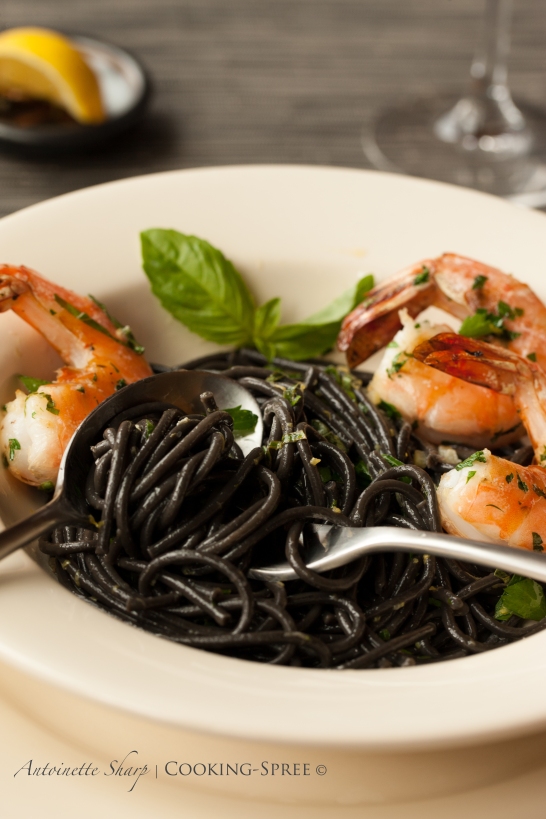
ShrimpLemonSquidInkPasta-1

Before we get to the recipe, a word about the pasta. It’s hard to imagine, isn’t it? Pasta as black as winter’s midnight! It still has the tooth-feel of a good spaghetti or fettucini noodle, but with a certain inexplicable velvety silkiness. Don’t think for a minute that I mean slippery like an eel! I mean smooth (and please, when you say it, say it slowly, drawing out those oo’s!) It tastes a bit of the sea, a little briny, but not salty. It will cost you a little more, and it may be hard for some of you to find, depending on your markets nearby, but it’ll be worth the hunt and worth a few extra dollars (only a few!) for a meal…this…this..indescribably good.  (If you have trouble locating the pasta locally, you can order from Amazon. There are several names and sizes to choose from.  Here’s one Italian brand I like a lot –  the  link here.)
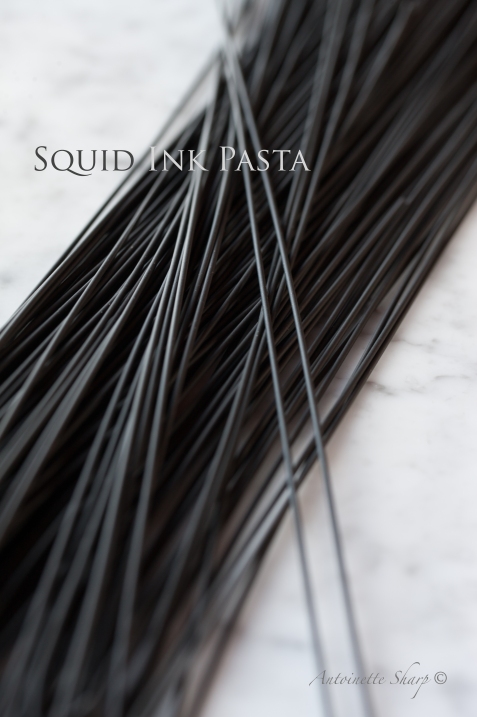
ShrimpLemonSquidInkPasta-5

I recently discovered a wonderful article in Cooks Illustrated on how to prepare (perfect, yes I’ll use the word) shrimp under the broiler. Being thus equipped, it was a cinch to put these two together. You’d have done it too…
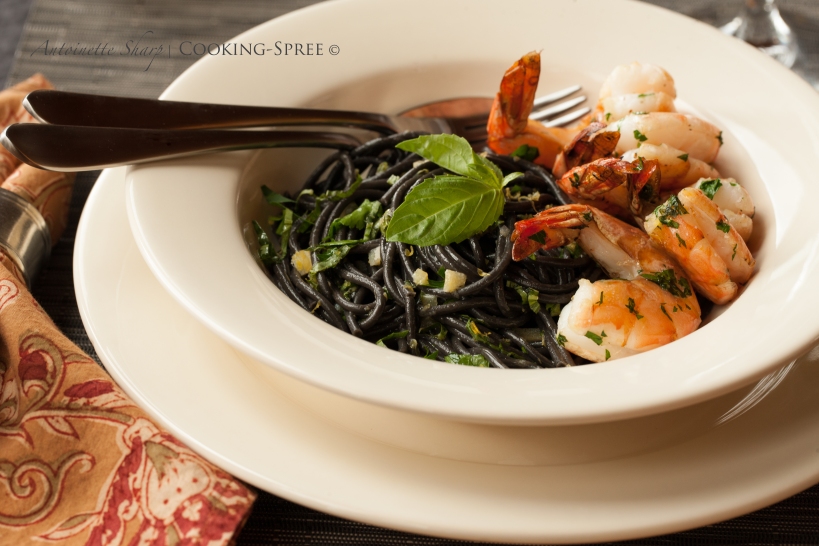
ShrimpLemonSquidInkPasta-3

Shrimp & Squid-Ink Pasta with Lemon & Basil

This all comes together pretty quickly…once you get those rascally shrimp clean and deveined. But be sure to leave the shells and tails on…lots of good flavor in those shells, and they share it with the shrimp as they cook. (Though of course you’re permitted to take them off before you eat.) The cleaned & butterflied shrimp are then dropped into a brine for 15 minutes before cooking. That will give you plenty of time to gather the rest of your dinner.

Garlicky Roasted Shrimp

( serves 4 to 6 )

____

Salt – ¼ cup

 Shell-on Jumbo Shrimp – 2 pounds (16-20 per lb)

Unsalted Butter – 4 Tablespoons

Vegetable Oil -¼ cup

Garlic – 6 cloves, minced

Red Pepper Flakes – ½ teaspoon

Black Pepper – ¼ teaspoon

Fresh Parsley – 2 Tablespoons minced

Garnish: Lemon Wedges

_____

Dissolve salt in 1 quart cold water in a large container. (It will take you some long minutes to prepare the shrimp so I wouldn’t add to the brine until you’ve got them all done so they’re all flavored equally.)

Using kitchen shears or a sharp paring knife, cut through the shell and devein but do not remove the shell. Using a paring knife, continue to cut the shrimp ½-inch deep, taking care not to cut in half completely. (See Illustration.)
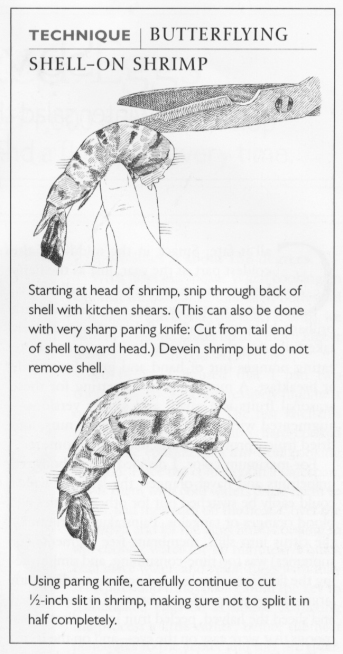
ShrimpLemonSquidInkPasta-6

Submerge the shrimp in brine, cover, and refrigerate for 15 minutes.

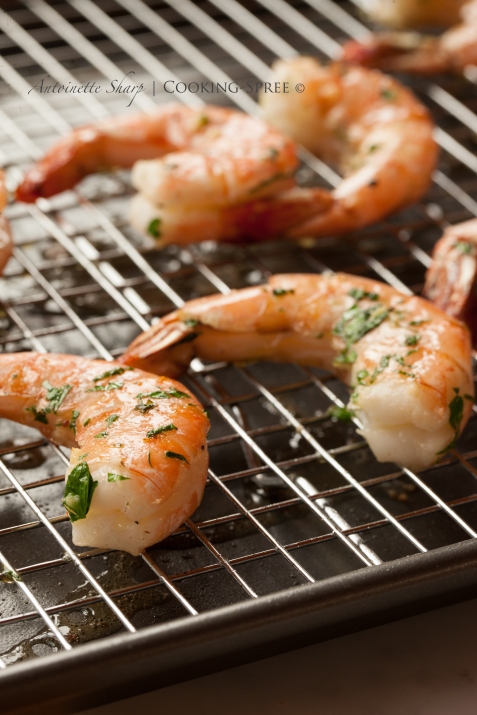
Adjust oven rack 4 inches from broiler element and pre-heat the broiler. Combine melted butter, oil, garlic, pepper flakes, and pepper in a large bowl. Remove shrimp from brine, pat dry with paper towels then add shrimp, along with the parsley, to the butter mixture. Toss well, making sure that the butter mixture gets into the interior of the shrimp. Arrange on a wire rack set into a rimmed baking sheet.

Broil until shrimp are opaque and shells are beginning to brown on the top side, 2 to 4 minutes, rotating sheet halfway through the broiling. Then flip shrimp over and continue to broil until second side is opaque and shells are beginning to brown, another 2 to 4 minutes, rotating halfway through. (Very doubtful this will require anything close to 8 minutes total time!)
ShrimpLemonSquidInkPasta-4

You may think now to plop these beauties onto pasta – and how lucky! That’s the very thing I’m recommending!

____________________________________________

the pasta!

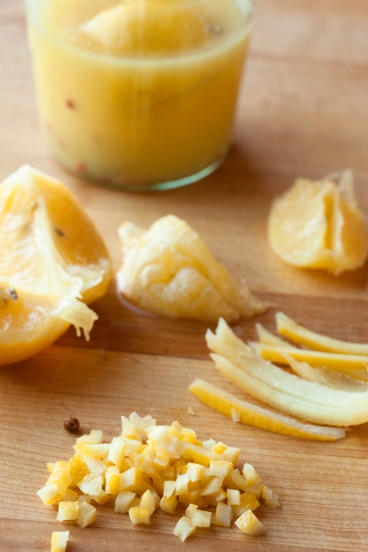
I’ve paired this pasta with a couple herbs and with lemon, three ways – the tart juice, the bright zest, and the Incomparable Preserved Lemon. (You can omit the preserved lemon if you wish, but I don’t know why you would! : ]  If you still haven’t made your own, you can buy them already prepared. In an upcoming Spreenkle I’ll share a quick trick for making a reasonable facsimile much faster in your freezer – or Google it and you’ll see the method. I still prefer the slower method though.)

Squid-Ink Pasta with Lemon & Basil

( serves 4 with shrimp )

__________

Squid-Ink spaghetti, fettucini, linguini, capellini (your choice) – 8 ounces

Juice of 1½ – 2 Lemons

Lemon Zest – from the juiced lemons

Preserved Lemon (the rind only, finely-diced) – from ½ lemon – rinsed well, pulp removed

Unsalted Butter – 3 Tablespoons

Extra-virgin Olive Oil – 3 Tablespoons

White Wine – a good Splash

Basil Leaves – 16 medium to large ones

Italian Parsley – 1½ Tablespoons chopped

Salt – to taste

Freshly-ground Pepper – to taste

________ Read more

on pita & filling our pockets

Making your own pocket bread may not be the thing for you. Do you have some leisure hours on one of your weekend days that you might like to spend playing with soft little pillows of dough? Do you find it a thing of pleasure to create something from scratch, something you can easily grab off the shelf, machine-made and already shrink-wrapped for you in plastic? Would it thrill you (just a tiny bit?) to watch flat pancakes fill like hot-air balloons in your oven while the aromas of a bakery fill your house?   hmmm! – well –

then…

PitaBread-5

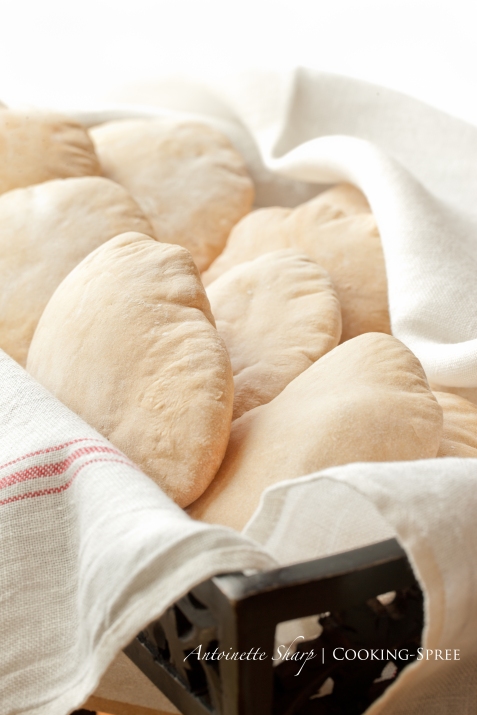
Pita  – from your own oven

_____

makes 16 pita pockets

___________

1 Tablespoon active dry yeast (or 1 package)

2½ cups lukewarm water

¼ teaspoon sugar

Approximately 6 cups unbleached white bread flour  (or unbleached all-purpose flour)

1½ – 2 teaspoons salt

3 Tablespoons vegetable or extra-virgin olive oil

__________

 Into a large bowl, pour ½ cup of warm water and stir in the yeast to dissolve. Add the sugar. When the mixture begins to froth (proving that the yeast is still lively) stir in the remaining 2 cups of water. Gradually add 3 cups of flour, 1 cup at a time, stirring vigorously. (You may either do this by hand, or with a stand-mixer.) You’ve now made a “sponge”. Allow it to rest for 10 minutes, or until it too froths.

Stir in the salt and 2 Tablespoons of the oil and mix together well. Gradually add the remaining flouryou may need less than the total amount specified – once you have a dough that holds together into a ball and isn’t sticking wetly to your hands, you’ve added enough flour.

(Because the flour hydrates gradually – and depends on ambient humidity amongst other things – if you add large amounts of flour all at once, you can overshoot the mark. All would not be lost…just add a bit more water – gradually – to find that happy balance.)  

Knead well by hand in the bowl, or on a floured board, ten minutes or so; or in a stand mixer using the dough hook for maybe 7 minutes. You’re looking for a smooth, shiny and elastic dough that no longer sticks to your fingers when held for several seconds. Dust with a bit more flour occasionally if it proves too sticky. Form it into a ball.

Put the remaining tablespoon of oil into the bowl and roll the ball of dough around so as to grease it all over. (This prevents a crust from forming on it.) Cover the bowl with plastic wrap and leave in a comfy warm place free of drafts for about 2 hours, until doubled in bulk.

Preheat the oven to 500°F (260°C), placing a large baking sheet in the hottest part. (Generally about ¼ of the way up from the bottom.) Allow it to preheat for 20 minutes.

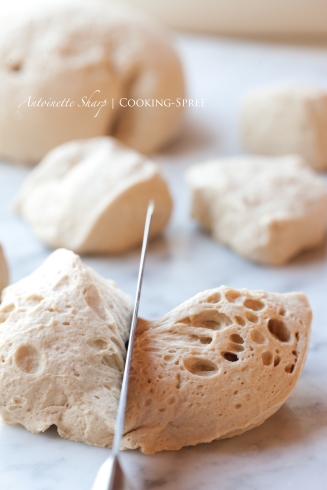
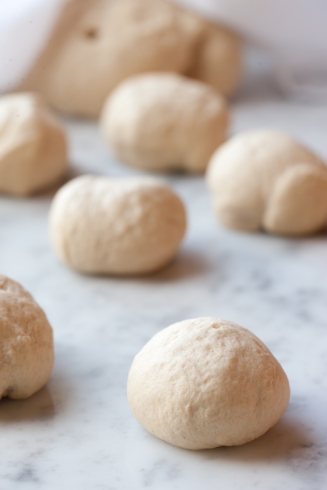
Punch the dough down and then knead again for several minutes. Divide the dough in half. Divide the first half into 8 “equal” lumps and roll these into balls.

PitaBread-1PitaBread-2

PitaBread-3

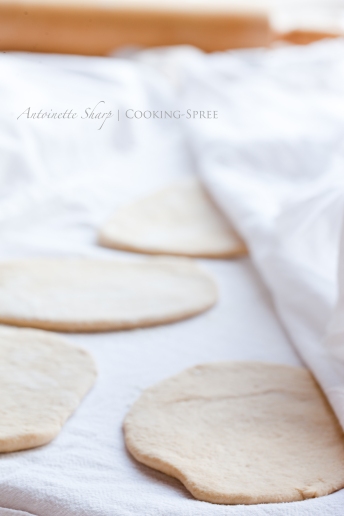
On a lightly floured surface, using either your hands or a rolling pin dusted with flour, flatten each lump into a “pancake” about 7 or 8 inches across and 1/8 to ¼-inch thick.  Spread a kitchen towel on your counter and sprinkle it with flour. Dust each of the rounds with flour and arrange on the cloth, leaving an inch between them.  Cover these with another flour-dusted cloth and allow them to rest for 20 minutes at room temperature. (If your counter is particularly cold, you could leave them to rest them slightly longer.)

________

Read more

creamy carrot soup & preserved lemons

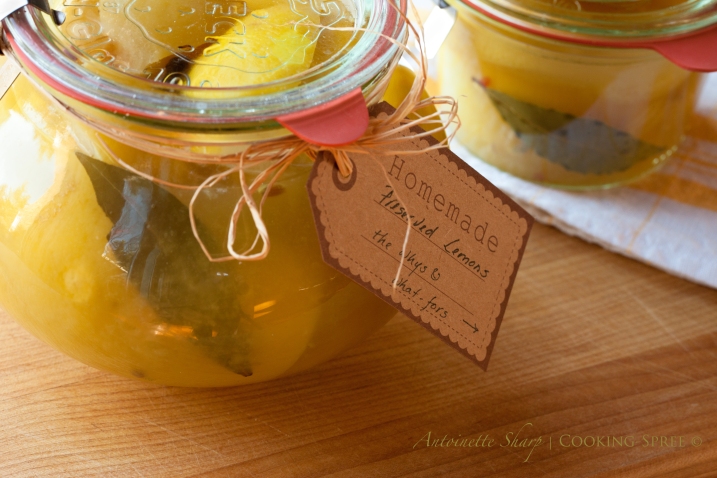
On a winter’s afternoon, weeks still before Christmas, a good friend Carolyn and I came together in my kitchen. We’d amassed on the counter several bags of organic lemons, sea salt, a few herbs and spices, and a collection of pretty jars.  We washed, sliced and stuffed the lemons with salt. We packed them tight into their jars. Then tighter still. We dropped bay leaves and pink peppercorns and allspice berries in behind them, and then squeezed juice enough from other lemons to cover them. We talked about what we’d do with them and who we’d give them to as gifts for Christmas. In six weeks they’d be ready. Carolyn hadn’t tasted them before, so she could hardly wait.CarrotSoup-1Some time – too long ago – I posted on how to preserve lemons. I (kind of) promised that I’d share recipes that used these indescribably delectable “preserves”. (In all truth, though, you don’t really need a recipe in order to use them. You can strew them on a salad or in the salad’s vinaigrette; or in with roasted or steamed vegetables; make a simple sauce sort of extraordinary; add them to stews or soups; flavor grilled or poached fish with them. I reach for them several times a week, at least!) Over the next couple months I’ll share a good handful of really good recipes. One of them will be from my friend Carolyn who invented it on the spot (she does that sort of thing, and created herself a beautiful shrimp dinner in about 15 minutes.) She told me about it and I made it and we loved it. (Expect to see more from Ottolenghi too.)

This one today is from Mike – Mike, married to my daughter, is a good good cook. They received a jar of Preserved Lemons for Christmas. One day my girl and I were on an outing and she raved about the dinner Mike had made the other night. By that afternoon, I was texting Mike…

He generously shares his soup:

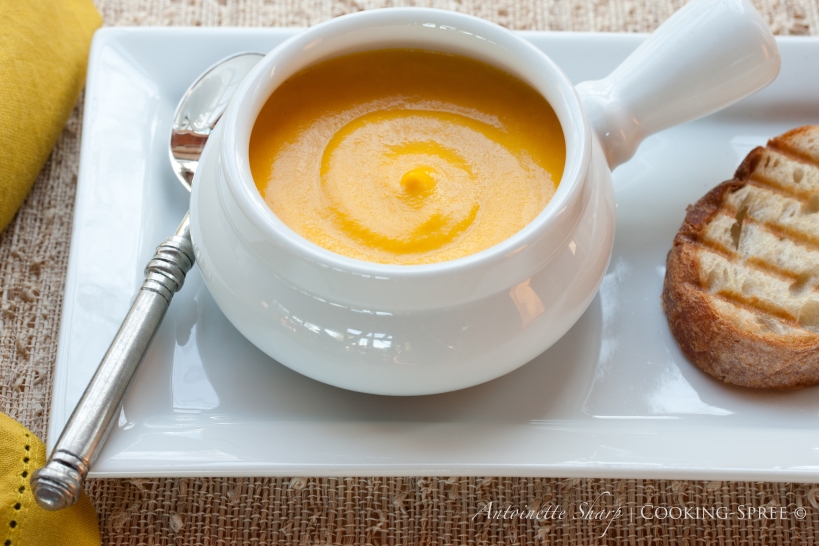
Creamy Carrot Soup with Preserved Lemons

1 medium yellow onion, diced

2 -3 Tablespoons butter or olive oil

 2 cloves of garlic, minced

1½ teaspoons finely minced ginger root

 2 cups chicken stock (or good vegetable stock)

2 Tablespoons dry sherry or white wine

8 to 10 medium carrots, sliced thinly

1 to 2 sections of preserved lemon, diced finely (See NOTE)

1 to 1¼ cups milk (from whole milk to 1% to your preferred milk alternative)

Salt & Pepper (white if you have it) to taste

NOTE on preserved lemons. By “sections” we mean quarters of lemon. After soaking in a briny liquid for 6 weeks, the flesh of the lemon has given over much of its juice to the jar. The rinds of the lemon have softened, and in a way quite impossible to describe, have mellowed, given up their acidic bite and become more roundly-flavored, very lemony still, but not mouth-puckeringly so. To use them, you remove the flesh (either discard it or toss it back in the jar) and use only the rind, which you rinse well first and then (generally) finely dice. If you cook with it, it will impart its lemony-ness to the dish but in a way you can’t quite put your finger on. If you use it fresh, without cooking first, you get little lemony bursts.

CarrotSoup-2

If you don’t want to make them yourself, you can find them in many markets. That said, they’re easy and (we think) fun to make…especially with a friend.

CarrotSoup-3 Read more

this little light…..& shortbread cookies

for those of us who live north of the equator, we’re only 4  days from the darkest day of the year. But for many among us, it felt as though last Friday must surely have been that day.

. . .

in this hurting world

don’t think that for one moment

your light goes unnoticed.

don’t think for an instant that your light,

just now, is too dim to shine for anyone.

. . .

don’t believe that what we face

is either too big or too complicated,

or that our little light

is powerless

in the creeping shadow of it.

. . .

in this hurting world, the one thing,

the one thing, we can each do

is let our own light shine.

whatever shape or brilliance your candle,

it is exactly what the world needs…

this shimmering little light

that is yours alone

to share.

___

LemonShortbread&Light-7-2________

Sometimes, when it feels like sadness might overtake us,

we bake.

something so small.

An unseen part of us knows though that an ancient comfort

is resident in our kitchens. When hope seems dim, or our candle flickers,

and we really haven’t much of a clue where to put our sorrow,

we can always bake cookies to share.

____

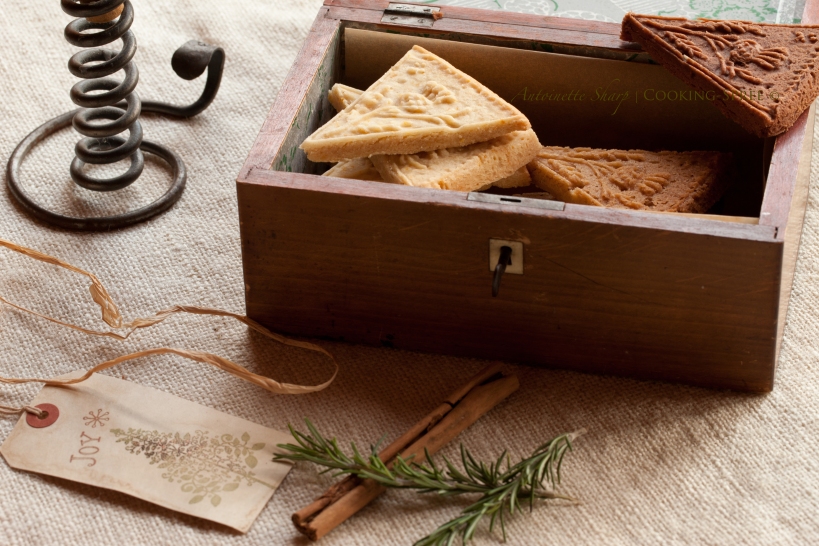
LemonShortbread&Light-11

______________________

these little shortbreads are aromatic and truly lovely. if you already know and love lavender in the kitchen, go for the full teaspoon. if you’re trying for the first time, you might start with the smaller amount. but if you don’t have lavender at all, it can be omitted. or try replacing it with ¼ to a scant ½ teaspoon fresh rosemary, very finely minced. (Culinary lavender is easily obtained on-line.)

however, if chocolate is your flavor, a recipe for chocolate shortbread follows.

___

Lemon Lavender Shortbread

___

½ cup butter at room temperature

½ cup powdered sugar (unsifted)

2 teaspoons grated lemon peel

¾ to 1 teaspoon culinary lavender  (see above) 

¼ teaspoon lemon extract

1 cup flour

___

Cream the butter until light and fluffy. Drop the powdered sugar into a small bowl. Mince very finely the zest of lemon and the lavender and add them to the powdered sugar. Add the lemon extract.  Stir to mix; then add to the butter and cream together. Work in the flour, scraping the bowl as you go.  Once the dough has mostly come together, remove to an unfloured board and knead  until nice and smooth.

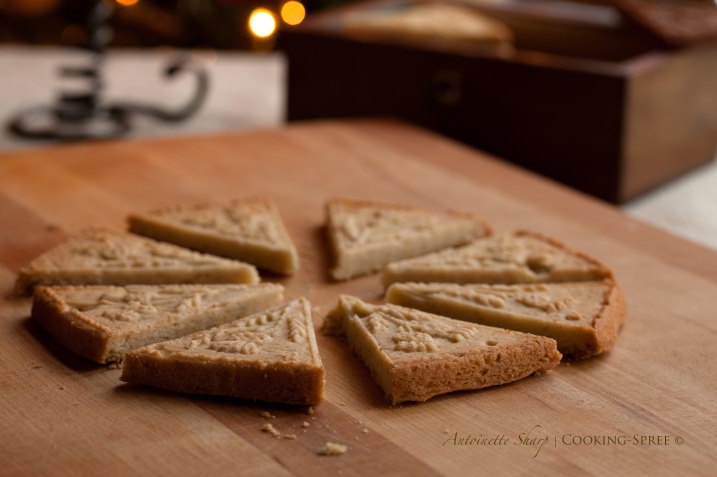
Either spray with non-stick vegetable spray or brush a thin layer of vegetable oil on the bottom and sides of your pan. Firmly press the dough into the pan. (I used a clay pan with Scottish thistle imprinted on it, but an 8-inch round cake pan or 9-inch pie tin will work just fine!) Prick the entire surface with a fork and bake at 325°F (165°C) for about 30 to 35 minutes, or until lightly browned. Set the timer and allow the shortbread to cool in the pan for 10 minutes. Loosen the edges with a knife and flip the pan over onto a wooden cutting board. (If it doesn’t release right away, tap one edge of the pan.) Cut the shortbread into 8 pieces while still warm.

( to print lemon lavender recipe, click. )

LemonShortbread&Light-12

Read more

Best Food Blog 2012 contest…

 No strangers to beauty…

If you follow my blog, you undoubtedly follow others. And if you frequent (or are a part of) this expanding world of food-writing and recipe-sharing, you’re no stranger to some jaw-droppingly beautiful food photography either. As a member of this community, I’m in some pretty wonderful (and at times very humbling) company. It was a real honor then to learn I’d been nominated for Best Food Blog 2012 in the Food Photography category. (The contest is sponsored annually by FriendsEAT.com…an online social community for foodies.)

Contest winners aren’t evaluated and selected by a panel of judges. This is a contest judged  by a jury of readers and followers like you. And there’re only a handful of days in which to vote. If it would please you to vote for Spree, it would please me no end! And if (by chance!) you wanted to pass the word around to family or friends and ask them to have a look… JOY!

You can vote here.  **

**  (Please see exactly HOW to register your vote at the bottom of this post.)

Voting concludes the end of this week on FRIDAY, December 14! And only one vote per person per category.

The gallery below samples some of my work over the past year-and-a-half of blogging… to scroll through the photos, click any image and use the right and left arrows that appear at the sides…

Read more

so what’s in a salad?

Fresh-air markets, booths and stalls stretching for blocks and blocks, wooden tables piled high with newly-picked fruits and vegetables.  Luscious juice-sweet fruits, all round-body shapes and colors. Rustic root or bright green vegetables some with the earth still clinging to them. Farmers in aprons, their hands, soil-worn and calloused, paring off samples for us to taste. And we held out our hands and we tasted, and we bought what we couldn’t resist. But we’d made some kind of cosmic mistake! We had no kitchen to take our booty to, no salad bowl, no wooden tongs. No aprons of our own. So it happened that everywhere we went, my longing for brilliant color tossed in a bowl grew. We had some nice salads while away, but they weren’t the salads of home. And  the salads of home are the foods I miss most of all when we’re away.

So here, for you (and for me) brilliant color in a bowl. (and between us, so delicious it’s startling!)

Once again, as is usually the case with salads around here, a list of ingredients but no amounts. I’ll give some rough guidelines, but you know how you like your salads from home, so no one will be as good a judge as you …


Brilliant Winter Green Salad with Pomegranate, Apple & Almonds

Baby Spinach – or Arugula  (which do you prefer, mild and green, or slightly bitter? Or maybe a mix of the two.)

Apple, cored and sliced

Pomegranate seeds (see a previous post for the most ingenious way to remove these wonderfully tart & crunchy little seeds)

Basil – leaves laid out on top of one another, rolled tight like a cigar and sliced thinly

Slivered Almonds, toasted brown

Shallot, sliced thinly and sauteed to a toasty brown in a bit of oil

Soft, mild goat cheese – Optional

Vinaigrette (see below)

__________

Thinly slice the shallot and drop it into a small medium-hot skillet to which you’ve added a small amount of oil. Stir occasionally until browned. Remove to a paper towel.

Toast the almonds – in a 350° oven for perhaps 15 minutes. Check frequently. (The last bit of browning goes very quickly.) About the last 5 minutes you might (might!) want to place the shallots in the oven along with the almonds to dry and crisp them a bit more. 

Remove the seeds from the pomegranate. (See previous post link above. You’ll also find another delicious salad there.)

Toss all ingredients into a bowl (reserving a little of the seeds, nuts and shallots for sprinkling on top.) Toss with a little vinaigrette. Taste to see if amply dressed. Drizzle more as desired. Sprinkle bits of brilliance on top.

Would you like me to taste it for you and tell you why it’s so good?

Even this time of year, most markets will still have fresh crisp baby spinach leaves. These leaves taste mild and green and like Health itself. (Arugula, a little or a lot, but only for those who like the mildly bitter. I do!) Crisp sweet-tart apple, toasted almonds tasting of the hearth, threads of fresh basil winding throughout (these you nearly taste in your nose), crunchy smoky bittersweet bits of shallot, bursting tart seeds full of juice…and then…if you like this sort of thing…mild and creamy, exquisite white cheese of goat.

I . love .  this .  salad !

Read more

a crisp of stone fruits

.

peaches, nectarines,

apricots, cherries, plums

sublime in their ecstasy dancing,

sweating sweet sunny juices of summer

. .

What is it about stone fruits that makes them so amiable and easy-going? Such contented things. Never any squabbling. Never an ego out of control. No matter which of them is in the bunch, it’s in all ways pure sweet harmony.

I’ve made this crisp  in many combinations and it always tastes … well, sort of perfect. This time it was with a crowd of them all – some just slightly under-ripe, holding their shape while adding a bit of tartness, other dripping their ripe sweet juices over the cutting board onto the counter. The addition of bing cherries (though no more than a good fragrant handful) colored the entire dish with the blush of magenta. Here is a dessert, baked but simple, without secrets or special formulas, and full of summer’s freshness and freedoms.

Crisp Topping

  • 3 T. unsalted butter, broken into several pieces  (see NOTE)
  • 3 T. walnut oil
  • ½ to ¾ cup brown sugar
  • 2/3 cup all-purpose flour
  • ½ cup rolled oats (not quick-cooking)
  • ½ tsp salt
  • ½ tsp freshly grated nutmeg
  • 1 tsp ground cinnamon

NOTE: instead of using a combination of butter and walnut oil, you could simply use 6 T. butter. Or all walnut oil.  Or 3 T. butter & 3 T. coconut oil. Such freedom.

Either using your fingers and kneading together the ingredients or using the paddle attachment of your mixer, work the ingredients together until you have a mixture resembling coarse crumbs. Set aside.

The following recipe will fill a 2½-quart gratin dish. On this occasion, I separated the recipe into 3 separate baking dishes, baking them all together, but only serving one. The others will be gently reheated for serving later – perhaps even for some special breakfast, served alongside cold Greek yogurt drizzled in honey.

A Crisp of Assorted Stone Fruits

  • 3 pounds (about 1.5 kg) assorted stone fruits
  • ¼ cup sugar (nice with vanilla bean scented sugar if you have it)
  • ¾ teaspoon cinnamon
  • ¾ teaspoon allspice
  • ½ teaspoon coriander
  • ¼ teaspoon nutmeg

When selecting fruits, a combination of ripe and slightly under-ripe fruits work to produce the most balanced flavors.

Preheat oven to 375°F (190°C).

Wash fruit, remove stones and pits. Cut cherries in halves, all other fruits in approximately ½-inch slices. Mix the sugar with all the spices and then sprinkle over the fruit. Toss together and tumble into buttered baking dish (or dishes) of your choice. ( See below for baking times.)

Read more

Smoky corn & sweet potato chowder

We woke in the dark, piled on layers of clothes and loaded cameras in the car. We gassed up and fearlessly set out in the sub-arctic temperatures of sunny Arizona, our hearts tilting toward Grand Canyon. Because it was dark and there was little else to look at, I became fascinated with the external temperature indicator on the dash. We left Sedona at 22°F. We climbed higher, through Oak Creek Canyon in the blue black frigid darkness and the temperature kept dropping. I couldn’t resist taking pictures of the numbers on the dash. 15°, 9°, 0°. Past Flagstaff, we changed directions, I think we were heading north, but I know we were heading colder. Somewhere up there on this wide white expanse, the temperature dropped to -15°. That’s 15°  below ZERO! I texted the proof back home.

I try not to get too terribly excited when my husband’s driving, but I was shrieking in my own head – I’d never been in a place this cold before, “I” was breaking records here! He (the rational one who considers our safety) thought of turning around and heading back. What if we stopped the car and it wouldn’t start again? Then where would we be? Me (the fool, who thrills to adventure) thought this was really cool! Happily, the fool prevailed – we drove on.

In another hour or so, we arrived. The brilliant sun shone. Long icicles dripped crystal drops. Blue-black ravens made their cracking sounds high in the branches above us.

Bundled tight, we ran for the edge to see to the bottom. It was dizzying, glorious!

We snapped our dozens of photos including one of our own long shadows holding hands. Then we headed for the warmth of the lodge, with its rockers on the porch, its grand-scale stone fireplace, and the soup we remembered from the last time we were here.

Last time, I’d even begged for the recipe for that soup. And they gave it to me!

We kept flipping the menu over, front to back, and back to front again, sure we’d missed the soup somehow. It wasn’t there.

We asked our server and were told that another restaurant in the canyon serves it regularly and that it only makes its way up to the big lodge on occasion. This was not to be such an occasion. There was no soup for us that day.

Did it dim our enthusiasm? Not one bit.

~ ~ ~

But with corn chowder still on my mind when we returned home, I had to make a pot. This pot though varies hugely from the one we’d eaten at the canyon. That one used a half gallon of cream. I kid you not. A half gallon! Granted it fed quite a few people, but there was just no way I could bring myself to do it.

I’m pointing no fingers, but I’ve noticed we’re all eating quite well this time of year. Sneaking cookies and egg nog, seconds on gravy and mashed potatoes. But here’s an offering that’s very low fat, creamy with no cream, sweet with no sugar, colorful with no candied sprinkles. What’s more, it’s inexpensive and easy to prepare.  Here’s how:

______________

Smoky Corn & Sweet Potato Chowder

(about 6 good servings)

1 medium-large yellow onion, chopped  (2 cups)

4 cloves garlic, minced

one 3- to 3½-inch jalapeno pepper, finely diced

1 Tablespoon olive oil

1½ teaspoon salt (plus more to taste)

1 Tablespoon cumin seed, dry roasted & then ground (or 4 teaspoons ground cumin)

¼ teaspoon cayenne pepper

¾ teaspoon liquid smoke

6 cups chicken, turkey or vegetable stock

2 medium-large sweet potatoes, in ½-inch cubes

6 cups frozen corn (3- 10 oz.bags)

1 large red bell pepper, medium-diced

_____

Garnish:

  • corn tortillas – sliced in ¼-inch slices, fried until crispy in small amount of olive oil
  • finely diced red onion
  • finely diced red pepper
  • small bunch cilantro, coarsely chopped

SweetPotatoCornChowder-1

Roast the cumin seed in a dry skillet, medium-low heat until its begun to brown and its aroma is rising. Grind using a mortar and pestle or a spice grinder. (Alternately use ground cumin. But the flavor of toasted cumin is wonderful and worth the extra step.)

Read more