Skip to content

Posts from the ‘Grains & Beans’ Category

a soup to carry you through winter

What’s to like about winter? A low-slung sun. A bluer sky than blue. The last golden leaves to cling. Grass  that crunches under foot. Children’s boots and mittens.  Hot cocoa. The glow of candles near your bath. Longer hugs. And soup.

This is winter’s version of pistou, a Provençal vegetable soup, and I believe it is very possibly the finest winter soup I’ve ever made. It is, in fact, so fine a soup I’m going to be adapting it to different  kitchens and circumstances. (Slow-cooker and pressure cooker versions will follow before winter’s done with us.) It’s gob-full of vegetables, heavenly hearty, and will warm you to your chilly toes.

This makes an enormous potful. We took half out to our mom and the half we have remaining is enough to feed a table full. There’s quite a bit of chopping involved, but sharpen your knife and trust me…it will be so worth your time.

WinterProvencalVegetableSoup-7

_____

Provençal Vegetable Soup

_____

Extra-virgin Olive Oil – 5 Tablespoons

3 plump, moist Garlic cloves

Onions 4 medium, cut in ½ – 1-inch pieces

Leeks – 3 medium, white & tender green parts only, rinsed, quartered & thinly sliced

Bouquet Garni: several fresh or dried bay leaves, fresh celery leaves, thyme sprigs & parsley – either tie together or put in a wire mesh tea strainer

sea salt

Carrots – 8 medium, scrubbed & cut into thin wheels

firm, yellow-fleshed Potatoes (Yukon Gold) – 1 lb. (500 g)  peeled & cubed

Celery ribs – 4 ribs with leaves, cut into thin pieces

Butternut Squash or raw Pumpkin – 2 lbs. (1 kg), peeled & cubed (yield: 1 qt. or 4 c.)

Farro or Spelt – or substitute Barley – 1 cup, rinsed & drained

can peeled Italian plum Tomatoes in their Juice – 28-ounce (750 g) can

Tomato Paste – 2 Tablespoons

small White Beans – such as navy or flageolet (see NOTE)

Cranberry Beans (such as Borlotti) (see NOTE)

mixture chopped Kale & Spinach *

freshly-ground coarse Pepper

freshly-grated Pecorino Romano cheese – ¾ cup

freshly-grated Parmigiano-Reggiano cheese – ¾ cup

_________

NOTE: If using fresh beans, 1 pound of each in their shells. If using dried beans, 8 ounces (250 g) of each  – pick them over, making sure you have no little pebbles, rinse the beans, place in a large bowl & cover with boiling water;  allow to soak for 1 to 2 hours. Please note the different instructions – step 2 below – based on whether fresh or dried beans are used.

* – a bag of frozen chopped kale & spinach works great for this. Add as you’re ready to serve – each time you heat up a new potful of soup, add a handful or 2 of this mixture and you’ll have bright green in each bowl.

_______

WinterProvencalVegetableSoup-1

1. In a large, heavy-bottomed stockpot, combine the oil, onions, leeks, bouquet garni and salt to taste,  then stir to coat. On low heat, sweat the onions & garlic mixture – cooking with the lid on for several minutes until what’s in the pot is softened and fragrant. Drop in the carrots, celery, squash, potatoes, farro (or spelt or barley), the tomatoes with their juice, along with the tomato paste. Add four quarts (4 liters) cold water. If you are using DRIED BEANS – add only 3 quarts cold water at this time. Cover the stock pot and bring to a simmer. Gently simmer for 30 minutes. Taste for salt & add as needed.

WinterProvencalVegetableSoup-4

Read more

a dinner for lovers

Yesterday’s post explained why this is what’s for our Valentines dinner…it’s quick and easy to prepare, colorful, pretty, sensuous, light in the stomach, delicious in the mouth. Tomorrow morning I’ll lay out a schedule for how to get it from kitchen to table in under an hour. That will be easy as pie if you just spend maybe 10 or 15 minutes of light prep work the night before. (Tomorrow or Sunday will also bring another option for dessert.)

~ ~ ~

A reminder of the menu:

To whet (& wet) the Appetite:

Passion Fruit Cocktails for Two

Stacked Crab Bistro Salad with Cilantro Lime Vinaigrette

Dinner:

Seared Sesame-Encrusted Ahi Tuna

Sugar Snap Peas with Shiitake Mushrooms and Ginger

oh-so Forbidden Rice

Dessert:

a sweet multitude of options

~ ~ ~

A very little time spent prepping the vegetables the night before will make this dish a breeze.

Sugar Snap Peas with Shiitake Mushrooms and Ginger

  • ½ pound sugar snap peas
  • 1 teaspoon salt
  • 2 teaspoons sesame oil (I love toasted sesame oil for this, but not necessary)
  • 2 teaspoons canola oil
  • ¼ cup thinly sliced shallots
  • ¼ pound shiitake mushrooms, (stems removed & discarded) – sliced
  • 1 to 2 Tablespoons ginger, thinly sliced & sliced again into matchsticks
  • 1 Tablespoon + 1 teaspoon soy sauce or Tamari
  • 1 Tablespoon cooking sherry
  • 1 teaspoon unsalted butter

Wash the snap peas and remove their strings, if any. Put a pot on to boil, add salt. Have a colander in the sink and a bowl of ice-water close by. When the water comes to a boil, add peas. Cook for only 1½ to 2 minutes. (You want peas to be bright green and crispy, nearly tender.) Empty into colander. Transfer peas to bowl of ice water for one or two minutes to cool. Remove from water. Place in a clean kitchen towel, and roll and pat to dry. (At this point you can put them in a plastic bag and put in the refrigerator if you’re preparing ahead.) Otherwise set aside as you prepare the other ingredients.

Remove the stems from the mushrooms and slice fairly thinly. Cut the ginger into tiny “matchsticks”.  (Whether you opt for 1 or 2 tablespoons is entirely dependent on your love and tolerance of spicy warm ginger.) Thinly slice the shallots.

Heat the canola and sesame oils in a good-size skillet over medium heat. When oil is shimmering, add the shallots and, stirring constantly, cook for 1 to 2 minutes.

Add the ginger. Stirring constantly, cook about 30 seconds, then add mushrooms, and cook for 2 to 3 minutes longer. They’ll have begun to release some of their liquid and have started to sizzle. Raise heat to medium-high and add the peas. Stir occasionally, allowing peas to be touched by bits of brown. Add the soy sauce and cooking sherry, deglazing the pan of brown bits. (Taste for salt, adding a bit more soy if needed.) Add a pat of butter, stir to melt and glisten the peas and mushrooms. Serve.

Printer-friendly version of the sugar snap peas, click here.

~ ~ ~

Ever hear of forbidden rice? It’s the deepest darkest shade of purple – like aubergine. Royal purple. With all its brilliant color (phytochemicals) it’s rich in antioxidants. (The stuff that protects our cells from free-radical damage.) It’s a whole-grain, even more nutritious than its brown cousin, but cooks in only slightly more time than its white relative. (About 30 minutes.) I suppose it was chosen for this menu for obvious reasons. How can one not be a little tempted – at least intrigued – by what’s labeled forbidden? It got its name in ancient China when it was grown and harvested and fed to only the Emperor. Anyone caught with purple grains between his teeth was summarily executed. Well, perhaps I’m playing loose with the facts there, but it makes a rather dramatic story. And a great introduction for a side dish for lovers. (It’s not on every market’s shelf, but some of the better-stocked markets will carry it. It costs more of course, but it’s not prohibitive…a small bag will make enough rice to feed 8 to 10 and cost about $5.00.)

oh-so Forbidden Rice

(will serve 4)

  • 1 cup forbidden rice
  • 1¾ cups water
  • ½ teaspoon salt
  • 1 teaspoon butter
  • optional: 1 teaspoon chicken bouillon (I like Better than Bouillon – concentrated, natural good flavor)
  • chives, finely chopped

Bring water to boil, add salt, butter and bouillon (if using.) Add rice, stir, return to boil, then lower temperature to simmer. Cook on simmer for 30-35 minutes. (My simmer took 35.) Turn the heat off and allow pan to sit for 5 minutes or so before removing the lid. Fluff rice with a fork. Return the lid if not serving immediately. Before serving sprinkle with chopped chives.

Printer-friendly version of the rice, click here

~ ~ ~

Read more

a simple post on a simple, luscious soup

dear readers, after the last two posts and all those   w o r d s   I must have bored you to teary yawns! Don’t think I don’t care about such things. I’m the first second to recognize you deserve a break!

So here, just one simple recipe, one photo and very few words from spree.

(I can’t launch into this recipe without first telling you –  I am so incorrigible! – that a recent study names beans as one of the top food categories implicated in promoting brain health into old age. The recommendation was for one to two servings per week (at a minimum.) Along with them,  the “super foods”. You know the ones.)

So, with very few words, may I simply offer you a bowl of luscious, comforting, healthful and delicious soup? Here, first…let me swirl my best olive oil on it. You deserve nothing less!

Chickpea Soup

4 servings

  • 2 cups (300 g) dried chickpeas
  • 1 medium onion, chopped
  • 1 garlic clove (or 2), chopped
  • 1 bay leaf
  • 1 fresh thyme sprig
  • a good pinch of cumin
  • a good pinch paprika
  • Chicken stock or vegetable stock (water is ok)
  • Salt & white pepper to taste
  • Your very finest olive oil (the one you’d serve the queen, or your future mother-in-law)

A day before, soak the beans in a large bowl. Fill with fresh cold water by several inches, and allow to sit overnight.

(I recently read – in Cook’s Illustrated – that if you add a ribbon of Kombu seaweed to your dried beans, you can actually do without the soaking, and it has a way of eliminating some of the side-effects as well as improving the texture of all beans cooked with it. I’ll try that next time. Too many words!) Read more

smokin’ hoppin’ john

From down south in New Orleans there comes a Cajun dish of black-eyed peas and rice, traditionally served on New Year’s Day. Hoppin’ John they call it. Eaten on the first day of the new year, it’s purported to bring good luck for the remainder. I figure when something tastes this good, it’s bound to be lucky! Most often made with ham and bones, this is a vegetarian version – don’t be dissuaded you meat-eaters – it’s brimming with smoky flavor from smoked paprika and chipotle peppers in adobo sauce.  (Now you see where the smokin‘ comes from.)

If you use frozen black-eyed peas and white rice, you could assemble this in well under an hour. And is it ever affordable! (With money saved….here I go with the pitch again…you could donate to a local food bank or shelter and help another eat well. That just may be doubly lucky.)

Smokin’ Hoppin’ John

makes 4 very generous servings

  • 2 Tablespoons vegetable or olive oil
  • 1 medium onion, coarsely chopped
  • 2 cloves garlic, minced
  • 1 cup uncooked medium- or long- grain rice (brown or white)
  • ½ teaspoon smoked paprika
  • 1½ cups dried black-eyed peas, soaked overnight, cooked and drained – or use a 20 oz. bag of frozen black-eyed peas for immediate use (see NOTE)
  • 2 – 3 cups vegetable both (or, if you prefer, chicken broth)
  • 1/4 cup beer
  • 1 chipotle chile in adobo sauce, minced
  • 1 t. salt

Optional Garnishes:

  • chopped green onions
  • grape tomatoes, cut in half
  • chopped fresh parsley
  • shredded cheddar
  • hot sauce (especially Cholula chipotle-style)

Soak black-eyed peas overnight.  Cover with water to level 2 inches above beans.  Gently simmer until done.  Drain and set aside. (If using frozen beans, simply proceed to the next step.)

NOTE: on the black-eyed peas. I have a preference for beans I cook myself. They hold together better, have just the perfect “doneness” and I think a bit more flavor. HOWEVER, frozen black-eyed peas make a totally acceptable alternative to cooking the long way and I wouldn’t hesitate to go that route if at all pressed for time.

Over medium heat, warm the oil in a large saucepan or heavy-bottomed pot.  Add the onion and cook until the onion is softened and sweaty, about 5 minutes.

Add the garlic and rice and stir well.  Allow rice to toast for 1 minute.  Add the smoked paprika and 1 teaspoon salt and stir to coat the mixture well. Read more

Fiesta Rice & Black Bean Salad

We pick up the series on Rice & Beans with Installment #6. (The series offers one idea on how we can help feed the hungry. If you’d like background, please see the NOTE at the bottom of this post.)

You know how in the dead of winter, when your bones are cold and your lips are chapped and you’re wearing your socks to bed, you long for something warm in your belly? Soups, stews, chilies, or maybe for you it’s a hearty roast and potatoes.

Does it ever happen for you in the dead of winter when your bones are cold that you long instead for something that smacks of warm summer days, open windows, t-shirts and flip flops?  Something on your plate that reminds you there IS a sun, and it’s on its way around again. Sometimes we just need a reminder that winter doesn’t last forever. And if you’re in need of such a reminder, and wanting the feel and taste of summer in your mouth again, this may be just what you’re in need of. I’ve posted lots of soups and stews in this series. Time to shake it up a bit. Time for a party of a salad.

This is a meal easily put together. The ingredients can be picked up at just about any market, any time of year. Not a thing to cook but rice. Open a can of beans and a bag of frozen corn, do a little chopping & tossing. Whir up a little dressing. There’s no meat, but plenty of lean protein from the rice and beans. With its tasty guacamole dressing, its a fresh sort of delicious. It’s light-tasting but satisfyingly filling. It’s a bite from a place where the sun always shines.

Fiesta Rice & Black Bean Salad

salad ingredients

  • 1 cup uncooked rice (your choice of white or brown)
  • 1 – 15 ounce can black beans, rinsed and drained
  • 1 cup thawed frozen corn
  • 1 medium red bell pepper, chopped
  • 8 green onions sliced
  • ¼ cup plus cilantro
  • 2 large or 3 medium jalapeño peppers, seeded, de-ribbed, and minced

the dressing

  • 1 large clove garlic
  • 2 ripe avocados
  • ¼ cup plain yogurt
  • 4 green onions roughly chopped
  • 2 Tablespoons chopped cilantro
  • 1 Tablespoon (to 2) fresh lemon juice
  • ¾ teaspoon salt
  • ¾ teaspoon ground cumin
  • ¼ teaspoon ground pepper

To serve:

  • leaf lettuce
  • tortilla chips
  • wedges of lime

Cook the rice and allow to come to room temperature. Add the black beans, corn, about ¾ of the chopped red pepper, 8 green onions sliced, ¼ cup chopped cilantro and the diced  jalapeños. Season with salt and pepper. Toss together and chill.

Prepare the dressing:

Into the jar of a blender put the minced garlic, 1 avocado in chunks, the remaining 4 green onions coarsely chopped, the yogurt, remaining 2 Tablespoons cilantro, lemon juice, salt, pepper and cumin. Process until smooth. Taste for salt and lemon, adding more as necessary.

Toss the rice and beans with the dressing and chill. Before serving cut the avocado in ¾-inch pieces and gently toss together with the rest of the salad. Place lettuce leaves on plates or large salad bowls, top with fiesta salad, scatter the last bit of red pepper over top and serve with tortilla chips and wedges of lime.

~ ~ ~

Read more

Feijoada – Spicy Beans Goan-Style – from India

Installment #4 in our continuing series on Rice & Beans. 

The idea behind this series of mostly vegetarian meals is that if we eat more frugally just once a week, with the money we save We Can Feed Another…(Read about the hunger problem in the November 1st post that introduced the series.)

~ ~ ~

In Goa, the smallest of India’s states and a former colony of Portugal, the people enjoy a spicy bean dish called Feijoada.  It’s made with either black-eyed peas or kidney beans and is traditionally served over steamed rice. Even though Feijoada is sometimes made with the addition of sausage, India has a long tradition of vegetarianism and this dish holds up very well without it.  Black-eyed peas, if you’ve never had them, are much smaller in size, have a more delicate taste and a more pleasant texture than their large red cousin the kidney bean, and it’s the bean we’ll use here.

With all the spices that make up a fragrant curry, and coconut milk that softens and mellows, Feijoada is another hearty and especially delicious dish. 

I made my own curry powder for this – (only because I kind of like playing with spices – you might have noticed) – but you can certainly avoid that step and simply add a mild, good-quality curry you’ve purchased. I certainly would if I were looking to save time.

If you’d like to make your own curry powder –

Fragrant Curry Powder

(makes about ½ cup)

  • ¼ teaspoon nutmeg pieces (nutmeg can be broken with kitchen knife or back of heavy pan)
  • seeds from 5 white cardamom pods (or 4 from green)
  • 3 whole cloves
  • 1 teaspoon black peppercorns
  • ½ teaspoon red peppercorns (optional)
  • 2 Tablespoons cumin seeds
  • ¼ cup coriander seeds (yes, ¼ cup)
  • 2 bay leaves
  • 2 dried curry leaves, if you can find them (Indian grocers and some Asian markets would have them.)
  • 1 teaspoon ground fenugreek

Combine all the ingredients except the fenugreek in a medium skillet over medium heat. Cook, shaking or stirring often, until the spices are lightly browned and their fragrance is rising. This will only take a few minutes. During the last minute of cooking, add the fenugreek powder and continue stirring.

Remove from heat and cool.  Using a spice or coffee grinder, process the spices until finely ground. Store in a small lidded jar for up to several months.

~ ~ ~

I started with dried black-eyed peas. For one thing, dry beans cost pennies. For another, I like the taste of home-cooked beans better. But again, if you’re short of time, you can find them canned and frozen. I’d recommend the frozen if you have a choice between the two.

If you’re starting with dried beans, soak them in enough water to cover by several inches for at least a few hours. (You can begin the morning of if that’s most convenient.) Discard the soaking water, start with fresh to cook the the beans. Put them in a good size pot, covered by a couple inches of water, no salt, and bring water to a boil. Reduce the heat and simmer while you prepare the rest of the stew.

Feijoada – Spicy Beans, Goan-Style

(serves at least 4)

  • ½ pound dried black-eyed peas, rinsed and picked over (or several cans – or – 1 or 1½ packages of frozen)
  • 2 large onion, peeled (cut into large pieces)
  • 6 garlic cloves, peeled
  • 1 small dried red chile or 1 teaspoon hot red pepper flakes, or to taste
  • one 1-inch piece fresh ginger (about the thickness of a thumb) peeled and roughly chopped
  • 2 tablespoons grapeseed, canola, corn or other neutral oil
  • salt and pepper to taste
  • 1 tablespoon Fragrant Curry Powder or any mild, good-quality curry powder
  • 2 large tomatoes, cored, seeded, and roughly chopped (or about 1½ cups of canned diced tomatoes)
  • 1 cup coconut milk
  • 1 Tablespoon tamarind paste (see NOTE)
  • Garnish:   Torn cilantro leaves, wedges of fresh lime, and finely chopped red onion

NOTE: Tamarind paste is found in Asian section of many markets, next to curry paste. If you can’t locate it, you can use fresh lime juice to taste, but the tamarind paste also imparts a nice rich color to the soup as well as its characteristic tart.

In the bowl of a food processor, combine the onions, garlic, chile, and ginger and process until thoroughly combined and resembling a paste.

Read more

Indian red bean curry – rajmah

Installment 2 in the series – we can feed another… 

My very good friend Amit was born and raised in Delhi, India. He tells me  how much time he would spend outdoors as a boy, running long distances, playing hard with his friends and his brothers, from morning until the hot sun was nearly down. Here he is, on the left, with his mother Anjana and his middle brother Moni, resting in a field of nasturiums at the end of a long day of play.

But something else was happening while Amit was growing up a boy in India. He was paying close attention to what his mother was doing in the kitchen. I know, because to eat at Amit’s house today is a treat, a sumptuous, sensuous, exotic and deeply satisfying treat! Even the simplest of meals feels like a feast at Amit’s house. He moves around his kitchen with ease and a deep but relaxed concentration, spooning spices from their metal tin, peeling and finely slicing ginger, roasting seeds in a pan on the stove. It takes but a few minutes of watching him at work in the kitchen and smelling the aromas rising before you know that the meal you’re about to be served is well on its way towards being amazing.

~ ~ ~

I told Amit that spree was doing a series on beans and rice dishes and the reasons why. (See rice & beans.) I asked if he’d share something his mother had cooked while he was growing up – something he’d loved then and brought with him when he moved to the States. He readily volunteered today’s recipe.

As often happens, we pick up the recipes of our parents and adapt them to our changing tastes and ideas about food and what we expect from it. Amit has made a couple changes to the recipe below, but we have first his mother Anjana to thank. This was a dish she was eating growing up a girl in India (seen here with her brother) –  long  before it came to be one of Amit’s very favorite dishes.

pressure cooker was used for this recipe. It makes very short work of cooking with dried beans, and cooking your own dried beans from scratch is always a more flavorful alternative to canned.

No Pressure Cooker?  – it can also be made using a simple soup pot,  though it will take somewhat longer…or, if you’re in need of getting dinner on the table a bit faster, canned beans (likely pinto) would be a good option. Keep in mind though that cooking the beans with these wonderful spices really is the secret behind a fabulous dish of beans!

See bottom of post for serving suggestions, which include rice and raita (an Indian yogurt sauce)

Red Bean Curry – Rajmah

  • 2 cups dried light red beans, preferably soaked overnight in water that covers by 3 inches (See NOTE on variety of beans to use) – if using canned beans, 3 cans should do
  • 3 to 4 large ripe tomatoes, diced
  • 1 Tablespoon peanut oil (or grapeseed oil – any oil with higher smoking point)
  • fresh ginger root    (3 thin slices 1-inch x 2-inch each, then cut into narrow strips)
  • 2 teaspoons cumin seeds
  • 1 teaspoon turmeric
  • 1 Tablespoon garam masala (a wonderful Indian spice blend)
  • 1 teaspoon ground coriander
  • 1 jalapeño pepper coarsely chopped (if you prefer a spicier dish, finely dice it)
  • 6 – 8 whole cloves
  • 1 to 2 teaspoons tamarind paste – I like 2 (find in Asian section of the market – see photo at bottom – if you absolutely can’t find, add fresh lime juice to taste)
  • salt – to taste
  • cilantro ½ to 1 whole bunch, washed well and chopped, stems included
  • 6 to 8 green onions, sliced

NOTE:  You can use a variety of red beans for this recipe: pinto, Anasazi, Borlotti or any other of the “cranberry” beans. You could also use kidney, but they are a bit less “creamy” than others just named, and a bit gummier too.

~ ~ ~

Soak beans overnight in enough water to cover by 3 inches. Discard the soaking water.

Cut long thin (longitudinal) strips from the ginger. Add peanut oil to the pressure cooker (or soup pot) on medium or medium-low heat. Add cumin seeds. Amit says to fry until they “chit-chit”  which is the sound they’ll make as they approach doneness and are dancing around the bottom of the pan. Turns out, that’s a pretty good guide!  Once the cumin has begun to chit-chit, add the julienned ginger and fry until it’s turned a light brown.

Add the diced tomatoes. (I’ve only had this recipe a very short time, and already I’m making my own little changes. I almost always like to add to a dish that has cooked tomatoes, some freshly-cut ones towards the end so that their beautiful color and brightness is present. Therefore, I reserved a 4th medium tomato for that purpose here, cooking for only 2 minutes or less when the dish was nearly ready to serve.) Add the spices – turmeric, garam masala and coriander. Saute for 3 to 5 minutes.

(You will not believe the aromas filling your kitchen! Exquisite I tell you!)

Add very coarsely chopped jalapeño. (If you want the dish more spicy, finely chop the pepper. Want it less spicy? Add it later in the cooking process.)

Add the beans along with 2½ cups of water. (This will create a stew-like consistency. If you’d prefer something a bit soupier, you can add 3 cups of water instead. Turns out that I needed 3.) Add also the whole cloves at this time. Bring the pressure cooker to full pressure and then cook for 15 minutes.

(OK, here’s where a bean dish can go terribly wrong. : ) I cooked for 15 minutes and sampled a couple beans at that time. Not exactly rock-like. Back to the stove. Cooked an additional 7 minutes, figuring they needed at least half again as much time as they were originally given. In the end, my beans required a full 25 – 27 minutes in the pressure cooker. I’ve included a note at the bottom of the post that helps explain. I’d advise that you not take it for granted that your beans will be finished in 15 minutes – though they COULD be!)

Cool down the pressure cooker – then put it back on the burner on medium heat. Add the tamarind paste and stir to mix thoroughly. Add salt to taste.  (Be sure NOT to add salt to un-cooked beans! Their tough little skins will never soften if you do!)  Heat thoroughly, then remove from the burner and allow it to sit with the lid on while you prepare the rice. (Or keep warm on the lowest possible setting on your stove.)

~ ~ ~

Serving:

This bean dish goes beautifully atop or alongside white or brown basmati rice or your favorite pilaf. Garnish with torn cilantro and sliced green onions.

Also very delicious served with Raita – in fact I consider it a must. It’s just the right amount of cool and fresh to balance the deep aromas and warmth.

Quick how-to: Thin yogurt with a tiny bit of water. Dry-roast cumin seeds in a pan. Grind coarsely. Add to yogurt along with salt. (Especially Himalayan Pink Salt, naturally.)

Amit also suggests a salad of kale, pomegranate seeds and apple slices, tossed in a dressing of olive oil, fresh lime juice and salt. Allow the kale to sit for a while in the dressing in order to soften and for the various flavors to marry.

A few notes on beans:

Read more

Gallo Pinto – Costa Rican rice & beans

The first installment in the we can feed another series… (If you’re new to the idea, see my introductory post Rice & Beans.)

When my daughter Ali studied abroad in Costa Rica her host parents prepared,  nearly every morning, what is a mainstay for many Latin Americans, Gallo Pinto. (Pronounced GUY-o PEEN-toe, and translated as spotted rooster.) She acquired quite a love of it and when she returned home we caught the contagion! In Costa Rica this beans and rice dish was most commonly served for breakfast, along with eggs, either fried or scrambled, and pieces of fresh fruit, and maybe toast. But you’d find it served at street-side cafes too, for lunch as well as dinner, often with fish and maybe fried plantains alongside. It’s a hearty, satisfying dish, alive with color and brimming with flavor. And it’s loaded with nutritional goodness.

Now I must say a word about Salsa Lizano. It’s as ubiquitous a condiment in Costa Rica as ketchup is here. Even more so. It’s on every table, drizzled on most anything you’d find on a plate, and is considered in Costa Rica essential to gallo pinto. However, it’s not readily found outside Latin America. BUT, good news, you can order it (inexpensively – and it will last you such a long time) on Amazon. Here’s the link:   Salsa Lizano on Amazon.   Ali would want you to know that she’s made gallo pinto for many – and she says that nearly each of them has ordered Salsa Lizano for themselves afterwards. Count that as a testimony.

All that being said, I’m going to provide a recipe that approximates the taste you’d get using the real thing without having to buy it. It’s not quite the same, but until the real thing arrives at your door, believe me, it’s good! I’m also providing a recipe for gallo pinto with  Salsa Lizano, which, you’ll be pleased to know,  is even more time-saving and a dish you can make on a whim, breakfast, lunch or dinner, when you’re out of nearly everything.

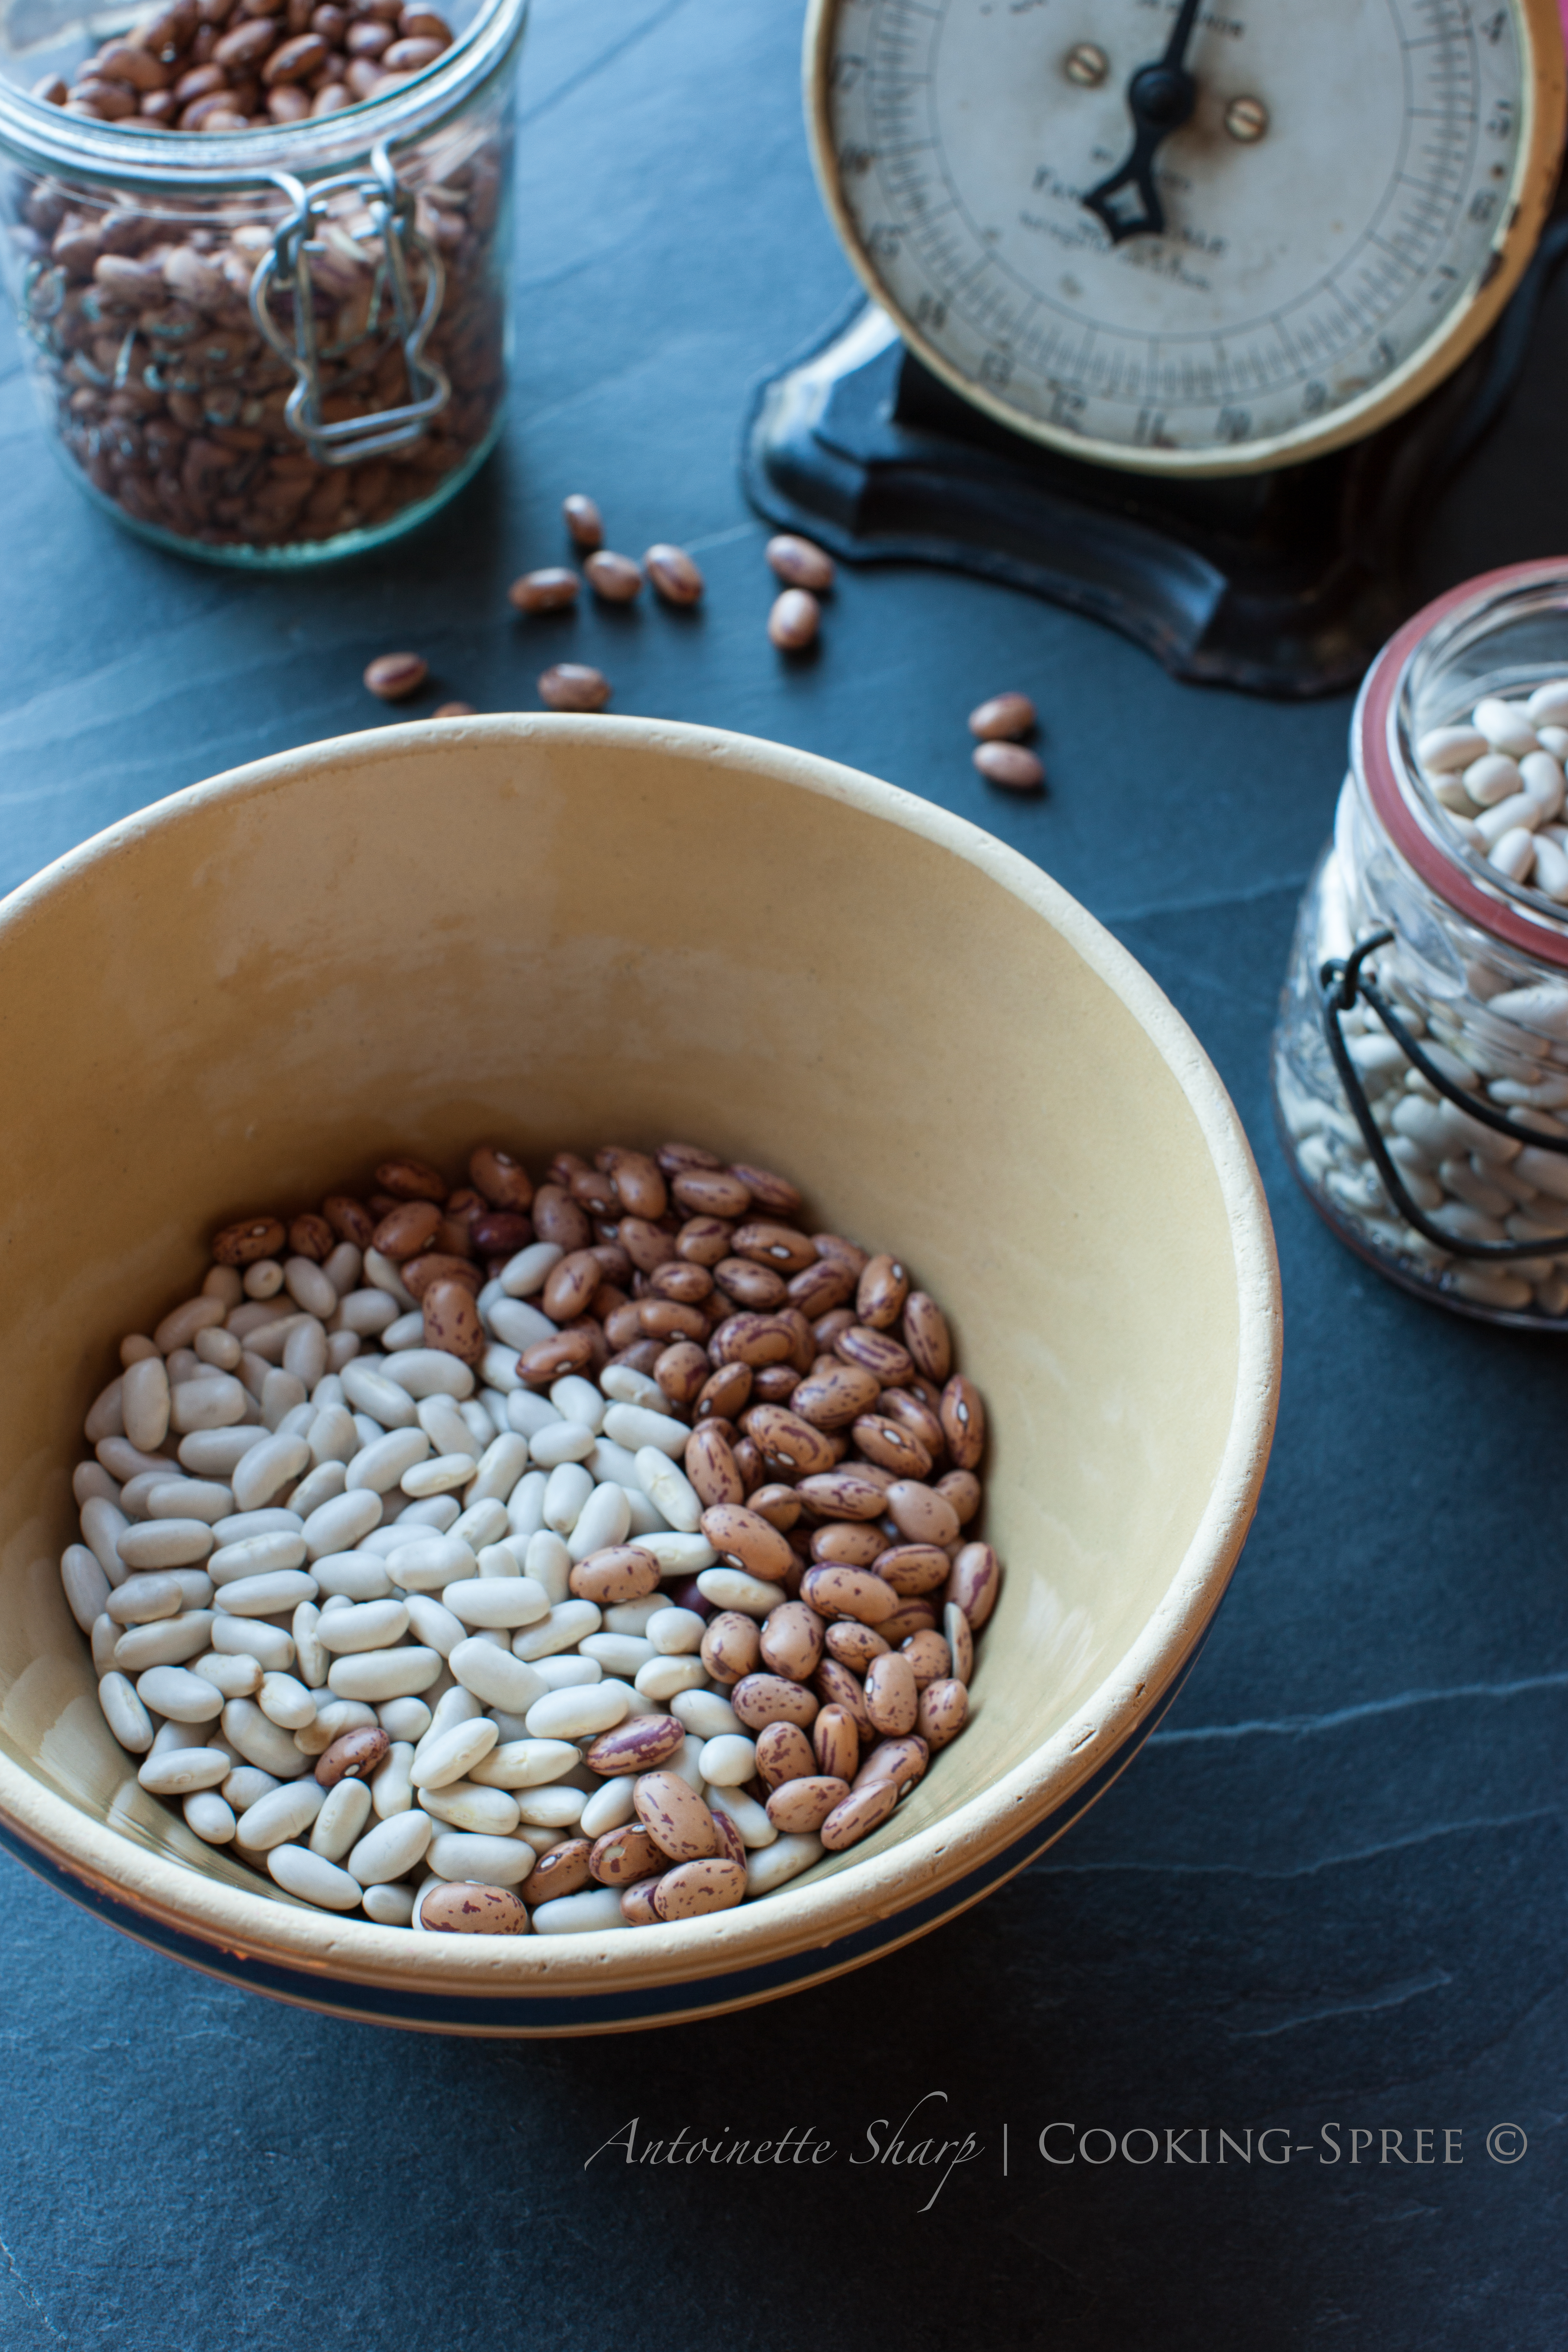
Pinto gallo is frequently made with white rice. If you’d rather use that, by all means do. It can be made with either black beans or small red beans, though I usually go with the black. We’ve adapted it a bit over the years and are apt to throw in all manner of vegetables – peas, corn, chopped spinach, diced zucchini, carrots, even diced butternut squash! You know a recipe’s become your own when you start playing with it! : )

~ ~ ~

First the rice…the recipe calls for cold rice. One explanation for how this came to be such a popular national dish is how common it was to have leftover rice from the night before. If you have leftover rice, this dinner is a snap to put together. If you don’t, and you’re in a hurry, making up a batch of white rice only takes 25 minutes and you can be preparing the rest of the ingredients as you wait. But here’s another thought on how to have rice on hand, for this and many other uses:

Brown rice, we know, nutritionally speaking, packs a power-punch that its pale counterpart cannot. But brown rice takes twice the time to cook as white, and that’s serious business when we’re up against a clock, as we often are weeknights. Here’s an idea then that may appeal: how about cooking a larger batch of brown rice when we have the time and have it ready in the fridge (or even in individual serving bags in the freezer) for when we don’t? Of course you can do that the traditional stovetop method, but I offer here another option. Let’s bake it in the oven! No boiling over, no scorching on the bottom. Take it out, fluff it, perfect every time. And may I offer a recommendation? If you’ve never tried brown Basmati, please do. It’s fragrant, almost buttery, just the right chew, and mouthfuls of nutty nummyness! It tastes just the teeniest bit like buttered popcorn. (If that sounds weird, please ignore that I just said that and try it anyway.)

~ ~ ~

Baked Brown Rice

this makes a double batch – about 8 servings

  • 3 cups brown rice (especially fond of brown Basmati rice!)
  • 5 cups water boiling
  • 2 Tablespoons unsalted butter
  • 2 teaspoons kosher salt

Optional:

  • 2 teaspoons bouillon (or Better than Bouillon, a product that adds such great flavor so easily)
  • 2 Tablespoons diced onion
  • 1 – 2 Tablespoons fresh finely chopped parsley

Preheat oven to 375°F.

Over medium heat, melt the butter in a dutch oven or heavy soup pot. If using onion,  add it now and saute two or three minutes; add parsley, rice, bouillon (if using),  salt, and boiling water. Bring to a boil on the stove. Stir the pot once to combine. Cover with a sheet of aluminum foil and then the lid. Press the lid down to tighten the seal, and tuck the edges of foil up over the lid to prevent escape of the liquid. Put the pot in the preheated oven and bake for one hour. Remove the lid, fluff with a fork and serve – or save for later. That way, with a couple cans of black beans in the cupboard, and a couple basic ingredients in the fridge, you’ll always have what it takes to make Gallo Pinto in a hurry.

Gallo Pinto with Salsa Lizano

  • 2 cups cooked rice
  • 2 cups cooked black beans or small red beans (canned or home-cooked)
  • 3 Tablespoons olive or other vegetable oil
  • 2 – 3 cloves garlic, minced
  • ½ medium-large onion, diced
  • 1 large or 2 small carrots, diced
  • 1 stalk celery, diced
  • 1 red bell pepper (or combination of different-colored peppers,) diced
  • ½ cup bean-cooking liquid, or liquid from canned beans (or vegetable broth, but less preferable)
  • 2 to 3 Tablespoons Salsa Lizano (or to taste)
  • ½ teaspoon salt
  • ½ teaspoon pepper
  • ½ cup chopped cilantro

Optional – other chopped or diced vegetables of your choice – peas, corn, spinach, squash, etc. etc.

Optional Garnishes: 

  • sliced green onion
  • wedges of fresh lime
  • sour cream or Greek-style yogurt
  • hot sauce or more Salsa Lizano 

If using canned beans, drain them and reserve their liquid. Set aside.

In a large, deep cast-iron or heavy bottomed pan, heat the olive oil over medium heat. Add the onion, and when it’s begun to soften, add the garlic, bell pepper, carrots, celery and other vegetables if using. (If using chopped spinach, add it toward the very end of the finished dish, after the beans and rice.) Sauté for 6 to 8 minutes, or until the onion is translucent and vegetables have become nearly tender. Add the rice and sauté for about 10 minutes, stirring often.

Stir in the beans and cooking cooking liquid, salt and pepper and 2 tablespoons of Salsa Lizano. Some like to use the back of a spoon or spatula to smash some of the beans into the rice – the choice is yours whether to do that or not. Cook until most of the liquid is absorbed but the mixture is still moist, about 10 to 15 minutes. If it begins to dry out, add a bit more bean liquid.

Stir in the chopped cilantro and remove from the heat. Serve with additional garnishes, as you choose.

Serving suggestions: Serve mounded on a platter, or on individual plates, along with eggs, fresh fruit (pineapple, oranges, grapes, fried plantains, mango, etc.) Another way to serve would be to pack gallo pinto in a small cup or ramekin then turn it upside down on the plate. (This will work best if it’s packed quite tightly.)

You have in beans and rice a “complete protein” so you’re lacking for no nutrition here, but it can be served with a side of chicken breast (first marinated in Salsa Lizano and grilled, or a piece of grilled fish, both of which would be traditional in Costa Rica.)

~ ~ ~

Gallo Pinto without Salsa Lizano

  • 2 cups cooked rice
  • 2 cups cooked black beans or small red beans (canned or home-cooked)
  • 3 Tablespoons olive or other vegetable oil
  • 3 cloves garlic, minced
  • ½ medium-large onion, diced
  • 1 medium jalapeño or 1 small red pepper, finely diced (optional)
  • 1 large or 2 small carrots, diced
  • 1 stalk celery, diced (or more)
  • 1 red bell pepper (or combination of different-colored peppers,) diced
  • ½ cup bean-cooking liquid, or liquid from canned beans (or vegetable broth, but less preferable)
  • 1½ teaspoons ground cumin
  • 1 teaspoon ground corriander
  • ½ teaspoon ground ginger
  • 1½ Tablespoons Worcestershire sauce
  • ½ teaspoon liquid smoke (only a couple dollars in the condiments section, often next to Worcestershire sauce)
  • ¾ teaspoon salt
  • ½ teaspoon pepper
  • ½ cup chopped cilantro
  • 1 lime
  • hot sauce for serving (ever tried Chipotle Cholula? GOOD!) Read more

the rest of summer – & stuffed red bell peppers

If you’ve been following along, you know that for me this summer has not been about maintaining a steady, even pace. For at least four weeks, it almost seemed as though you’d need to poke me to know I was still alive. : ) There were whole days in fact when I could do little but stare out a window. Then the pace, following surgery, suddenly changed. Daily, for the next three weeks, I was shot out of a cannon.  My youngest brother was marrying his sweet love at our house (!) and I had everything yet to do! Inside, outside, all around the house! I’m delighted to say that they were married this past Saturday…and everything was . just . plain . lovely ! Sixty or so of the nicest people, a beautiful and moving ceremony, a stringed trio,  a veritable feast, and so much love it was contagious. Quite a few of us left euphoric…but no one more so than my brother and his new wife.

Health, happiness and a long, sweet life together, Jeem and Darlyn!

Today I think I may be hitting one of the gears I missed between the two extremes of summer. I am back to humming in my kitchen, and happy to be back in your company again. Expect me to be keeping it in third gear for the rest of summer, with a steady stream of food-stuff I’ll be wanting to share.

But I begin by emptying my refrigerator. I have a few too many red bell peppers and oodles of feta. I have farro (that wonderful nutty Italian grain tasting something like barley, but actually an old-world wheat.) And oregano (passed down from our Greek Yaya) is spilling out of the herb garden. So let’s stuff ourselves some peppers!

These can be served as a side-dish or as the center of a vegetarian meal. Perhaps with green salad or fresh green beans drizzled with olive oil, sprinkled with coarse salt and thin strips of fragrant, fresh basil.

(If you don’t have or can’t find farro – it is worth the hunt – substitute with brown or white rice  – or barley – or that little pasta, orzo.)

Stuffed Red Bell Peppers with Farro and Feta

  • 4 red bell peppers, medium to medium-large – (peppers with broad bottoms will stand up better)
  • 1 cup farro
  • 1/4 cup sun-dried tomatoes (packed in oil) – diced
  • 1-1/4 cup canned crushed tomatoes (along with their juice)
  • 3 – 4 green onion, thinly sliced
  • 1-1/2 Tablespoon fresh oregano, chopped,  or 2 teaspoon dried oregano, crushed
  • 4 cloves of minced garlic
  • pinch of red pepper flakes
  • 1 cup feta cheese, crumbled
  • 3 Tablespoons olive oil
  • Pepper and salt to taste (keeping in mind that the feta will impart its own)
  • A little extra sauce from the the crushed tomatoes (or catsup if you like) to spread over the top

Optional:  10 black or Kalamata olives, pitted and sliced

Garnish: toasted (& herbed) bread crumbs for the peppers once they come out of the oven (see NOTE)

Set a large pot of water to boiling. Add 1 tablespoon salt. Cut off the top 1/2 inch of the peppers (reserving these tops for later) and remove and discard the cores and seeds. Submerge the peppers in the boiling water and boil for about 3 minutes – peppers will just be starting to soften. With slotted spoon, remove the peppers to a paper towel to cool and dry. (Place open-side up to prevent over-softening.) No need to discard the cooking water.

To the boiling water add one cup farro and cook for about 15 minutes or until done al dente. (Depending on the type of farro you use, cooking times can vary by quite a bit.)

Preheat oven to 350°F. Read more

a bowl of irony & a jar of sunlight

Spree’s been down with a stomach bug – blech! The doctor has called for bland. For the last several days, no appetite at all. My husband’s gone to the store (twice) to fill my wish list – and then, not meaning to be ungrateful – I turn my nose up. How in the world does spree do bland? What an irony!

Spree’s White Rice

  • 2 teaspoons clarified butter (or olive oil if you haven’t any)
  • 1/8 teaspoon cumin seeds
  • 1/8 teaspoon fennel seeds
  • 1/8 teaspoon coriander seed
  • 1 teaspoon salt
  • 1 cup white basmati rice
  • 2 cups water
  • chopped cilantro as garnish, optional, but just about perfect

Put clarified butter (Ghee, in India) into a heavy pot. Add cumin, fennel and coriander seeds and toast over medium-low heat until (as my friend from India says) “they go chit chit,” which is to say they crackle and get medium-toasty brown. Add the rice, salt and stir to coat with butter. Add your water and bring to boil. Stir once. Reduce heat to simmer for 18 minutes. (Don’t peek.) Turn heat off and allow rice to sit undisturbed for 5 minutes. Fluff with a fork, and serve with something colorful and savory…if you can. (But even unaccompanied or unadored, it satisfies.) A sprinkling of chopped cilantro over top, nice!

A Jar of Sunlight – Clarified Butter

Butter is a combination of butter fat, milk solids and water. Clarifying removes the water and milk solids, leaving pure buttery goodness and elevating the smoking point. With clarified butter, you can now turn up the heat without risk of smoking up your kitchen or blackening your lovely meal plan. It has an absolutely wonderful aroma and delicately-toasty taste. It keeps well in the refrigerator for at least a month. (Some grocery stores will sell ghee in the refrigerated section.)

a jar of sunlight

  • 8 ounces unsalted butter
  • a heavy pot
  • a jar
  • a piece of dampened cheesecloth

Read more