Skip to content

Posts from the ‘Pasta Dishes’ Category

pasta that stands out in a crowd

Several years ago, three of us went to a newly-opened restaurant here in Portland by the name of Fin. Great name for a (primarily) fish restaurant, no? One plate after another was brought to us, bearing exquisite-tasting and exotic-looking creations, works of culinary art, in very small portions…each with just a few bites to share. We saw one on this tasting menu using “Squid Ink Pasta” and our eyebrows went up and our eyes grew wide and we looked at each other with question marks across our foreheads that read, “Dare we?” We did! And what a good move that turned out to be!

About a year later, Fin closed its doors…lost its lease, through no fault of its owners…the landlord just wanted another and quite different use for the property. We have so many very good restaurants in Portland, but we were sad to see Fin go.

How I’d like to thank them for first introducing us to this intoxicatingly delicious, love at first bite, pasta. The one thing I know to do is to share the good noodle news with you’s!

This wasn’t the way it was prepared for us the first night we dined at Fin, but I’ve been thinking of preparing it like this for quite some time. And, turns out, it was as good as a very good food dream can be.

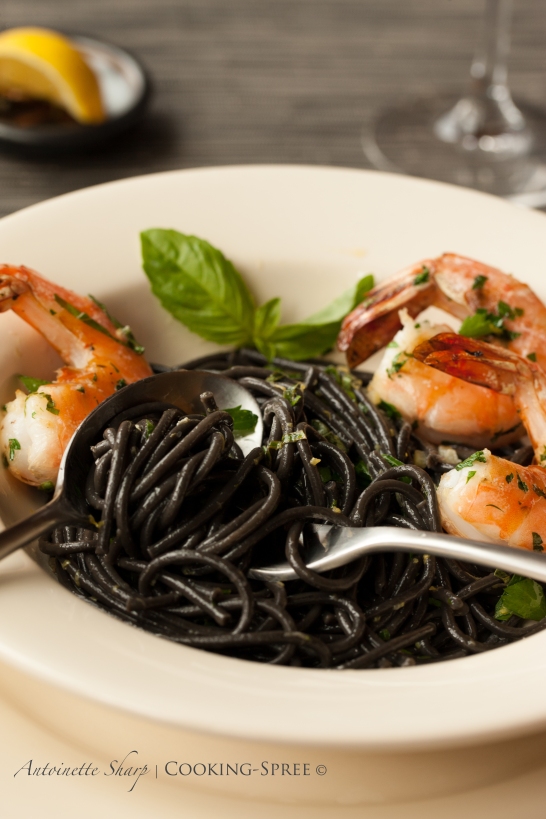
ShrimpLemonSquidInkPasta-1

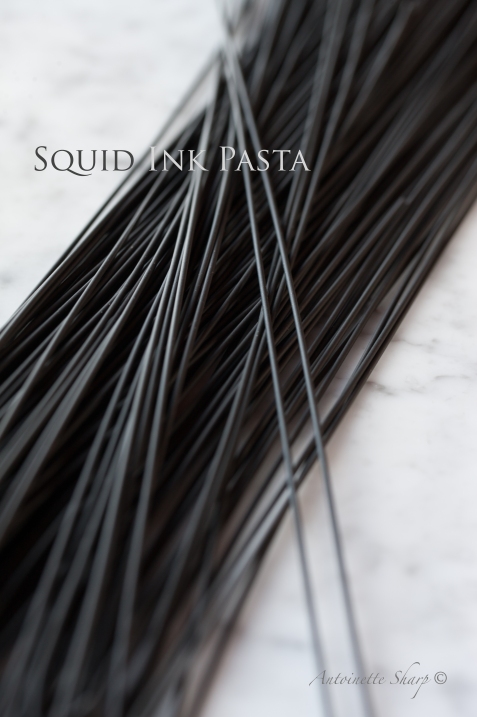
Before we get to the recipe, a word about the pasta. It’s hard to imagine, isn’t it? Pasta as black as winter’s midnight! It still has the tooth-feel of a good spaghetti or fettucini noodle, but with a certain inexplicable velvety silkiness. Don’t think for a minute that I mean slippery like an eel! I mean smooth (and please, when you say it, say it slowly, drawing out those oo’s!) It tastes a bit of the sea, a little briny, but not salty. It will cost you a little more, and it may be hard for some of you to find, depending on your markets nearby, but it’ll be worth the hunt and worth a few extra dollars (only a few!) for a meal…this…this..indescribably good.  (If you have trouble locating the pasta locally, you can order from Amazon. There are several names and sizes to choose from.  Here’s one Italian brand I like a lot –  the  link here.)

ShrimpLemonSquidInkPasta-5

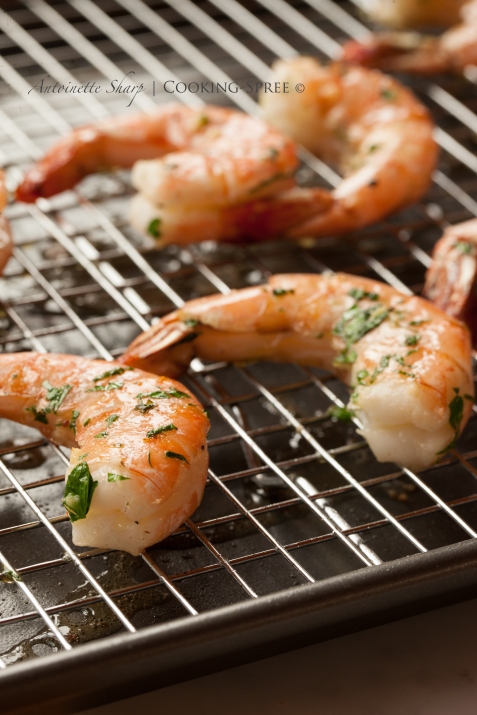
I recently discovered a wonderful article in Cooks Illustrated on how to prepare (perfect, yes I’ll use the word) shrimp under the broiler. Being thus equipped, it was a cinch to put these two together. You’d have done it too…

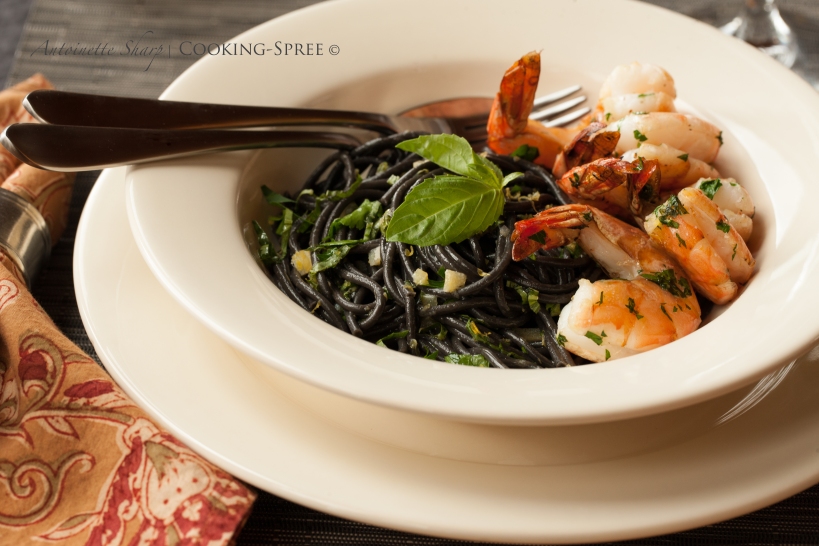
ShrimpLemonSquidInkPasta-3

Shrimp & Squid-Ink Pasta with Lemon & Basil

This all comes together pretty quickly…once you get those rascally shrimp clean and deveined. But be sure to leave the shells and tails on…lots of good flavor in those shells, and they share it with the shrimp as they cook. (Though of course you’re permitted to take them off before you eat.) The cleaned & butterflied shrimp are then dropped into a brine for 15 minutes before cooking. That will give you plenty of time to gather the rest of your dinner.

Garlicky Roasted Shrimp

( serves 4 to 6 )

____

Salt – ¼ cup

 Shell-on Jumbo Shrimp – 2 pounds (16-20 per lb)

Unsalted Butter – 4 Tablespoons

Vegetable Oil -¼ cup

Garlic – 6 cloves, minced

Red Pepper Flakes – ½ teaspoon

Black Pepper – ¼ teaspoon

Fresh Parsley – 2 Tablespoons minced

Garnish: Lemon Wedges

_____

Dissolve salt in 1 quart cold water in a large container. (It will take you some long minutes to prepare the shrimp so I wouldn’t add to the brine until you’ve got them all done so they’re all flavored equally.)

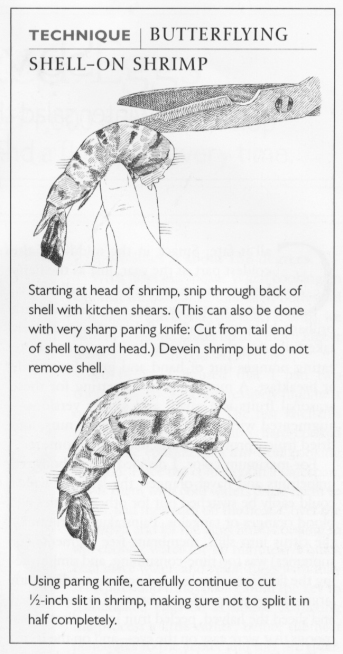
Using kitchen shears or a sharp paring knife, cut through the shell and devein but do not remove the shell. Using a paring knife, continue to cut the shrimp ½-inch deep, taking care not to cut in half completely. (See Illustration.)

ShrimpLemonSquidInkPasta-6

Submerge the shrimp in brine, cover, and refrigerate for 15 minutes.

Adjust oven rack 4 inches from broiler element and pre-heat the broiler. Combine melted butter, oil, garlic, pepper flakes, and pepper in a large bowl. Remove shrimp from brine, pat dry with paper towels then add shrimp, along with the parsley, to the butter mixture. Toss well, making sure that the butter mixture gets into the interior of the shrimp. Arrange on a wire rack set into a rimmed baking sheet.

Broil until shrimp are opaque and shells are beginning to brown on the top side, 2 to 4 minutes, rotating sheet halfway through the broiling. Then flip shrimp over and continue to broil until second side is opaque and shells are beginning to brown, another 2 to 4 minutes, rotating halfway through. (Very doubtful this will require anything close to 8 minutes total time!)

ShrimpLemonSquidInkPasta-4

You may think now to plop these beauties onto pasta – and how lucky! That’s the very thing I’m recommending!

____________________________________________

the pasta!

I’ve paired this pasta with a couple herbs and with lemon, three ways – the tart juice, the bright zest, and the Incomparable Preserved Lemon. (You can omit the preserved lemon if you wish, but I don’t know why you would! : ]  If you still haven’t made your own, you can buy them already prepared. In an upcoming Spreenkle I’ll share a quick trick for making a reasonable facsimile much faster in your freezer – or Google it and you’ll see the method. I still prefer the slower method though.)

Squid-Ink Pasta with Lemon & Basil

( serves 4 with shrimp )

__________

Squid-Ink spaghetti, fettucini, linguini, capellini (your choice) – 8 ounces

Juice of 1½ – 2 Lemons

Lemon Zest – from the juiced lemons

Preserved Lemon (the rind only, finely-diced) – from ½ lemon – rinsed well, pulp removed

Unsalted Butter – 3 Tablespoons

Extra-virgin Olive Oil – 3 Tablespoons

White Wine – a good Splash

Basil Leaves – 16 medium to large ones

Italian Parsley – 1½ Tablespoons chopped

Salt – to taste

Freshly-ground Pepper – to taste

________ Read more

butternut squash ravioli with toasted pecans & sage

Many of you are well-acquainted with the Italian gentleman whose handsome head pops up on many pages around this neighborhood. Always nattily dressed in dark suit and narrow tie, always raising his glass and leaving kind words to cheer us. He’s known to us as Chicago John. And he’s a legend in these parts.

You’ll find John cooking up a delicious Italian storm in the Bartolini Kitchen, every Wednesday.  The smells that rise from his oven and bubbling pots will make you hungry. They’ll make you wish you could pop into his kitchen and pull up a chair and spread your napkin and toast the cook and lift your fork and stay long into the night! They might make you wish you’d grown up Italian, with family recipes handed down, and down again to you. For sure they’ll make you wish you could cook like John does. And that’s where this little journey began for me…

SquashRavioli-1

Only a handful of times in my life have I made pasta from scratch. I should be throttled for that! The man I married (who calls himself my grateful guinea pig and is such a good sport) is an enormous fan of pasta. Wrong word choice…he likes pasta, a Lot. So it was that when I spotted John’s series of posts on pasta – and then – Ravioli! – I knew I’d just discovered the Holy Grail – no question about it – this was D.i.n.n.e.r. – written in the Guinea Pig’s own Language of Love.

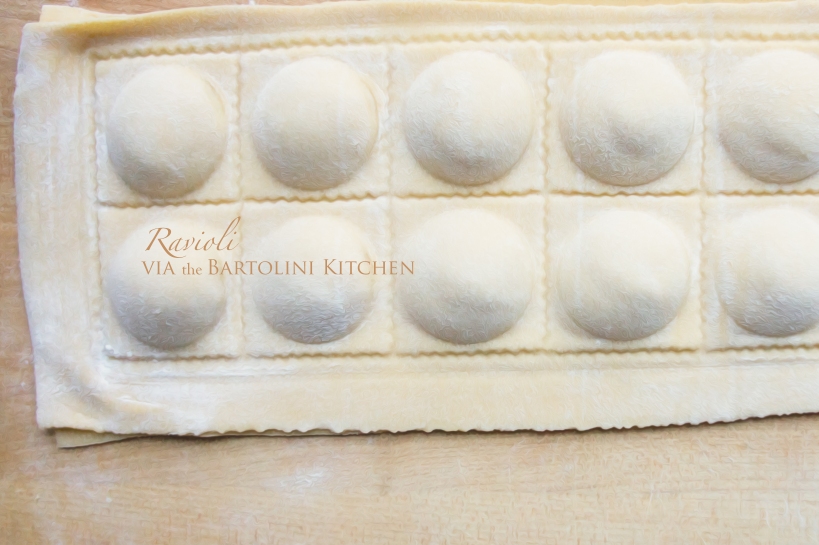
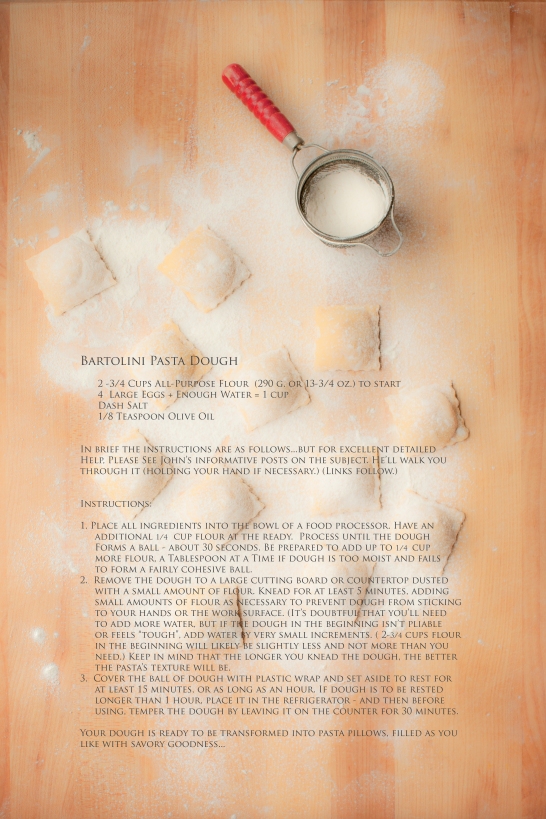
Now you understand, I’m not the one to learn pasta making from. No, no. I’d head over to John’s if I were you. Below is the recipe for the Bartolini’s pasta dough. It’s the one I used (Naturally!) I followed his expert guidance on how to roll and what dies to use as a novice raviol-ist. I prayed the rosary (ok, not exactly), asked John for one more encouraging word and then I dove right in. Fearless! (ok, not exactly.)

(You’ll be able to view this recipe better if you click on it.)

SquashRavioli-4

It all went quite well, just like John said it would. I had mechanical issues with my pasta roller and I think I’m tossing it (but not til I’ve found a replacement.)

__________

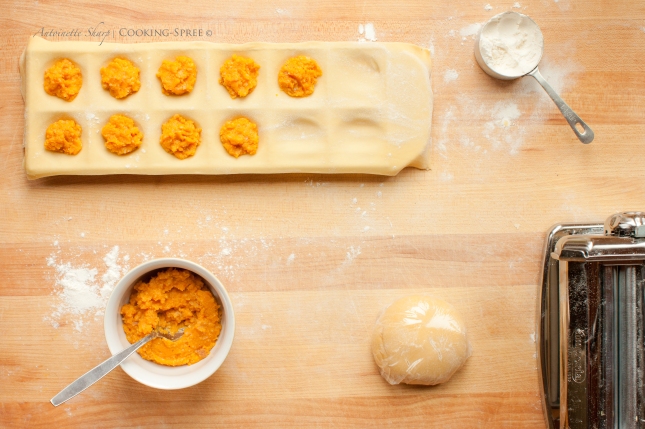
I made a sweet & savory butternut squash filling…

(recipe follows)SquashRavioli-2

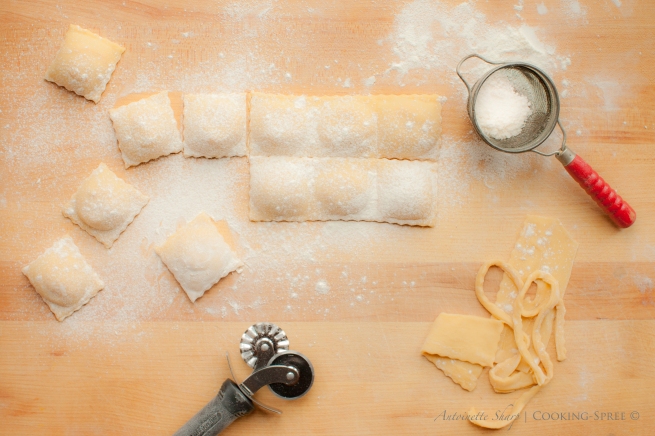
Closed those little pillowy parcels up…SquashRavioli-3

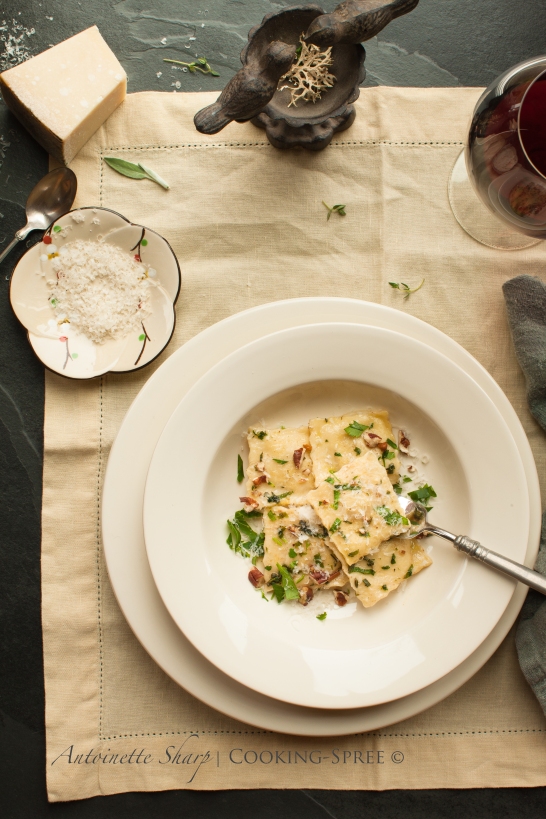
Gently boiled them in salted water, drained them and then slid them into a simple sauce of browned butter, garlic & sage, thyme & parsley & toasted pecans. G.P. will probably chime in here and tell you about it, but if he’s still tied up licking fingers, I’ll tell you…

it was pretty fine!

SquashRavioli-12

_____

Butternut Squash Ravioli with Toasted Pecans and Sage

1 butternut squash, about 2 pounds

Vegetable Oil – just a wee bit for brushing squash

 Cayenne Pepper – a Dash

Freshly-grated Nutmeg – (about 5 passes over the grater – to taste)

Salt & Freshly-Ground Black Pepper

Freshly-Grated Parmesan –  ½ cup

dried bread crumbs – ½ cup

_____

Freshly-Made Pasta ala Bartolini (recipe above)

___

Brown Butter with Pecans & Sage

Butter – 4 to 6 Tablespoons, melted

Garlic – 1 medium to large clove

Chopped Fresh Sage Leaves – 2 Tablespoons

Chopped Parsley – 2 Tablespoons (divided)

Chopped Fresh Thyme – 2 teaspoons

Toasted Pecans, ½ cup coarsely chopped

Freshly Grated Parmesan or Pecorino Romano (I prefer the latter here)

Prepare the filling: Preheat the oven to 375°F (190°C) Slice the squash in two, from top to bottom and scoop out the seeds. Brush the cut surface with vegetable oil and place cut-side down on a baking sheet lined with parchment paper or silpat. Bake until soft – about 40 minutes (though begin checking at 30.) Scoop out the flesh and measure 2 cups full. Drop it into a food processor (or mash well with a fork) blending with 2 Tablespoons butter. Season with a dash of cayenne, grated nutmeg, salt and pepper. Season to your own tastes. (It will not need to be fully seasoned with salt since the cheese will bring some of its own.) If the squash seems a bit too liquid-y you can dry it out by dropping it into a skillet on high heat for a few moment. Add bread crumbs and cheese. Set aside.

Read more

Greek baked chicken with orzo

In several previous posts, I’ve written of our Dad. (If you haven’t yet seen it, you may want to read: Orange Flowers. ) His influence  on me (on us all) was enormous, though he didn’t even come to be my dad until I was already a gawky ten-year-old girl. His tender love forever changed me. We lost him a few years back, but his birthday’s coming very soon. I’m posting this recipe now – it’s one I think our Greek Pop would have loved.  I’m thinking primarily of my family when I say this, but if anyone out there would like to prepare this on November 2nd, I’d like to think there will be at least one more smile than the ones you see around your own table.

Efharisto!

This chicken dish is a common Sunday one-pot meal on the Greek islands, where chickens are raised primarily for their eggs. Therefore, it’s considered special – besides that, it’s absolutely wonderful!

~ ~ ~

~ ~ ~

Baked Chicken with Orzo – Kotopoulo Youvetsi

  • 1/3 cup olive oil
  • 1 4-pound free-range chicken, cut into 6 pieces (or the equivalent weight in pieces you choose)
  • 1 large onion, halved and thinly sliced
  • 1/3 cup chopped oil-packed sun-dried tomatoes
  • 2 cinnamon sticks
  • 1½ teaspoon dried oregano, crumbled
  • 1 teaspoon Aleppo pepper or a pinch crushed red pepper flakes
  • 2 cups grated ripe tomatoes or canned diced tomatoes with their juice
  • Salt
  • 2 cups chicken stock, plus more if needed
  • 1 pound orzo (you substitute elbow macaroni) – cooked in plenty of boiling salted water for only 2 minutes, then drained
  • 2 Tablespoons chopped fresh flat-leaf parsley
  • 1½ cup coarsely grated hard myzithra, pecorino Romano or Parmigiano-Reggiano cheese

Preheat the oven to 400°F.

In a Dutch oven, heat the olive oil over medium-high heat and sauté the chicken parts in batches until brown on all sides. Set aside.

Add the onion to the pot and sauté until soft, about 5 minutes. Add the sun-dried tomatoes, cinnamon sticks, oregano, pepper or pepper flakes and tomatoes. Sprinkle the chicken with salt and return to the Dutch oven. Add about 1/2 cup of stock, or enough to come about two-thirds of the way up the chicken.  (You want to be sure that the breast meat is sunk quite deeply into the sauce, so just the very top of it sticks above. That will help prevent it from drying out.)  Bring to a boil, cover and transfer to the now-hot oven.

Read more

It’s Official – Spring is Finally Here

It’s time to wrap up the last of the Beat the Winter Blues menu and get on to more colorful things! (And April’s going to be a very colorful and fun month for the cooking-spree!) 

We served two lasagnas that winter night – one of them a Roasted Butternut Squash and Rapini lasagna; and the other  a Turkey Sausage and Goat Cheese one which got raves, and rightly so. I don’t have photos of it and it was prepared very much as the recipe specified, so I’ll simply supply you the link for that one. It ranks right up there with the best lasagna I’ve ever had. I did make two little changes to the recipe though; first, instead of link sausage called for (which then requires you remove the turkey from its casings), I used bulk Italian turkey sausage. The other change was that instead of all mild or sweet Italian sausage, I replaced half the total amount called for with a hot or spicy variety. When I was recently visiting my daughter Ali and her family, we made it again, but this time with ricotta cheese we made ourselves. It was the first time we’d ever tried that, and it was remarkably easy and made us feel quite …well, puffed up and pleased with ourselves. Who knows if the lasagna tasted any better because of that extra love in the pan, but it couldn’t hurt, right? So, now that you have that background, if you’re a lasagna lover (or you know and love one) you might check out

Ina Garten’s Turkey and Goat Cheese Lasagna:

http://www.foodnetwork.com/recipes/ina-garten/turkey-lasagna-recipe2/index.html

(This post first appeared in March 2011.)