Skip to content

Posts tagged ‘baking’

on pita & filling our pockets

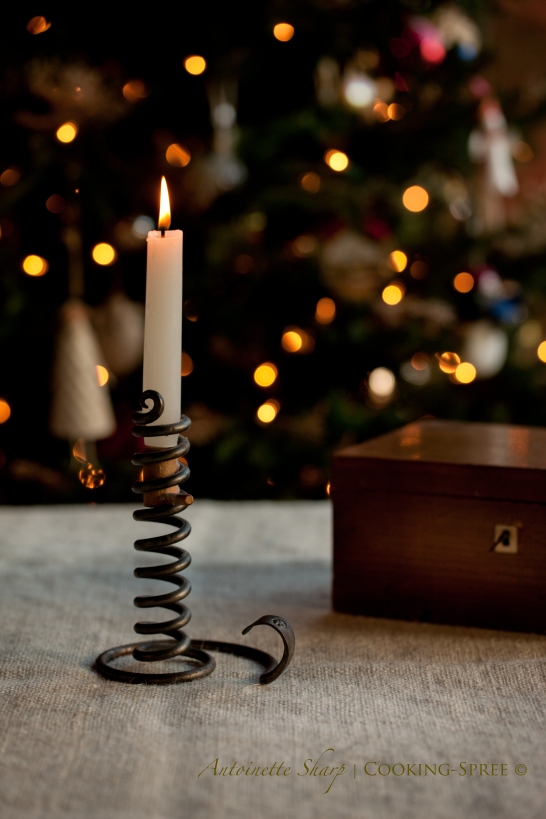
Making your own pocket bread may not be the thing for you. Do you have some leisure hours on one of your weekend days that you might like to spend playing with soft little pillows of dough? Do you find it a thing of pleasure to create something from scratch, something you can easily grab off the shelf, machine-made and already shrink-wrapped for you in plastic? Would it thrill you (just a tiny bit?) to watch flat pancakes fill like hot-air balloons in your oven while the aromas of a bakery fill your house?   hmmm! – well –

then…

PitaBread-5

Pita  – from your own oven

_____

makes 16 pita pockets

___________

1 Tablespoon active dry yeast (or 1 package)

2½ cups lukewarm water

¼ teaspoon sugar

Approximately 6 cups unbleached white bread flour  (or unbleached all-purpose flour)

1½ – 2 teaspoons salt

3 Tablespoons vegetable or extra-virgin olive oil

__________

 Into a large bowl, pour ½ cup of warm water and stir in the yeast to dissolve. Add the sugar. When the mixture begins to froth (proving that the yeast is still lively) stir in the remaining 2 cups of water. Gradually add 3 cups of flour, 1 cup at a time, stirring vigorously. (You may either do this by hand, or with a stand-mixer.) You’ve now made a “sponge”. Allow it to rest for 10 minutes, or until it too froths.

Stir in the salt and 2 Tablespoons of the oil and mix together well. Gradually add the remaining flouryou may need less than the total amount specified – once you have a dough that holds together into a ball and isn’t sticking wetly to your hands, you’ve added enough flour.

(Because the flour hydrates gradually – and depends on ambient humidity amongst other things – if you add large amounts of flour all at once, you can overshoot the mark. All would not be lost…just add a bit more water – gradually – to find that happy balance.)  

Knead well by hand in the bowl, or on a floured board, ten minutes or so; or in a stand mixer using the dough hook for maybe 7 minutes. You’re looking for a smooth, shiny and elastic dough that no longer sticks to your fingers when held for several seconds. Dust with a bit more flour occasionally if it proves too sticky. Form it into a ball.

Put the remaining tablespoon of oil into the bowl and roll the ball of dough around so as to grease it all over. (This prevents a crust from forming on it.) Cover the bowl with plastic wrap and leave in a comfy warm place free of drafts for about 2 hours, until doubled in bulk.

Preheat the oven to 500°F (260°C), placing a large baking sheet in the hottest part. (Generally about ¼ of the way up from the bottom.) Allow it to preheat for 20 minutes.

Punch the dough down and then knead again for several minutes. Divide the dough in half. Divide the first half into 8 “equal” lumps and roll these into balls.

PitaBread-1PitaBread-2

PitaBread-3

On a lightly floured surface, using either your hands or a rolling pin dusted with flour, flatten each lump into a “pancake” about 7 or 8 inches across and 1/8 to ¼-inch thick.  Spread a kitchen towel on your counter and sprinkle it with flour. Dust each of the rounds with flour and arrange on the cloth, leaving an inch between them.  Cover these with another flour-dusted cloth and allow them to rest for 20 minutes at room temperature. (If your counter is particularly cold, you could leave them to rest them slightly longer.)

________

Read more

this little light…..& shortbread cookies

for those of us who live north of the equator, we’re only 4  days from the darkest day of the year. But for many among us, it felt as though last Friday must surely have been that day.

. . .

in this hurting world

don’t think that for one moment

your light goes unnoticed.

don’t think for an instant that your light,

just now, is too dim to shine for anyone.

. . .

don’t believe that what we face

is either too big or too complicated,

or that our little light

is powerless

in the creeping shadow of it.

. . .

in this hurting world, the one thing,

the one thing, we can each do

is let our own light shine.

whatever shape or brilliance your candle,

it is exactly what the world needs…

this shimmering little light

that is yours alone

to share.

___

LemonShortbread&Light-7-2________

Sometimes, when it feels like sadness might overtake us,

we bake.

something so small.

An unseen part of us knows though that an ancient comfort

is resident in our kitchens. When hope seems dim, or our candle flickers,

and we really haven’t much of a clue where to put our sorrow,

we can always bake cookies to share.

____

LemonShortbread&Light-11

______________________

these little shortbreads are aromatic and truly lovely. if you already know and love lavender in the kitchen, go for the full teaspoon. if you’re trying for the first time, you might start with the smaller amount. but if you don’t have lavender at all, it can be omitted. or try replacing it with ¼ to a scant ½ teaspoon fresh rosemary, very finely minced. (Culinary lavender is easily obtained on-line.)

however, if chocolate is your flavor, a recipe for chocolate shortbread follows.

___

Lemon Lavender Shortbread

___

½ cup butter at room temperature

½ cup powdered sugar (unsifted)

2 teaspoons grated lemon peel

¾ to 1 teaspoon culinary lavender  (see above) 

¼ teaspoon lemon extract

1 cup flour

___

Cream the butter until light and fluffy. Drop the powdered sugar into a small bowl. Mince very finely the zest of lemon and the lavender and add them to the powdered sugar. Add the lemon extract.  Stir to mix; then add to the butter and cream together. Work in the flour, scraping the bowl as you go.  Once the dough has mostly come together, remove to an unfloured board and knead  until nice and smooth.

Either spray with non-stick vegetable spray or brush a thin layer of vegetable oil on the bottom and sides of your pan. Firmly press the dough into the pan. (I used a clay pan with Scottish thistle imprinted on it, but an 8-inch round cake pan or 9-inch pie tin will work just fine!) Prick the entire surface with a fork and bake at 325°F (165°C) for about 30 to 35 minutes, or until lightly browned. Set the timer and allow the shortbread to cool in the pan for 10 minutes. Loosen the edges with a knife and flip the pan over onto a wooden cutting board. (If it doesn’t release right away, tap one edge of the pan.) Cut the shortbread into 8 pieces while still warm.

( to print lemon lavender recipe, click. )

LemonShortbread&Light-12

Read more

rhubarb apple tart & tulips on the table

we all bring something to the table. what are our gifts? what of ourselves do we decide to grow and then share? what love language do we speak? do we learn to speak another’s? how well do we listen?

my husband learned years ago that i love flowers. in the beginning he would order elaborate flower arrangements (full to overflowing) and have them delivered to the door. then, somewhere along the line, he learned i like simple, and all of one thing. and now, he brings me bundles wrapped in paper, wound with string, carried in his own man arms. and sometimes, after days away, blooms are there, welcoming me home again.

if you’ve been with me awhile, you’ve heard of my fear of pie. (more truly, it was fear of a colossal-y failed crust.) i’ve done truly brave things in my life (i’ll even cop to a “reckless” act or two) but pie crust? why and how this fear (irrational to begin with) grew to be such a beast, you might guess. but for years i steered clear of the rolling pin. then, only fairly recently, i decided to stand toe to toe with that tiger, stare unflinching into his golden eyes.

that tiger walks beside me now, purring like a kitten. and finally (and this is reason enough to take on a tiger) i can make my love his apple pie.

Apple Rhubarb Tart

I’ve shared my recipe for a tart shell in an earlier post. (see French Lemon Tart if you want to be tempted!) I’ll include the crust recipe here too, at the end of the post. I’d like to be humble about this, but after years of being humble, to finally be proud seems like something worthy of sharing. So here’s the un-softened, un-humble truth. This crust is   a.w.e.s.o.m.e.

A word about the filling: I grew up eating and loving rhubarb. To me, it’s a thing of spring. So as a base for this pie is a thick rhubarb “compote” of sorts – the liquid cooked out of it and nothing but the essence of the fruit remaining, lightly sweetened, imbued with the scented seeds from a vanilla pod and touched with a hint of cardamon. Apples, rolled in melted butter and brown sugar twirl across the top. Serve as is, warm from the oven, with or without ice-cream or crème fraîche. Or serve it chilled. It’s not too sweet for brunch or tea.

the Fillings

the rhubarb

  • 1 pound rhubarb stalks
  • 2/3 cup dark brown sugar or muscavado
  • 1/3 vanilla bean
  • 1/8 teaspoon ground cardamom

the apple

  • 2 apples – Granny Smith or Pink Lady are good (or any other apple that will hold its shape while cooking)
  • 2 Tablespoons butter
  • 2 Tablespoons dark brown sugar or muscavado

Wash the rhubarb stalks. Split in half lengthwise, then cut into pieces about 1/2-inch or smaller. Put in a medium-size heavy pot. Split the piece of vanilla bean in half lengthwise and scrape out the seeds, adding both the pod and seeds to the pot. Drop in the brown sugar and cardamom.

Place the lid on the pot and cook over low heat for 15 minutes or until saucy. (No water in this compote – the low heat will encourage the rhubarb to release its own moisture.)

Read more

muffin madness

It’s time I told you of some plans. On Wednesday April 4th I’ll be heading out of town, gone for 9 days. Gone to meet, to hold and to fall in love with our family’s newest and littlest little. Besides nuzzling of soft powdery neck and losing my heart again, I’ll be preparing some meals, hiding-and-seeking, story-telling and tending to Ali, the  littles’ mama.

In anticipation, yesterday was largely spent in the kitchen, making muffins (and more & more muffins) and two batches of granola. We’ll all be pretty busy at breakfast time, so a bowl of yogurt topped with fruit and crunchy granola, or nutritious muffins in one hand and baby in the other will put us one leg up on the day.

GratefulGuineaPig is out of town and comes home in the afternoon of the same morning I leave. Our ships will pass in the night, so I’ve left him some muffins for breakfast too.

Earlier I posted a recipe for the Morning Glorious Muffins. You can find them here.

In the basket, Morning Glorious Muffins.

Earlier I posted a recipe for the above muffins. You can find them here.

But the muffin I’m about to share with you is ta-da   G l u t e n   F r e e.  That matters to an increasing number of eaters out there. And what I’m discovering in sampling some of these g-f recipes is that the baked goods that result are extremely Tender & surprisingly Delicious! A number of them win the taste test over traditional flour recipes, with hands tied behind their backs. (I’d have lost good money if I’d bet on that one.) Here’s one plucked from the pages of La Tartine Gourmande that I thought you’d like!

Millet, Oat & Apple Muffins

 Made with a combination of flours –

Quinoa flour – wheat-free, gluten-free, an ancient grain that adds a richness of flavor as well as a complete protein.

Millet Flour – one of the earliest cultivated grains (5,000 years ago in China!) it has a sweet flavor, high in amino acids and fiber and contributes a delicate, cake-like crumb to the baked goods it’s in. Again, easily digested and gluten-free.

Add in Gluten-Free Rolled Oats, tahini, grated apple, and this muffin packs a nutritional wallop and starts the day off right. 

Millet, Oat & Apple Muffins – Gluten-free

makes 10 muffins

  • 2 large eggs
  • ½ cup (80 g, 2¾ oz.) Muscovado sugar (or substitute with brown sugar)
  • 2 Tablespoons tahini (sesame butter)
  • 3½ tablespoons (50 g) unsalted butter, melted
  • 1 teaspoon pure vanilla extract
  • ½ cup (60 g, 2 oz) millet flour
  • ¼ cup (30 g) quinoa flour
  • ½ cup (50 g) rolled oats, plus more for topping
  • Pinch sea salt
  • 1 teaspoon baking powder
  • ½ teaspoon baking soda
  • 1 cup (175 g, 6 oz) finely grated pink lady apples or substitute (peeled & cored)

Preheat oven to 350°F (180°C). Line a muffin tin with 10 paper muffin cups, or use silicone muffin molds.

Read more

spreezza!

Oh, you’ve not heard of it? Spreezza’s that immensely popular little dessert pizza, covered with marscarpone cheese, topped with juicy fresh fruits, drizzled with  some delectable sauce or other, some even scattered with herbs. Oh, you’ve not heard of them?  I guess I must have made it up.

It begins with a good pizza dough….

This No-Knead Pizza Dough is bubbly, chewy, crispy and better than you’ll find at most pizza parlors. It can be used for ALL manner of pizzas – nothing at all about it restricts it to the dessert realm – in fact I’m the one who’s taken it there. It’s a take on the now-famous No-Knead Bread of Jim Lahey (owner of Sullivan St. Bakery in NYC) who introduced it a number of years back to rave reviews. I posted the bread late last year but if you missed the post and would like to take a look, you can check it out hereThis pizza dough, like the bread that inspired it, derives its wonderful complex flavor from its overnight fermentation. So the only thing you have to consider moving forward is to start it the day before you plan to enjoy it.

Now if you’ve got a hankering for a spreezza and you don’t want to wait til tomorrow, you can always begin with a store-bought dough (Trader Joe’s has a very good one), skip all this that I’m about to tell you about the dough, and move quickly to the spreezza recipe further down. But you might want to return to this dough another time, because it really is wonderful.

~ ~ ~

(Each of the following 10 to 12″ pizzas will make about 4 portions of dessert, 2 slices per person. About the same amount would hold true if being served for brunch with accompanying eggs and/or meats and other items. For breakfast, I’d allow more per person…maybe half a Spreezza per person. You can halve the recipe easily if you like. Or make the whole thing, break it into portions, wrap and refrigerate for up to 3 days to use in other ways…like a traditional pizza. Or stay tuned because I’ve got another fun idea coming up very soon! Flavor and texture of the dough will not suffer at all for the extra time spent in the fridge. If you want to wrap and chill ahead, just allow 2 to 3 hours once they come out of the fridge for unwrapped dough balls to rest before forming into pizza pies.)

No-Knead Pizza Dough

makes six 10″ to 12″ pizzas

(about 20½ hours, with only 90 minutes active time)

  • 7½ cups all-purpose flour (3 lb. 1.5 oz. or 1000 grams) plus more for shaping loaves later
  • 4 teaspoons fine sea salt
  • ½ teaspoon active dry yeast

Half recipe of the No-Knead Pizza Dough

makes three 10″ to 12″ pizzas

  • 3¾ cups all-purpose flour plus more for shaping loaves later (1 lb. 14 oz. or 850 kg.)
  • 2 teaspoons fine sea salt
  • ¼ teaspoon active dry yeast

Whisk flour, salt and yeast in a medium bowl. While stirring with a wooden spoon, gradually add 3 cups water (1½ cups if halving the recipe!). Stir until well incorporated. Mix dough gently with your hands to bring together  and form into a rough ball. Transfer to a large clean bowl. Cover with plastic and allow the dough to rise at room temperature in a draft-free place until the surface is covered with tiny bubbles and dough has more than doubled in size. About 18 hours time, though time will vary depending on the temperature of the room. 

Transfer dough to a floured work surface. Gently shape into a rough rectangle. Divide into 6 equal portions (or 3 if halving the recipe.) Working with 1 portion at a time, gather 4 corners to the center to create 4 folds. Turn seam-side down and mold gently into a ball. Dust the dough with flour; set aside on the work surface or floured baking sheet, and repeat with the remaining portions.

Let the dough rest, covered with plastic wrap or a damp kitchen towel, until soft and pliable, about 1 hour.

To Bake the Pizza Dough

During the last hour of the dough’s resting, prepare the oven. If using a pizza stone, place a rack in the upper third of the oven, put the pizza stone on it and preheat oven to its hottest setting, 500° – 550°F (260° – 290°C.) (If using a baking sheet, no need to preheat that.)

Working with 1 dough piece at a time, dust the dough generously with flour and place on a floured work surface. Gently shape the dough into a 10″ to 12″ disk (25-30 cm.)

If using a pizza stone – Sprinkle a pizza peel or rimless (or inverted rimmed) baking sheet lightly with flour. Place dough disk on the peel or prepared baking sheet, and, using back-and-forth movements, slide pizza from peel onto the hot pizza stone. Bake the pizza, rotating halfway through, until the bottom crust is crisp and the top is blistered, about 5 – 7 minutes total. If using this pizza dough for a Spreezza, brush with melted butter when you rotate the pizza. 

Spreezza! 

(pronounced spreé-tza)

Now, here is where this whole thing turns so fun! I’ll give guidelines for 2 versions here. I’ll share others as seasonal fruits appear. This isn’t science. This isn’t hard-and-fast measurements. This is Playing with Food! 

for each 10-12″ pizza, you will want – approximately:

Marscapone Layer

  • Marscarpone cheese – 8 ounces
  • zest of ½ lemon (about 1 Tablespoon
  • Juice of 1 lemon
  • 2 teaspoons (to 3 tsp.) powdered sugar

Berries

  • Fresh strawberries – ½ – ¾ cup, sliced
  • 2 teaspoons (to 3) powdered sugar (for strawberries)
  • zest of ½ lemon added to strawberries
  • Fresh raspberries – ½ cup
  • Fresh blueberries – ½ cup
  • lemon thyme – a couple sprigs
  • blueberry balsalmic vinegar – or good quality aged balsamic vinegar
  • OPTIONAL: Additional Powdered Sugar, sifted – you may want this especially if you’re serving for dessert as opposed to a brunch or breakfast


~ ~ ~ Read more

bread for tomorrow – the no-knead loaf

Did you know that ¼ teaspoon of yeast can rise a loaf’s-worth of dough just as well as a tablespoon? It’s true. It will simply take longer for it to do so. But there’s a real beauty in that. The old adage good things take time applies. With each extra hour the yeast grows, it adds incredibly to the flavor of the finished loaf. So, though some recipes for home-baked bread will have you adding nearly a tablespoon of yeast, and sugar for it to feast and grow quickly on, and have you rising the dough in a warm place, that’s meant for your convenience and to hurry the process. If you slow it down, you’ll love what happens!

This may be the easiest – and possibly one of the most delicious – breads you’ll ever bake. Start it today, finish it tomorrow, and there will be curtain calls and encores in your future! Do I exaggerate? Occasionally, I have, yes. But here, no.

For full-effect, a true Dutch oven is required f or this. Cast iron is best because it creates its own highly-conductive little furnace to bake the bread in. Higher-end brands like Le Creuset or Staub are lovely and come in many colors. But just as effective here are non-enameled (lidded) cast iron pots that you might see hanging over a campfire. The latter are inexpensive but require a bit more care in the cleaning, curing and preventing of rust. Always nice to have options though.

I’m sorry to repeat myself, but a digital kitchen scale makes this process so much simpler too, and with fewer things to clean up after. (See preceding posts if you haven’t already.)

This method (ingenious really) was first developed and introduced to us several years back by Jim Lahey of Sullivan Street Bakery in New York City. Since its introduction, this No-Knead method has rather revolutionized home bread-baking. Without terrifically expensive ovens (the kind of which are almost never seen in home kitchens), this bread’s crust wasn’t reproducible at home before. You can see for yourself though, loaves reminiscent of old-world bakeries can now emerge steamy and fragrant from our own rather ordinary ovens.The secret lies in the steam that’s created and contained within the Dutch oven as the bread bakes.

This bread will cost you the equivalent of 3 cups of good-quality flour. We won’t calculate the cost of ¼ teaspoon of yeast or a spoon of salt. Let’s just say this gorgeous bread costs less than a cup of coffee or tea (even a very bad cup.)

Let’s get started.

No-Knead “Artisan” Bread

and you are the artist!

  • 3 ¹⁄3 cups (430 g) flour (either all-purpose or bread flour)
  • ¼ teaspoon instant or active dry yeast
  • 2 teaspoon salt
  • 1½ cups  + 2 T (390 mL) water
  • Extra flour, wheat bran, fine cornmeal, as needed for dusting

a NOTE on the weight measurements, this primarily for the readers in the States who are as yet not as familiar as we will one day be with metrics. One beautiful thing about the metric system is that grams and mL’s are virtually interchangeable. In other words 100 mL’s of liquid will weigh 100 grams. Don’t you love that? That makes it possible to weigh out water measurements instead of the more approximate method of filling a glass measure where “a tad above-the line, below the line, eye-level” all makes a difference. Weighing is exact, every time.  (If you have a scale, it will likely convert US measurements to metric with a button-push, but just fyi 430 grams =  15.2 ounces.)

In a bowl, mix the flour, yeast and salt. Stir in the water to blend. If using a scale, place bowl on scale and zero it out. Add 430 grams flour. Add yeast and measure out salt. Zero the scale, and add 390 mL (or grams) of water. Mix loosely. (It will finish the process of blending as it sits.) What you’ll have will be a bit wet, shaggy and messy-looking. Cover bowl with a tea towel and allow to rest (and grow!) for 12 to 24 hours. (If you choose a cooler place, the process will likely take 18 to 24 hours. Room temperature, more like 12 hours.) When the dough is dotted with bubbles and very alive-looking, you’re ready for the next step.

Only 1/4 teaspoon yeast…amazing right?

Generously flour a work surface. Dump the contents of the bowl out onto it.

See all the strands of gluten that have formed while you’ve ignored your dough? This is what will create pockets to contain the gas.

No need to knead, but simply fold the dough over on itself several times. Cover it with a clean towel and allow it to rest for 15 minutes. (Dough that rests like this is much more workable.)

(This next step feels so good!) Using only as much flour as needed to prevent the dough from sticking to your fingers, shape the dough as follows:

Fold in thirds (as if you were folding a letter for an envelope, one fold, then another.) Rotate the loaf, then fold each longer end in again. (You’ve made roughly a square shape with rounded corners.) What you have facing you is the seam that will open later, upon the final rise in the oven. 

After the first two folds

After the last two folds. Ready to rise.

Lie another towel on your counter and cover with a generous amount of flour, wheat bran or fine cornmeal and then place the dough on it, seam-side down. Be sure the flour extends beyond the borders of the bread as it will be growing. The reason for the generous amount of flour is that you do NOT want the bread sticking to the towel when you go to invert it into a hot Dutch oven.  Dust the dough with a little more flour then cover with a tea towel and allow to rise about 2 hours. In these two hours the bread will have more than doubled its size.  Read more

German apple pancake

No food tradition in our family is longer-lived than the German apple pancake. So central a family holiday tradition, so beloved, for years it even served as the “secret password” between my daughters and me. We never needed to use it, but it was comforting knowing it was there. ; )

Every Christmas morning for our children’s lives our house would fill with the sweet perfume of cinnamon and nutmeg and caramelizing apples. Every Christmas morning, the girls’ eyes, and later on, the boy’s, would pop at the big puff of a pancake as it came from the oven. (It’s a bit of a wonderment really.) From the oven, I’d slip it onto a warm platter and then –  into the golden heart of it a steaming skillet-ful of glistening caramelized apples would tumble. I think it’s become impossible for any of us now to separate Christmas morning from the pancake.

As true as that is, we enjoy this special breakfast too much to relegate it to one morning a year. It manages to show up at birthday breakfast tables by request, and occasionally it appears just because  someone’s in need of a little extra lovin’ or an atta-boy or -girl! This year we’ll bring it the New Year’s table too. It’s how our family celebrates with breakfast.

So disappointed I forgot to include the cranberries for this one – it’s positively beautiful with them.

German Apple Pancake

serves 6 to 8 

the pancake:

  • 3 large eggs
  • ¾ cup milk
  • ¾ cup all purpose flour (3¾ oz. – 105 g.)
  • 1 teaspoon vanilla extract
  • ½ teaspoon salt
  • 1 teaspoon granulated sugar
  • 1½ Tablespoons butter

the apples:

  • 1½ pounds apples (up to 2 pounds will work) – Granny Smith are a good choice
  • ¼ cup melted butter
  • ¼ cup light brown sugar
  • ½ teaspoon ground cinnamon
  • ½ teaspoon ground nutmeg (either new or freshly grated is best)
  • ½ cranberries (optional)

the sprinkling of snow:

  • powdered sugar

Place an oven rack in the middle position. Preheat the oven to 500°F.

Into a blender (or food processor) break 3 eggs. Add milk and vanilla, and process for about 30 seconds. Add the flour, salt and sugar and process until lumps are gone, about 15 seconds. (Don’t overmix.) Allow to “bloom” – for flour to absorb the liquids completely – at least 15 minutes, and as long as overnight. Briefly mix again before pouring in the pan.

With oven at 500°F, melt 1½ Tablespoons butter in a heavy skillet over medium heat- cast iron works very well for this. When the butter has turned to foam, swirl it around the bottom of the pan, and slightly up the sides. Pour in the pancake batter and place the pan in the oven. Promptly lower the heat to 425°F. Cook for 10 minutes at this setting, and then lower the heat to 350°F and cook for about 15 minutes longer. (If during the initial stages of the baking, the center of the pancakes bubbles up and forms a little mountain, pierce it with a long handled fork. No worries if it doesn’t completely flatten though because the apples will take care of most of that.) Like magic, the sides of the pancake will rise up and form a bowl.  Read more

Mexican wedding cookies

When my brother and his new wife were married at our home this summer, our Mom brought Mexican wedding cookies. Every year they also appear at Christmas. They’re a lovely, buttery little cookie, tasting of toasty walnuts and covered with a dusting of white. They look like a snowball rolled downhill to me and seem so right on a plate of holiday cookies. But, somebody named them first, so Mexican wedding cookies they are.

We’ve had a busy four or five days. We’d feasted on Thanksgiving with fifteen around our table. Friday we finished cleaning up after the feast and then briefly braved the crowds. Saturday, after pulling boxes and boxes from the attic, our Christmas tree was lit and dressed with ornaments collected over years. Sunday, we had family for breakfast before they headed out of town. With no precise plan for the rest of the day, a little slow and easy pre-holiday baking sounded more restful than a nap.

I’d made this snowy little confection recently as part of a cookie platter we took to a party. I do remember pulling the recipe card from its sleeve inside a large binder, but its space was now vacant. I looked in files I keep near by desk, files filled with ideas to sample and recipes I intend to post. Not there. I looked in my cookbooks, thinking maybe I’d used the recipe card as a bookmark.  (Truth is: I looked in each of those places several times, disbelieving my eyesight the times before.) I looked in all kinds of unlikely places too, places I’m a bit embarrassed to confess. (Might I have left it in the laundry room on one of my many trips there? You never know.) But gradually it became clear: Mom’s recipe had gone missing.

Plan B: I’d seen a recipe for the same cookie in a special baking issue of Cook’s Illustrated and I’d wanted to sample it anyway. Thought I’d try it side-by-side my mom’s. The side-by-side would have to wait.

We’ve loved this cookie of mom’s. Trying to prepare myself for the possibility, I thought: No matter which recipe I end up using in the future, I’ll always associate this cookie with mom and the holidays. It will always be her cookie. Until yesterday, I had two unanswered questions: Can we improve upon perfection? and Why should we even try? I’ve explained the why part. Let me speak to improving upon perfection:

The Cook’s Illustrated  cookie is not overly sweet, but neither was my mom’s. And it has a wonderful texture. (Some I’ve tried are a bit dry and with no particular taste.  Again, not my mom’s.)  But where this version shone is in its walnut-ier taste and its supreme tenderness. (The secret: half of the two cups of these healthful nuts are ground, lending their good oil to the mix – and the other half are chopped, providing their softly nutty bite.)  Conclusion:

This cookie is one tender, melt-in-the-mouth, dribble-a little-powdery-sugar-on-your-sweater bite of deliciousness!

And yes, every once in a long while, we may need to update our notion of perfection.

~ ~ ~

While enjoying  a cookie or two with a cup of tea, I combed through some cookbooks that had come down through my mom’s family, some of them from as far back as the early 1900’s. Some of the ingredients, wow! At least a couple dozen updates to “perfection” have to have taken place since then!

Mexican Wedding Cookies

(Makes about 4 dozen)

  • 2 cups (8 ounces) walnuts (or pecans)
  • 2 cups (10 ounces) unbleached all-purpose flour
  • ¾ teaspoon table salt
  • 2 sticks (16 Tablespoons) unsalted butter, softened
  • 1/3 cup (2.5 ounces) superfine sugar (see NOTE on how to make your own)
  • 1½ teaspoons vanilla extract
  • 1½ cups (6 ounces) confectioners’ sugar (approximate) – for dusting

Adjust oven racks to upper-middle-and lower-middle positions. Preheat oven to 325°F. Line 2 large baking sheets with parchment paper or use silicon mats.

Using a food processor, grind 1 cup of walnuts to coarse cornmeal texture (10 to 15 seconds.) Transfer to medium bowl. Using either the food processor or chopping by hand, coarsely chop the remaining cup of nuts. (5 seconds in food processor.) Transfer to the same bowl and add the flour and salt.

In a large bowl, either using hand mixer or stand mixer, beat the butter and superfine sugar until light and fluffy. Beat in the vanilla extract. With mixer on low, slowly add the flour-nut mixture until combined, about 30 seconds. Scrape the bowl and beaters, then continue to beat on low speed until the dough is cohesive. (About 7 seconds.)

Working with one tablespoon at a time, press and roll dough together into balls and lay on prepared sheets, about 1 inch apart.

Bake cookies until pale gold and the bottoms are just beginning to brown, about 18 minutes, switching and rotating baking sheets halfway through the baking.

Allow cookies to cool on the cooking sheet for 10 minutes, then move to cooling rack to cool completely, about 1 hour.

Using either a bowl or a paper bag filled with confectioners’ sugar, roll the cookies to coat. Just before serving, re-roll and gently shake off any excess.

~ ~ ~

Read more

Grandma Bea’s Banana Bread with Chocolate

Makes two 5 x 9-inch (or 4-1/2 x 8-inch, taller) loaves

Ingredients

  • 3 cups mashed banana (6 – 7) (ripe & soft, but not mushy)
  • 1 tsp. lemon juice
  • 4 eggs
  • 1-1/2 cup sugar
  • 1 cup canola oil
  • 2-1/2 cups all-purpose flour
  • 2 tsp. baking powder
  • 2 tsp. baking soda
  • 1 tsp. salt
  • 1/2 – 3/4 cup chocolate chips
  • 1/2 cup chopped walnuts or hazelnuts, plus more for the top (nuts are optional)

Preheat oven to 350°F. Butter your loaf pans or line them with parchment paper.

With a fork, mash the bananas well in a small bowl. Add lemon juice to prevent discoloration; stir and set aside.

Read more

Strawberry & Rhubarb Galette

I had a bunch of fresh strawberries sitting on an old plate in a north window this morning as the sun came up. Dawnberries, I thought. And of course I had to bring my camera to where they sat. I can rarely leave anything this beautiful alone. The joy for me in cooking starts here, with beautiful fruit and vegetable shapes and colors. How shadows accentuate their plumpness. How water  makes their washed surfaces glisten.  How creases and dimples and stems and seeds tell the story of how they grew. What beauty crosses our paths in the ordinary, everyday act of putting a meal on the table!

(In the preceding post you’ll see how I came to choose this particular dish to share.)

Strawberry & Rhubarb Galette

For the dough, enough to make two 8-inch galettes:

(using a food processor)

  • 3 T. sour cream (or yogurt or buttermilk)
  • 1/3 cup (approximately) ice water
  • 1 cup all-purpose flour
  • 1/4 cup yellow cornmeal
  • 1 tsp. sugar
  • 1/2 tsp. salt
  • 7 T. cold unsalted butter, cut into 6 to 8 pieces

Stir the sour cream and 1/3 cup ice water together in a small bowl. Put the flour, cornmeal, sugar and salt into the bowl of a food processor fitted with the metal blade. Pulse to blend. Drop the butter pieces into the processor bowl and pulse 8 to 10 times, or until you have a consistency ranging from bread crumbs to pea-size pieces. With the machine running, pour the sour cream and water mixture through the feed tube and combine until the dough forms soft curds. (This will take just a short moment. You don’t want to over-mix, but you probably already knew that.)

Remove the dough from the processor and, separating it into two pieces, quickly shape each into a ball and then flatten to a disc. Wrap each separately in plastic and chill for at least 2 hours. (Alternately, put in the freezer for about 15 minutes.)

Remove from the refrigerator and with a light dusting of flour on your work surface, roll the disc into an 11-inch circle. (You may need to lift and add several light dustings of flour since the dough is very soft, and will roll out very thin.)

Storage of galette dough:  If you decide to only make one galette at a time, the remaining dough can stay in the refrigerator for a couple days; or, with parchment paper between them and wrapped air-tight, they can stay in the freezer for up to a month.

Read more