Skip to content

Posts tagged ‘brunch’

crêpes au chocolaté

As full as life is these days, I didn’t want to miss the opportunity to share a special treat that a MOM might like. Besides, I promised a mom I would.

I’ve shared another crêpe recipe with you previously (“plain,”  yet not-so-plain, and simply wonderful) – partly because of its versatility, savory or sweet, it remains our favorite.

Don’t misunderstand – today’s crêpe is no slouch! And it steps in to fill the cockles of a chocolate-lover’s heart…it  might even be the one to make a Mom or Grandma swoon….if you aim for that sort of thing.

__________

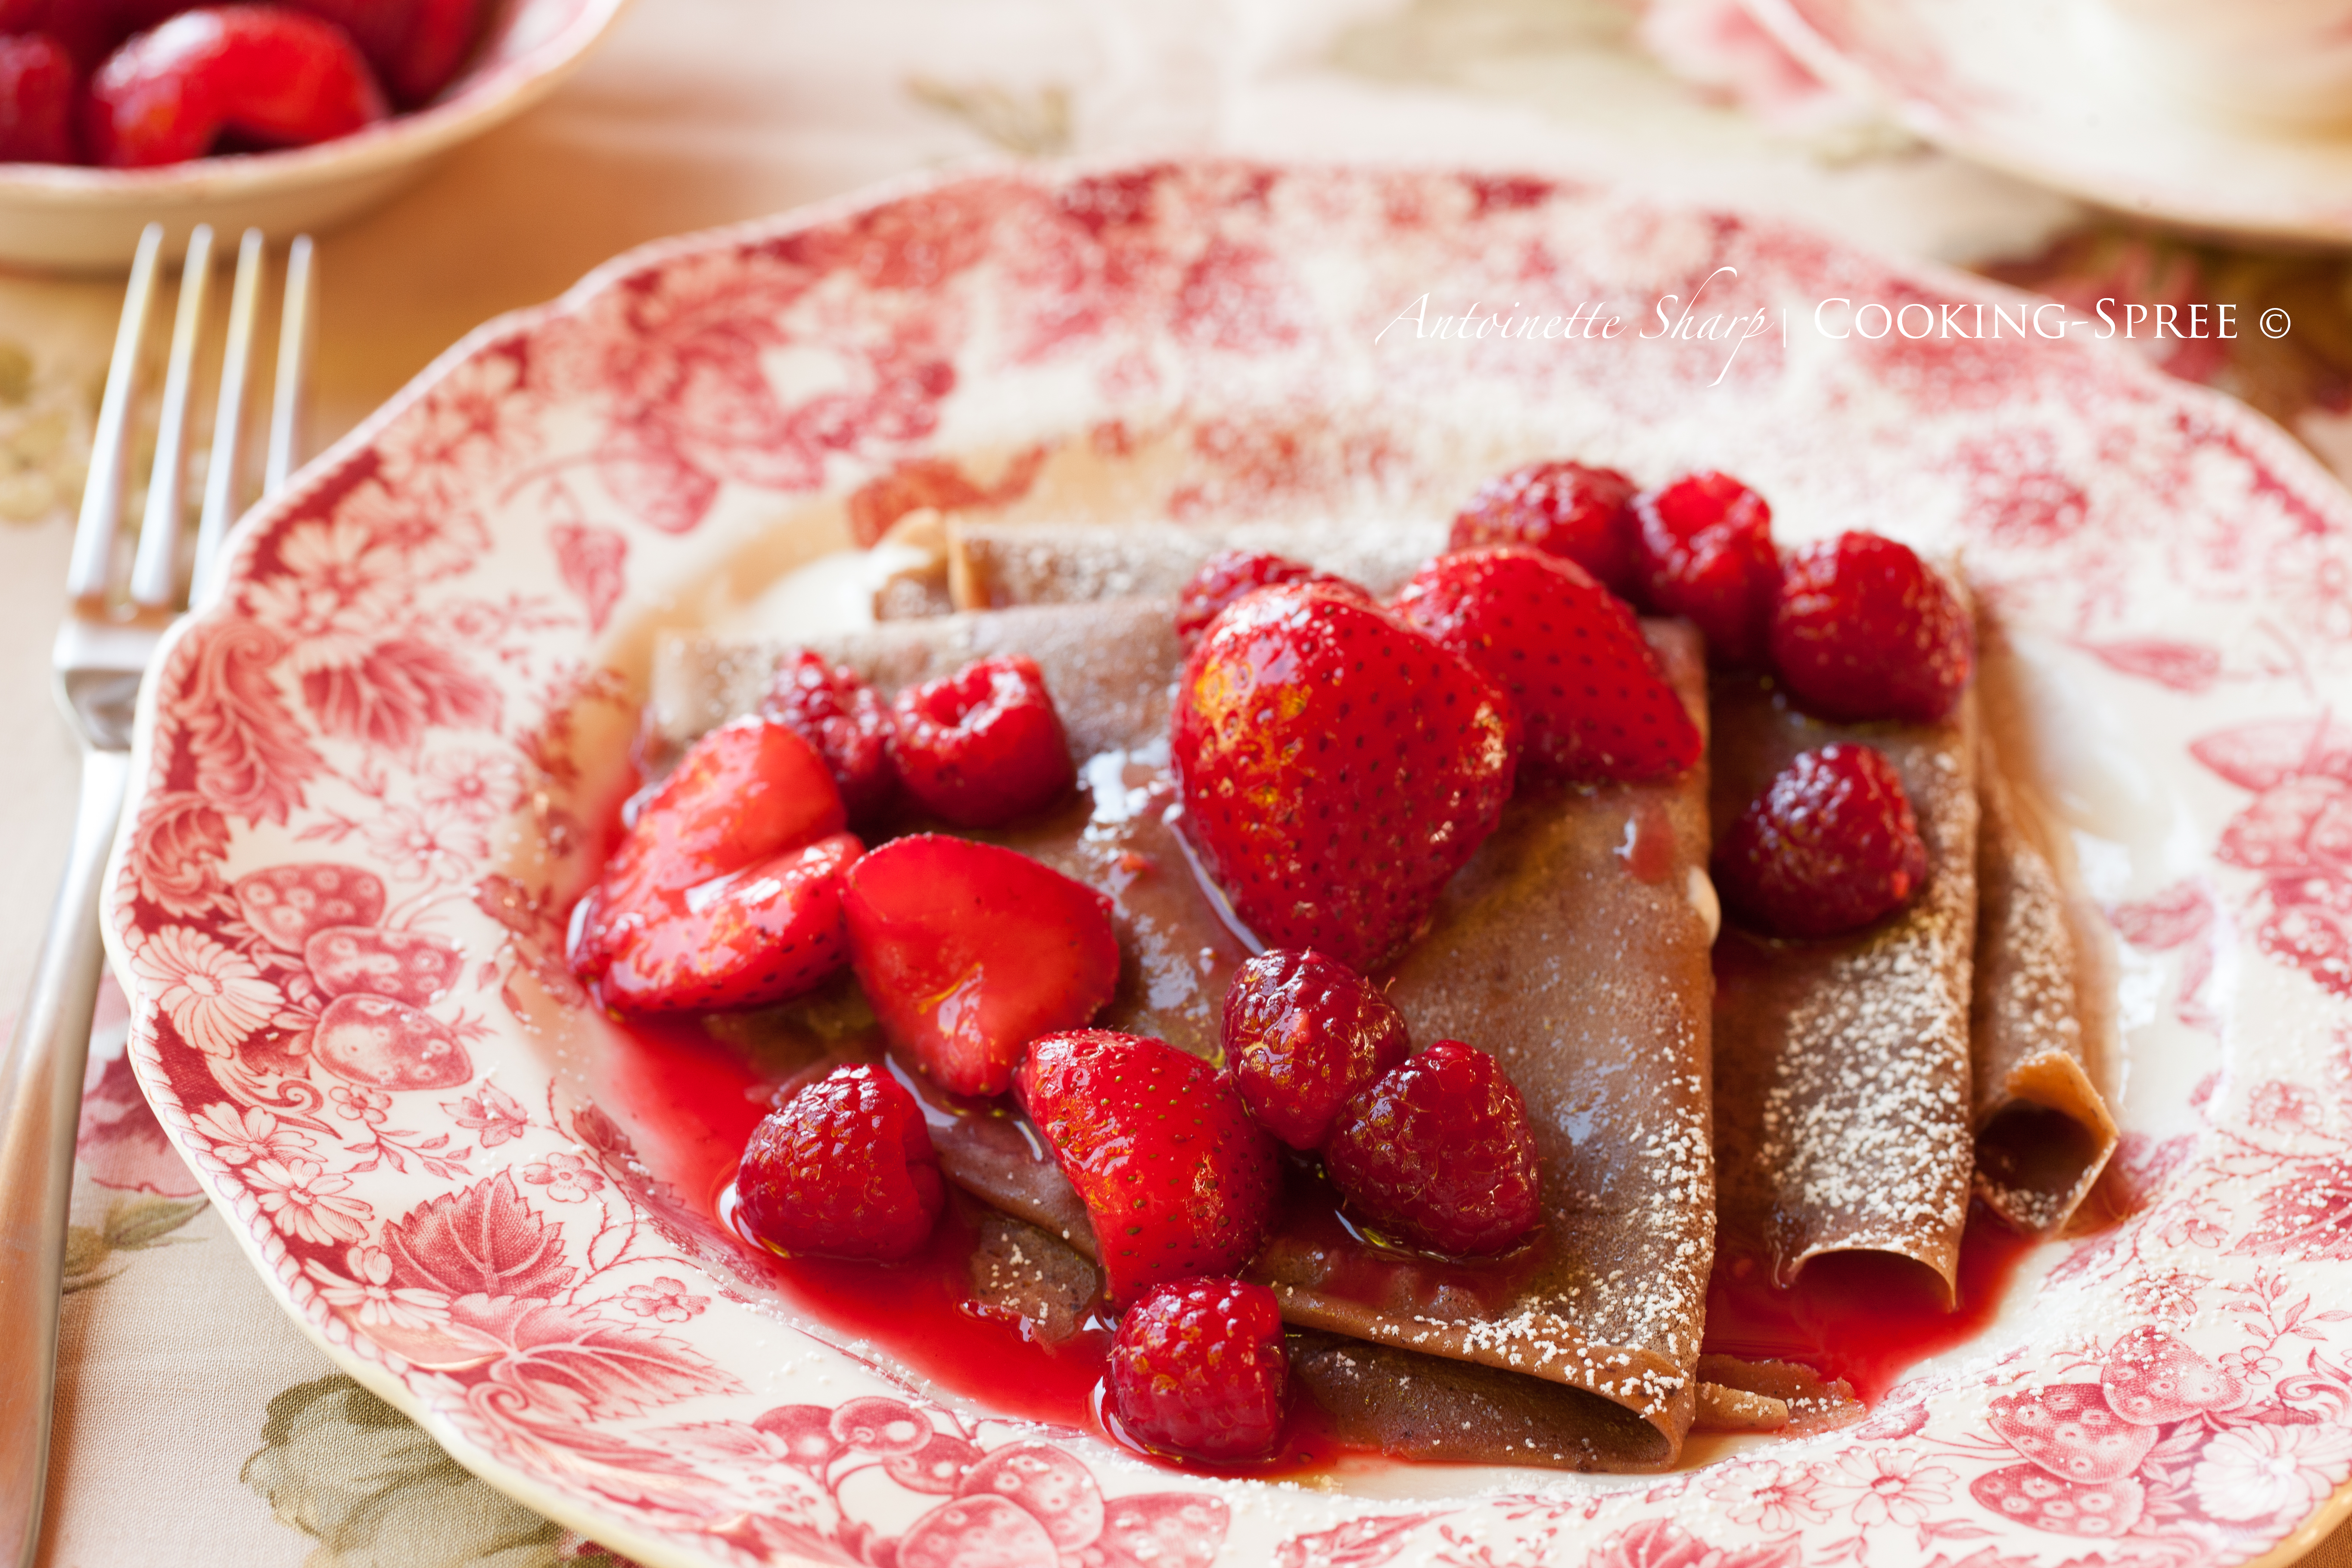
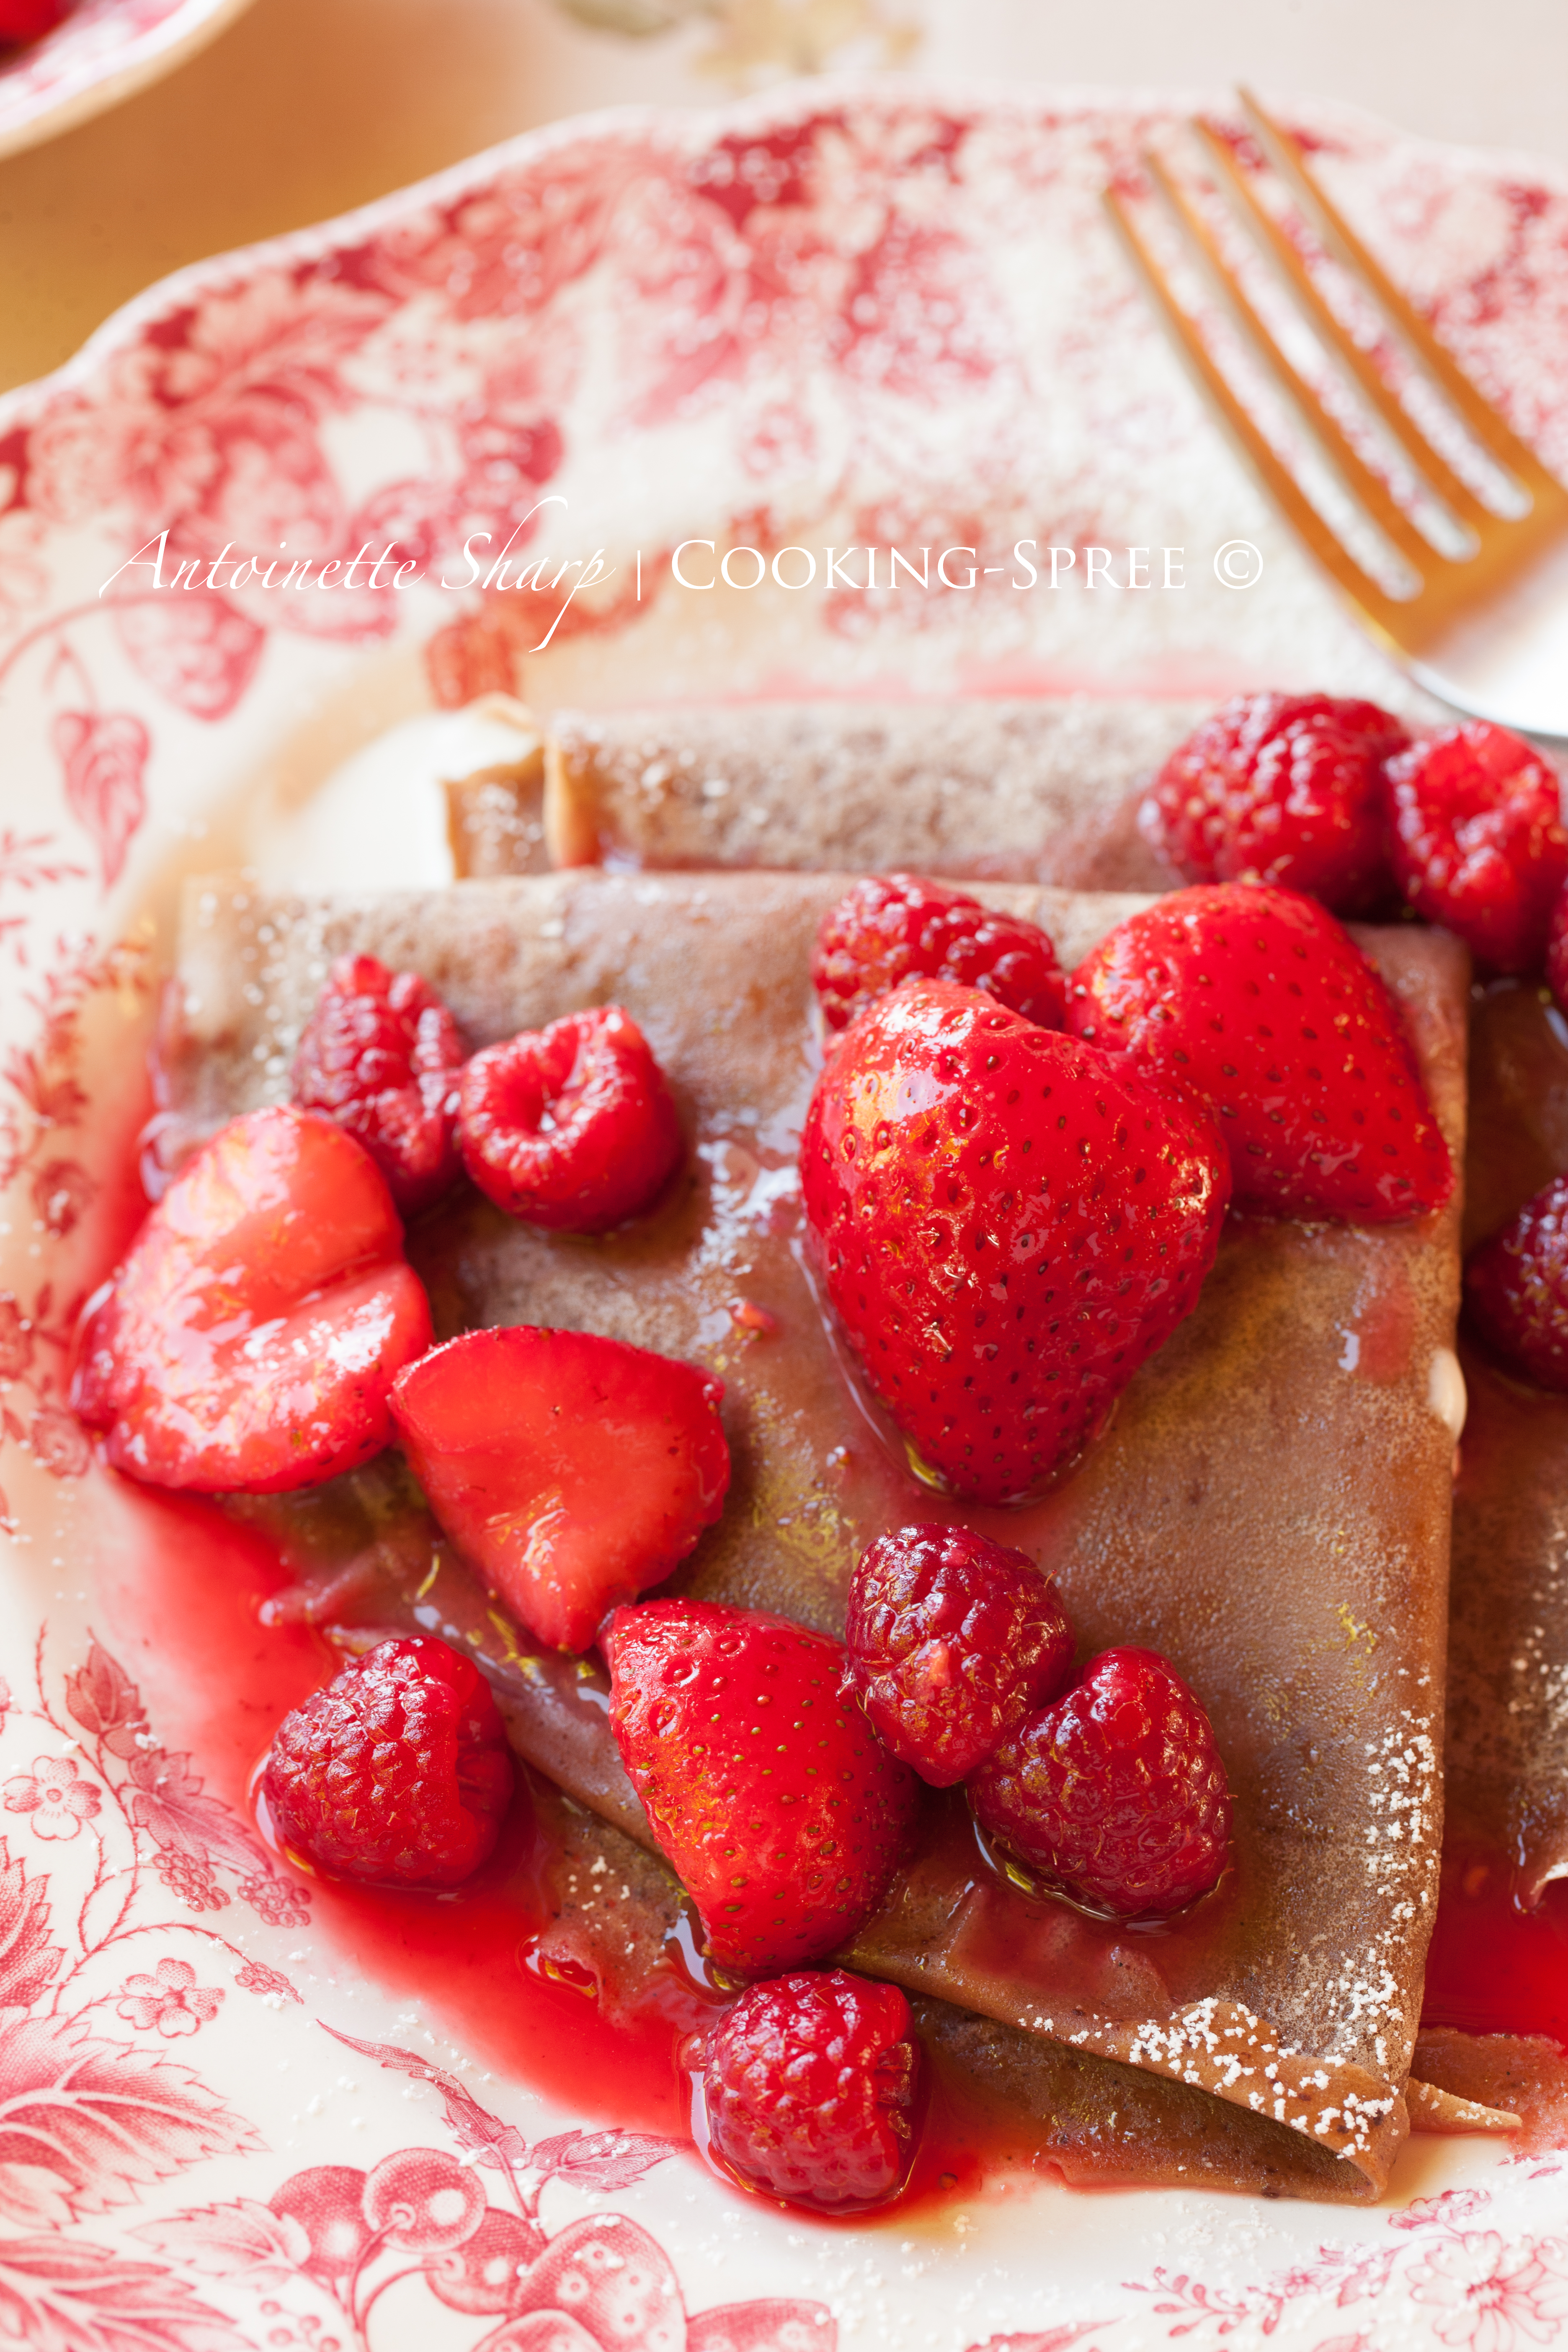
With a plateful of warm crêpes of chocolate, you’ll be faced with choices…What to pool inside? What to dribble over?

♥ A mixture of sour cream & crème fraîche, sweetened & flavored with vanilla, tucked inside (see below), and fresh berries toppled over…

 Or perhaps the yogurt of your choice, and then once again berries on top…

♥ Or even sliced bananas tucked inside and then a good dollop of cinnamon-scented whipped cream…and even an extra drizzle of chocolate…

 You might decide to roll them instead of folding them like hankies…

 You can dust the finished crêpes with either dark chocolate or confectioners sugar…or both…

For a dessert:

 Maybe you’d like to macerate your berries in melted raspberry sorbet first – you’ll know what to do with them from there…!

 You might like a softened vanilla ice-cream inside & a rich chocolate sauce dribbling over the edges of your hankies…

ChocolateCrepes-9

NOTE:  Keep in mind that it’s best to prepare these at the very least one hour ahead of cooking. Two hours is better. Overnight, or a full day ahead, is great! This allows the flour molecules to become fully hydrated and the crêpes to become their tenderest.

_________

Chocolate Crêpes

Makes 12 – 8 to 9-inch crêpes

__________

Butter – 1 Tablespoon

Bittersweet Chocolate – 1½ ounces (40 g) – chopped

Milk – 1 cup (250 mL)

Large Eggs – 2 

Sugar – ¼ cup (55 g)

Vanilla Extract – 1 teaspoon

All-Purpose Flour – 1 cup (125 g)

_______

ChocolateCrepes-8

Into a small to medium saucepan place the butter, chocolate and milk and gently heat, stirring occasionally, until the chocolate has melted. Remove from heat.

Using a medium-size bowl, beat the eggs with the sugar. Add the vanilla and then the flour. Now beat in the chocolate milk mixture, slowly at first to eliminate lumps from forming. Pour the mixture into a pitcher or jug.  (If lumps are present, strain into the pitcher.)

Allow to sit for at least one hour. See NOTE above.

Check the consistency of your batter. It should be like a thin cream…add small amounts of milk, mixing thoroughly, until desired consistency is reached.

When it’s time to cook your crêpes, a non-stick skillet (8 – 10″) will work best. But any skillet of this size will work…they will just require a spraying or a buttering/oiling of the pan from time to time. Crêpes are better if they’re drier, but don’t let this stand in your way of a treat!

Heat the oven to 150°F (65°C) and place a plate inside. Place your skillet over medium high and allow it to come to temperature.

(Count on the first one or two crêpes being trials, just as in pancakes.)

Depending on the size of your pan, you’ll only need 1½ to a scant 3 Tablespoons of batter per crêpe. Once your pan has reached temperature, raise it off the heat and drop in the batter, tilting the pan in a circular motion so that it coats the bottom of the pan evenly. Any holes can be filled with a touch of additional batter. When the underside is cooked and the topside is mostly dried (only about 1 minute!) lift one edge with a butter knife, or a skinny spatula (or even your fingers) and flip it to finish the crêpe – 30 seconds or so.

Place them on the heated plate in the oven (covered with foil) as you prepare the others, or serve them as they come out of the pan, as you prefer.ChocolateCrepes-10

These crêpes will freeze well if prepared ahead. Simply place parchment paper or waxed paper squares between them, and then placed in a freezer bag. Allow them to come to room temperature and then gently reheat them in a warm oven. Then fill and prepare as you like.

Read more

spreezza!

Oh, you’ve not heard of it? Spreezza’s that immensely popular little dessert pizza, covered with marscarpone cheese, topped with juicy fresh fruits, drizzled with  some delectable sauce or other, some even scattered with herbs. Oh, you’ve not heard of them?  I guess I must have made it up.

It begins with a good pizza dough….

This No-Knead Pizza Dough is bubbly, chewy, crispy and better than you’ll find at most pizza parlors. It can be used for ALL manner of pizzas – nothing at all about it restricts it to the dessert realm – in fact I’m the one who’s taken it there. It’s a take on the now-famous No-Knead Bread of Jim Lahey (owner of Sullivan St. Bakery in NYC) who introduced it a number of years back to rave reviews. I posted the bread late last year but if you missed the post and would like to take a look, you can check it out hereThis pizza dough, like the bread that inspired it, derives its wonderful complex flavor from its overnight fermentation. So the only thing you have to consider moving forward is to start it the day before you plan to enjoy it.

Now if you’ve got a hankering for a spreezza and you don’t want to wait til tomorrow, you can always begin with a store-bought dough (Trader Joe’s has a very good one), skip all this that I’m about to tell you about the dough, and move quickly to the spreezza recipe further down. But you might want to return to this dough another time, because it really is wonderful.

~ ~ ~

(Each of the following 10 to 12″ pizzas will make about 4 portions of dessert, 2 slices per person. About the same amount would hold true if being served for brunch with accompanying eggs and/or meats and other items. For breakfast, I’d allow more per person…maybe half a Spreezza per person. You can halve the recipe easily if you like. Or make the whole thing, break it into portions, wrap and refrigerate for up to 3 days to use in other ways…like a traditional pizza. Or stay tuned because I’ve got another fun idea coming up very soon! Flavor and texture of the dough will not suffer at all for the extra time spent in the fridge. If you want to wrap and chill ahead, just allow 2 to 3 hours once they come out of the fridge for unwrapped dough balls to rest before forming into pizza pies.)

No-Knead Pizza Dough

makes six 10″ to 12″ pizzas

(about 20½ hours, with only 90 minutes active time)

  • 7½ cups all-purpose flour (3 lb. 1.5 oz. or 1000 grams) plus more for shaping loaves later
  • 4 teaspoons fine sea salt
  • ½ teaspoon active dry yeast

Half recipe of the No-Knead Pizza Dough

makes three 10″ to 12″ pizzas

  • 3¾ cups all-purpose flour plus more for shaping loaves later (1 lb. 14 oz. or 850 kg.)
  • 2 teaspoons fine sea salt
  • ¼ teaspoon active dry yeast

Whisk flour, salt and yeast in a medium bowl. While stirring with a wooden spoon, gradually add 3 cups water (1½ cups if halving the recipe!). Stir until well incorporated. Mix dough gently with your hands to bring together  and form into a rough ball. Transfer to a large clean bowl. Cover with plastic and allow the dough to rise at room temperature in a draft-free place until the surface is covered with tiny bubbles and dough has more than doubled in size. About 18 hours time, though time will vary depending on the temperature of the room. 

Transfer dough to a floured work surface. Gently shape into a rough rectangle. Divide into 6 equal portions (or 3 if halving the recipe.) Working with 1 portion at a time, gather 4 corners to the center to create 4 folds. Turn seam-side down and mold gently into a ball. Dust the dough with flour; set aside on the work surface or floured baking sheet, and repeat with the remaining portions.

Let the dough rest, covered with plastic wrap or a damp kitchen towel, until soft and pliable, about 1 hour.

To Bake the Pizza Dough

During the last hour of the dough’s resting, prepare the oven. If using a pizza stone, place a rack in the upper third of the oven, put the pizza stone on it and preheat oven to its hottest setting, 500° – 550°F (260° – 290°C.) (If using a baking sheet, no need to preheat that.)

Working with 1 dough piece at a time, dust the dough generously with flour and place on a floured work surface. Gently shape the dough into a 10″ to 12″ disk (25-30 cm.)

If using a pizza stone – Sprinkle a pizza peel or rimless (or inverted rimmed) baking sheet lightly with flour. Place dough disk on the peel or prepared baking sheet, and, using back-and-forth movements, slide pizza from peel onto the hot pizza stone. Bake the pizza, rotating halfway through, until the bottom crust is crisp and the top is blistered, about 5 – 7 minutes total. If using this pizza dough for a Spreezza, brush with melted butter when you rotate the pizza. 

Spreezza! 

(pronounced spreé-tza)

Now, here is where this whole thing turns so fun! I’ll give guidelines for 2 versions here. I’ll share others as seasonal fruits appear. This isn’t science. This isn’t hard-and-fast measurements. This is Playing with Food! 

for each 10-12″ pizza, you will want – approximately:

Marscapone Layer

  • Marscarpone cheese – 8 ounces
  • zest of ½ lemon (about 1 Tablespoon
  • Juice of 1 lemon
  • 2 teaspoons (to 3 tsp.) powdered sugar

Berries

  • Fresh strawberries – ½ – ¾ cup, sliced
  • 2 teaspoons (to 3) powdered sugar (for strawberries)
  • zest of ½ lemon added to strawberries
  • Fresh raspberries – ½ cup
  • Fresh blueberries – ½ cup
  • lemon thyme – a couple sprigs
  • blueberry balsalmic vinegar – or good quality aged balsamic vinegar
  • OPTIONAL: Additional Powdered Sugar, sifted – you may want this especially if you’re serving for dessert as opposed to a brunch or breakfast


~ ~ ~ Read more

German apple pancake

No food tradition in our family is longer-lived than the German apple pancake. So central a family holiday tradition, so beloved, for years it even served as the “secret password” between my daughters and me. We never needed to use it, but it was comforting knowing it was there. ; )

Every Christmas morning for our children’s lives our house would fill with the sweet perfume of cinnamon and nutmeg and caramelizing apples. Every Christmas morning, the girls’ eyes, and later on, the boy’s, would pop at the big puff of a pancake as it came from the oven. (It’s a bit of a wonderment really.) From the oven, I’d slip it onto a warm platter and then –  into the golden heart of it a steaming skillet-ful of glistening caramelized apples would tumble. I think it’s become impossible for any of us now to separate Christmas morning from the pancake.

As true as that is, we enjoy this special breakfast too much to relegate it to one morning a year. It manages to show up at birthday breakfast tables by request, and occasionally it appears just because  someone’s in need of a little extra lovin’ or an atta-boy or -girl! This year we’ll bring it the New Year’s table too. It’s how our family celebrates with breakfast.

So disappointed I forgot to include the cranberries for this one – it’s positively beautiful with them.

German Apple Pancake

serves 6 to 8 

the pancake:

  • 3 large eggs
  • ¾ cup milk
  • ¾ cup all purpose flour (3¾ oz. – 105 g.)
  • 1 teaspoon vanilla extract
  • ½ teaspoon salt
  • 1 teaspoon granulated sugar
  • 1½ Tablespoons butter

the apples:

  • 1½ pounds apples (up to 2 pounds will work) – Granny Smith are a good choice
  • ¼ cup melted butter
  • ¼ cup light brown sugar
  • ½ teaspoon ground cinnamon
  • ½ teaspoon ground nutmeg (either new or freshly grated is best)
  • ½ cranberries (optional)

the sprinkling of snow:

  • powdered sugar

Place an oven rack in the middle position. Preheat the oven to 500°F.

Into a blender (or food processor) break 3 eggs. Add milk and vanilla, and process for about 30 seconds. Add the flour, salt and sugar and process until lumps are gone, about 15 seconds. (Don’t overmix.) Allow to “bloom” – for flour to absorb the liquids completely – at least 15 minutes, and as long as overnight. Briefly mix again before pouring in the pan.

With oven at 500°F, melt 1½ Tablespoons butter in a heavy skillet over medium heat- cast iron works very well for this. When the butter has turned to foam, swirl it around the bottom of the pan, and slightly up the sides. Pour in the pancake batter and place the pan in the oven. Promptly lower the heat to 425°F. Cook for 10 minutes at this setting, and then lower the heat to 350°F and cook for about 15 minutes longer. (If during the initial stages of the baking, the center of the pancakes bubbles up and forms a little mountain, pierce it with a long handled fork. No worries if it doesn’t completely flatten though because the apples will take care of most of that.) Like magic, the sides of the pancake will rise up and form a bowl.  Read more