Skip to content

Posts tagged ‘vegetable’

a soup to carry you through winter

What’s to like about winter? A low-slung sun. A bluer sky than blue. The last golden leaves to cling. Grass  that crunches under foot. Children’s boots and mittens.  Hot cocoa. The glow of candles near your bath. Longer hugs. And soup.

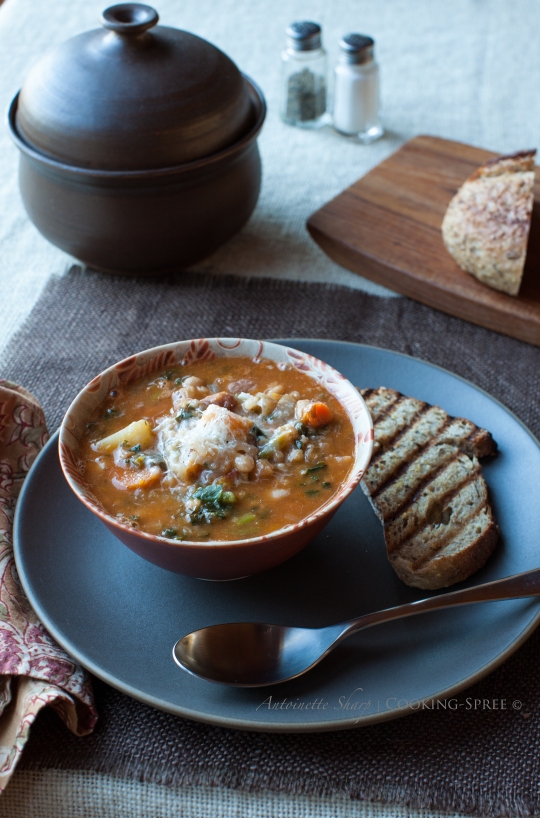
This is winter’s version of pistou, a Provençal vegetable soup, and I believe it is very possibly the finest winter soup I’ve ever made. It is, in fact, so fine a soup I’m going to be adapting it to different  kitchens and circumstances. (Slow-cooker and pressure cooker versions will follow before winter’s done with us.) It’s gob-full of vegetables, heavenly hearty, and will warm you to your chilly toes.

This makes an enormous potful. We took half out to our mom and the half we have remaining is enough to feed a table full. There’s quite a bit of chopping involved, but sharpen your knife and trust me…it will be so worth your time.

WinterProvencalVegetableSoup-7

_____

Provençal Vegetable Soup

_____

Extra-virgin Olive Oil – 5 Tablespoons

3 plump, moist Garlic cloves

Onions 4 medium, cut in ½ – 1-inch pieces

Leeks – 3 medium, white & tender green parts only, rinsed, quartered & thinly sliced

Bouquet Garni: several fresh or dried bay leaves, fresh celery leaves, thyme sprigs & parsley – either tie together or put in a wire mesh tea strainer

sea salt

Carrots – 8 medium, scrubbed & cut into thin wheels

firm, yellow-fleshed Potatoes (Yukon Gold) – 1 lb. (500 g)  peeled & cubed

Celery ribs – 4 ribs with leaves, cut into thin pieces

Butternut Squash or raw Pumpkin – 2 lbs. (1 kg), peeled & cubed (yield: 1 qt. or 4 c.)

Farro or Spelt – or substitute Barley – 1 cup, rinsed & drained

can peeled Italian plum Tomatoes in their Juice – 28-ounce (750 g) can

Tomato Paste – 2 Tablespoons

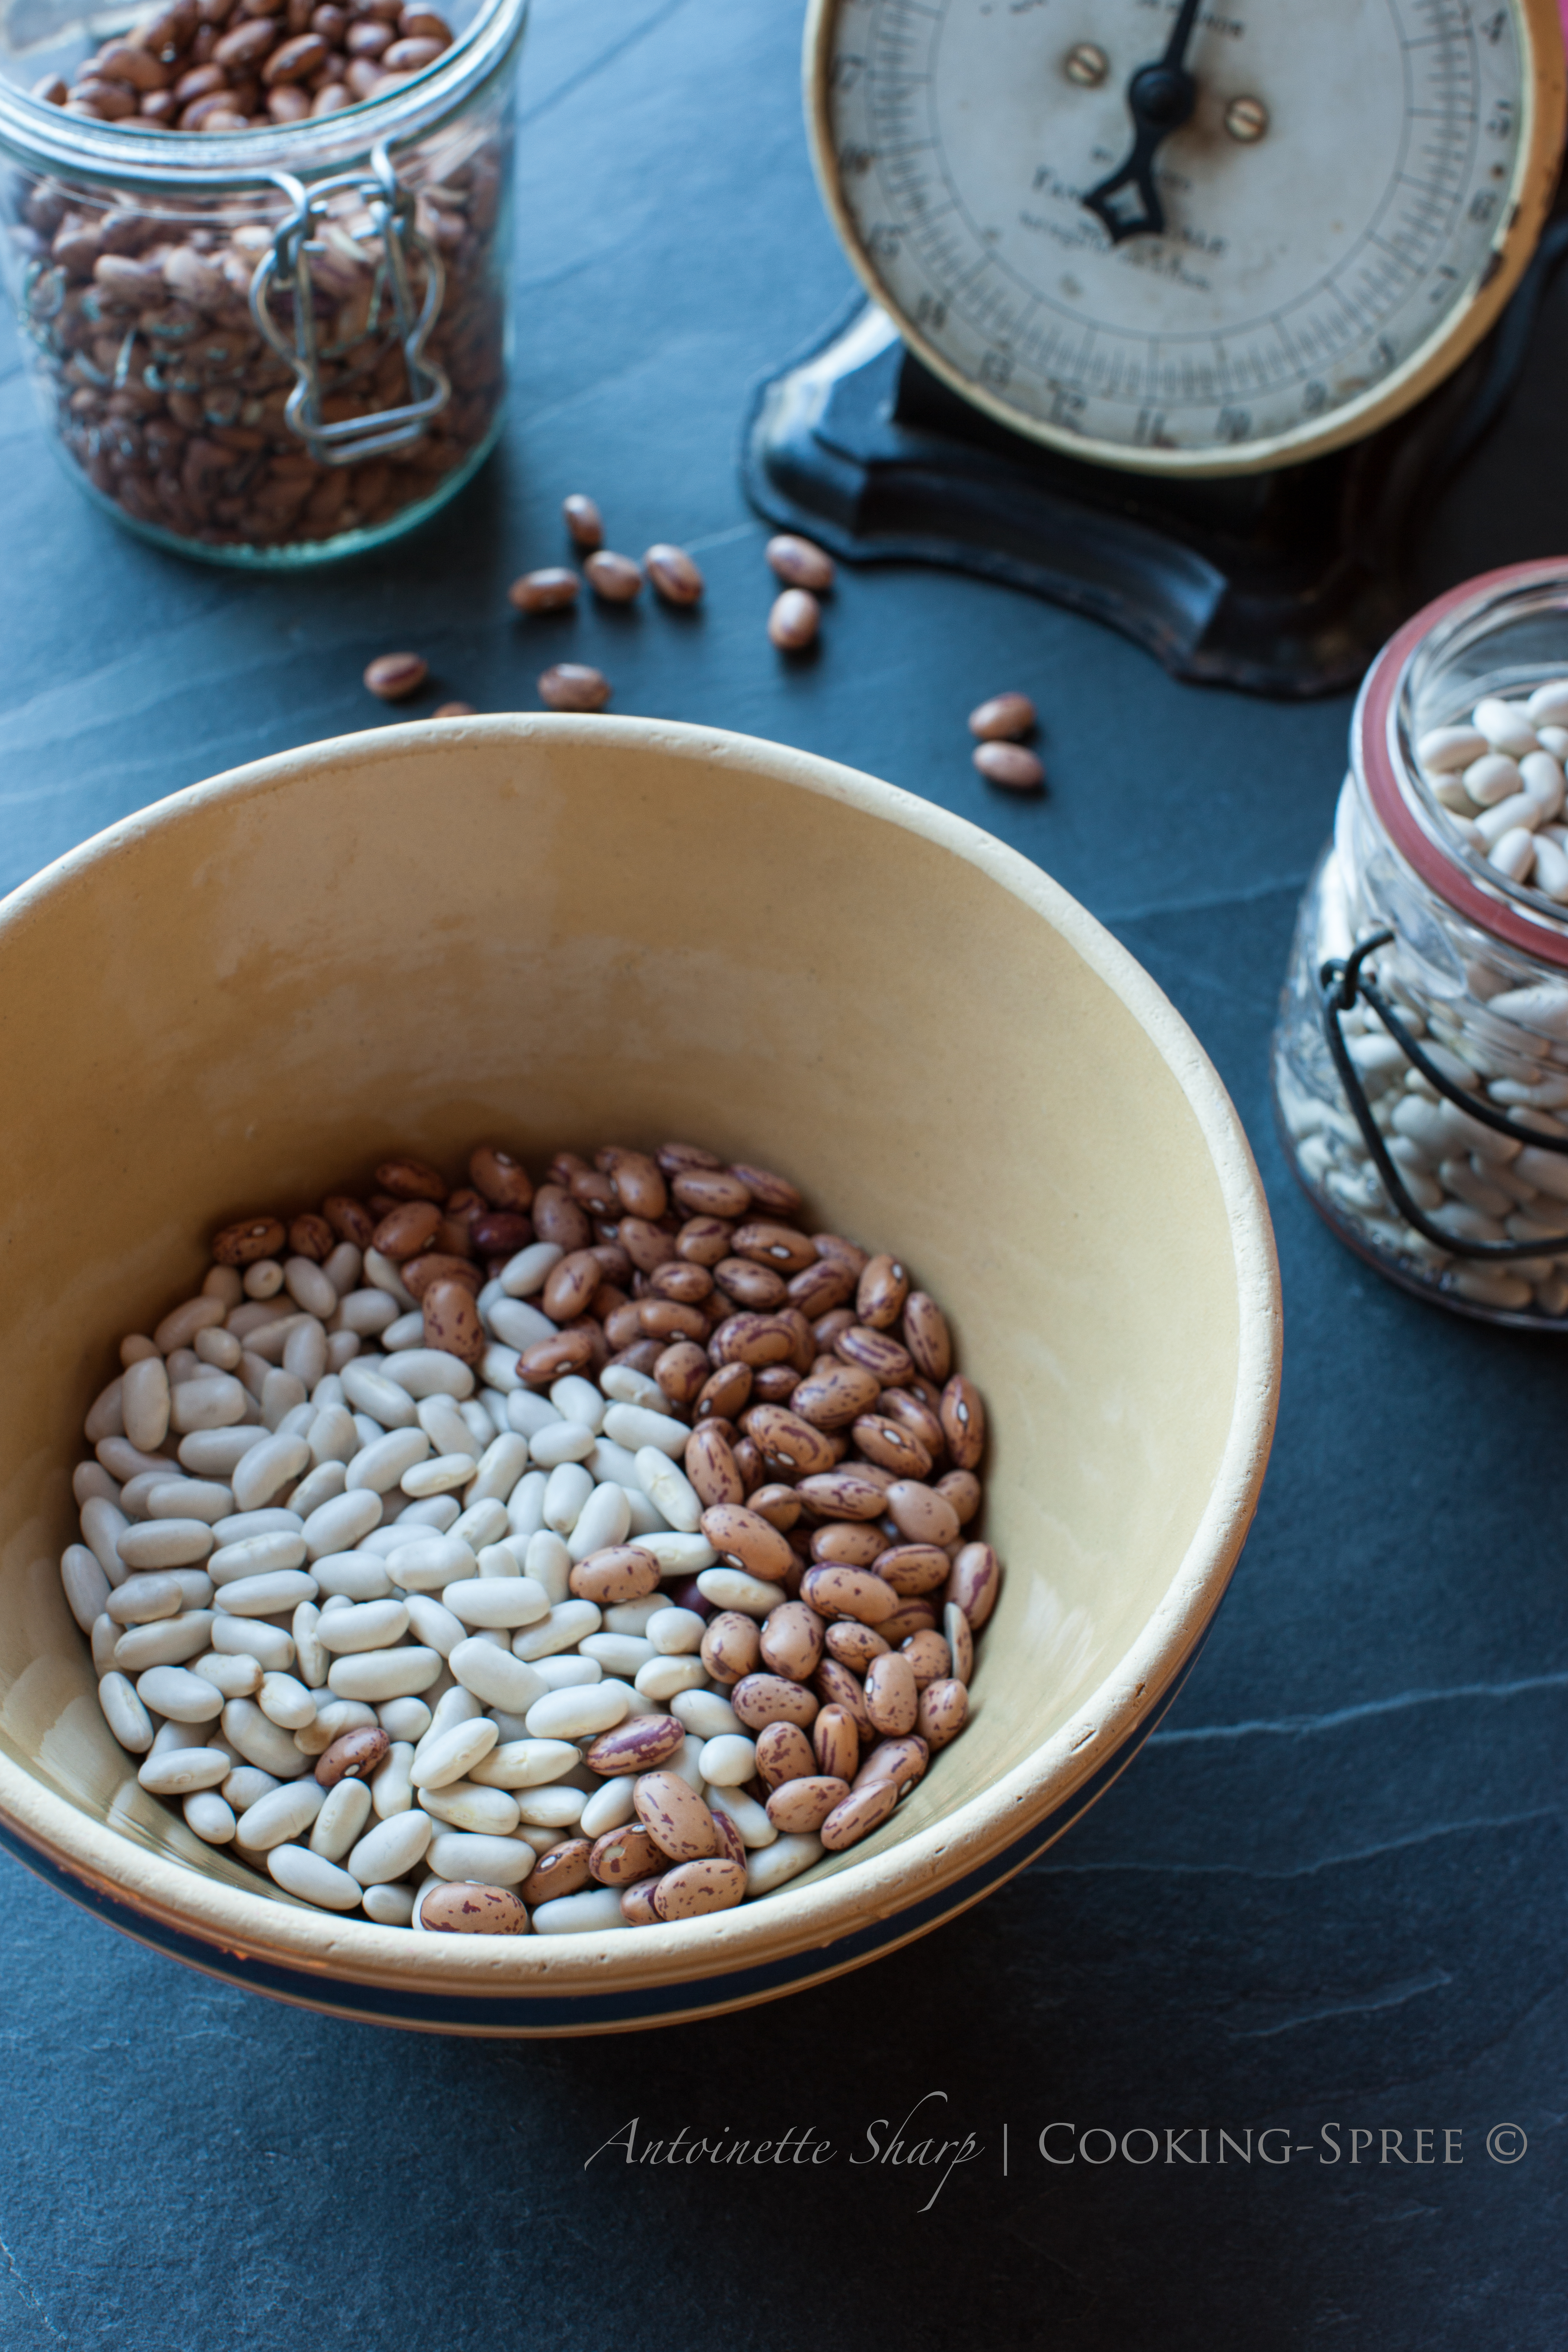
small White Beans – such as navy or flageolet (see NOTE)

Cranberry Beans (such as Borlotti) (see NOTE)

mixture chopped Kale & Spinach *

freshly-ground coarse Pepper

freshly-grated Pecorino Romano cheese – ¾ cup

freshly-grated Parmigiano-Reggiano cheese – ¾ cup

_________

NOTE: If using fresh beans, 1 pound of each in their shells. If using dried beans, 8 ounces (250 g) of each  – pick them over, making sure you have no little pebbles, rinse the beans, place in a large bowl & cover with boiling water;  allow to soak for 1 to 2 hours. Please note the different instructions – step 2 below – based on whether fresh or dried beans are used.

* – a bag of frozen chopped kale & spinach works great for this. Add as you’re ready to serve – each time you heat up a new potful of soup, add a handful or 2 of this mixture and you’ll have bright green in each bowl.

_______

WinterProvencalVegetableSoup-1

1. In a large, heavy-bottomed stockpot, combine the oil, onions, leeks, bouquet garni and salt to taste,  then stir to coat. On low heat, sweat the onions & garlic mixture – cooking with the lid on for several minutes until what’s in the pot is softened and fragrant. Drop in the carrots, celery, squash, potatoes, farro (or spelt or barley), the tomatoes with their juice, along with the tomato paste. Add four quarts (4 liters) cold water. If you are using DRIED BEANS – add only 3 quarts cold water at this time. Cover the stock pot and bring to a simmer. Gently simmer for 30 minutes. Taste for salt & add as needed.

WinterProvencalVegetableSoup-4

Read more

what? another take on hummus?

We have this favorite little Japanese maple out back. This past week, its finely pointed leaves began to wave then drop in sweet clusters of beet red.

It was quite impossible to say no to the urge that hit me…so,  with that…Wegetable Vednesday makes a comeback!

BeetBelugaLentilHummus-8

With the crimson and scarlet, burnt orange, rust and gingko gold of fall flying,  suddenly I craved the taste of color.

BeetBelugaLentilHummus-1

I’m in school and everything I do in the  kitchen for months will need to be simple. So, for a while simple is all I have to offer you.

…and a hope and a toast to your very good health!

__________

(Though the following recipe calls for black beluga lentils, they may be somewhat difficult to find. You can order on line if you like, or substitute with small, dark green Puy Lentils. Both these varieties will make a more luxuriously textured and  dramatically colored hummus.)

_______

Red Beet & (Black Beluga) Lentil Hummus

 Black  Beluga Lentils, rinsed – ½ cup

2 medium Beets or 3 small – peeled and cut into chunks

garlic – 2 cloves, peeled

Tahini Paste – 2 Tablespoons

Olive Oil – 2 Tablespoons

Fresh Lemon Juice – 2 Tablespoons

Lemon Zest – 2 teaspoons grated (minimum)

sea salt – 1 teaspoon (to start)

__________

NOTE: Sometimes lentils off the shelf are rather old and will benefit from a little soaking. Nothing extravagant here, but it wouldn’t hurt to allow them to soak an hour or two before draining and cooking. If your package says no need to soak, then no need to soak.)

BeetBelugaLentilHummus-13

Rinse the lentils and add to a medium size pot. Peel the beets and cut into chunks about 1½ inches in size. Add to the pot with the lentils and add 1 cup of water. Bring to boil and reduce temperature to simmer. The beets should be fork tender and the lentils soft when done.  (About 20 minutes or so.) Read more

Hummus – stuffing our pockets

Hummus was one of the first things I learned to make as a 20-something year old bent on eating well, while not making life difficult on relatives of cows I’d grown to love as a girl. The hummus of those days has morphed a number of times over, as we ourselves tend to do.

Back then I used canned chickpeas. I prefer to cook my own these days, but I’d much rather use canned chickpeas than face the dreadful plight of hummus-lessness when the mood for hummus-in-a-hurry strikes. I’m not at all a fanatic about cooking my own and  always have canned chickpeas on hand. BUT, I do think home-cooked beans are noticably better-textured and flavored and if you want to consider giving it a gohere are some reasons why you might consider it too –

You’ll cook them with no preservatives, no gross amounts of salt in the canning liquid – (though not all canned beans come loaded this way.) You can use some of your own cooking liquid to puree in with the beans. (Much better than plain water.) I won’t use the liquid if they’re canned. A batch of your own fresh-cooked chickpeas is a fraction of the cost of canned. There’s less to throw away (or recycle.) And then, there’s the taste.

One of the changes to my hummus has come about quite recently – only since developing a mad crush on Ottolenghi (I mean, his recipes!) It would seem that the skins of the chickpeas, even when the beans are cooked to softness, retain a bit of their toughness unless measures are taken to further soften them. Ottolenghi adds baking soda to both the soaking water, and then again to the cooking pot. This addition and sufficient cooking time are  probably THE keys to THE creamiest, most velvety hummus your mouth will ever taste. I’d like to compare it to ambrosia’s savory cousin, but having never tasted ambrosia…Anyway…

Another measure which I’ve read about recently – in several places – seems awfully tedious at first. – but perhaps especially in the case when canned beans are used, worth the extra effort. You squeeze each and every little chickpea between thumb and forefinger, easily slipping them out of their filmy skins. This happens all the more easily with the addition of baking soda to the cooking water. (It’s as if they were itching to shed them, and you came along, right place, right time.) What’s left, once these naked beans are pureed with garlic and fresh lemon juice and tahini (the “butter” of sesame seeds”) is exquisitely smooth.

________________

The pita-pocket sandwich is just about whatever you’d like it to be. What I’d like it to be goes something like this:

Home-baked pita, sliced in half. A good slathering of lemony hummus, topped with thinly-sliced tomatoes and English cucumbers (the kind with the very small seeds); perhaps some sprouts or pea-shoots or micro-greens; maybe some delicate leaves of Spring lettuce, or any other lettuce shredded; perhaps some shredded carrot; a little feta; thin slices of red onion; perhaps some marinated & grilled kabobs of fish or chicken (or you decide); definitely some Greek-style yogurt or tzatziki. And maybe an extra drizzle of olive oil. And because each half is fairly small and because life comes with SO many choices, and choosing is sometimes very hard, make them every which way.

PitaHummus-3

But DO start with the hummus:

PitaHummus-2

The Hummus

_______

1¼ cups dried chickpeas, soaked in cold water overnight (See NOTE)

1½ teaspoon bicarbonate of soda (baking soda)

Juice of 2 to 2½ lemons, or to taste

2 or 3 cloves garlic, crushed

salt to taste

4 – 5 Tablespoons tahini (sesame paste)

a pinch (or several) of ground cumin

extra virgin olive oil

_____

OPTIONAL: see below for optional garnishes & serving suggestions

Hummus becomes a personal thing over the years. You find what you like – more garlicky or lemony, or less? – more tahini, less tahini? – more herbs or none at all? It pays to taste a little as you go. Taste your tahini before you start. Is it bitter? Then go with far less than what’s shown above. (I ruined a batch once with tahini far different than what I was used to.) Add most of the lemon and 2 cloves of garlic to start. It won’t be the right consistency yet, but Taste. If it’s tasting about right, don’t add the rest until closer to the end if at all. You’ll develop your own perfect proportions. With that out of the way, here’s the method –

NOTE: 1¼ cups dried chickpeas will equal about 3¾ cups cooked – if you use canned chickpeas you can give them a little extra cooking time in fresh water to soften them further, and then if you like, remove the skins from them as well.

_____

Read more

creamy carrot soup & preserved lemons

On a winter’s afternoon, weeks still before Christmas, a good friend Carolyn and I came together in my kitchen. We’d amassed on the counter several bags of organic lemons, sea salt, a few herbs and spices, and a collection of pretty jars.  We washed, sliced and stuffed the lemons with salt. We packed them tight into their jars. Then tighter still. We dropped bay leaves and pink peppercorns and allspice berries in behind them, and then squeezed juice enough from other lemons to cover them. We talked about what we’d do with them and who we’d give them to as gifts for Christmas. In six weeks they’d be ready. Carolyn hadn’t tasted them before, so she could hardly wait.CarrotSoup-1Some time – too long ago – I posted on how to preserve lemons. I (kind of) promised that I’d share recipes that used these indescribably delectable “preserves”. (In all truth, though, you don’t really need a recipe in order to use them. You can strew them on a salad or in the salad’s vinaigrette; or in with roasted or steamed vegetables; make a simple sauce sort of extraordinary; add them to stews or soups; flavor grilled or poached fish with them. I reach for them several times a week, at least!) Over the next couple months I’ll share a good handful of really good recipes. One of them will be from my friend Carolyn who invented it on the spot (she does that sort of thing, and created herself a beautiful shrimp dinner in about 15 minutes.) She told me about it and I made it and we loved it. (Expect to see more from Ottolenghi too.)

This one today is from Mike – Mike, married to my daughter, is a good good cook. They received a jar of Preserved Lemons for Christmas. One day my girl and I were on an outing and she raved about the dinner Mike had made the other night. By that afternoon, I was texting Mike…

He generously shares his soup:

Creamy Carrot Soup with Preserved Lemons

1 medium yellow onion, diced

2 -3 Tablespoons butter or olive oil

 2 cloves of garlic, minced

1½ teaspoons finely minced ginger root

 2 cups chicken stock (or good vegetable stock)

2 Tablespoons dry sherry or white wine

8 to 10 medium carrots, sliced thinly

1 to 2 sections of preserved lemon, diced finely (See NOTE)

1 to 1¼ cups milk (from whole milk to 1% to your preferred milk alternative)

Salt & Pepper (white if you have it) to taste

NOTE on preserved lemons. By “sections” we mean quarters of lemon. After soaking in a briny liquid for 6 weeks, the flesh of the lemon has given over much of its juice to the jar. The rinds of the lemon have softened, and in a way quite impossible to describe, have mellowed, given up their acidic bite and become more roundly-flavored, very lemony still, but not mouth-puckeringly so. To use them, you remove the flesh (either discard it or toss it back in the jar) and use only the rind, which you rinse well first and then (generally) finely dice. If you cook with it, it will impart its lemony-ness to the dish but in a way you can’t quite put your finger on. If you use it fresh, without cooking first, you get little lemony bursts.

CarrotSoup-2

If you don’t want to make them yourself, you can find them in many markets. That said, they’re easy and (we think) fun to make…especially with a friend.

CarrotSoup-3 Read more

green beans in summer

Keeping it simple, keeping it cool.

Fresh, crisp green beans, lightly and barely cooked then chilled. Drizzled with walnut oil. Scattered with toasted walnuts and fresh thyme leaves. Sprinkled with crunchy salt & crumbles of blue cheese. Served with anything off the grill or as one of a trio of summer salads. Simple and cool, like lemonade and a run through the sprinkler, just what we need, just as we need it.

.

.

.


A few secrets to beautifully cooked green beans: 

Lots and lots of water…a big pot full of roiling, boiling water.

Lots of salt…way more than you think you’d need.

quick cooking.

And, unless you’re serving immediately, a good ice-cold bath & toweling off. (the beans, I mean … but it might be just what you need too.)

Why so much water? Because when you drop the beans in, the temperature will naturally drop and will need to return to a boil…that takes far less time the more water you have. Why so much salt? It helps lock in the color AND salted water boils at a higher temperature. (Don’t worry – very little of it will be left on the beans.) As quick a cooking as possible because the longer they’re in hot water the limper and paler they become and the more of their vitamins and minerals they’ll lose. Why the quick ice bath? If you don’t cool them immediately, they’ll continue cooking outside the pot, well beyond their perfect doneness. (Thank you Julia Childs – how to cook good green beans, one of the first things I learned from you as a young cook.)

As usual when presenting vegetables, I’ll leave quantities safely in your own able hands. Here are just a list of ingredients & a few guidelines.

Green Beans in Summer with Walnut Oil, Walnuts & Blue Cheese

Fresh, crisp brightly colored green beans

Walnut oil (so delicious! You won’t be sorry you picked some up if you haven’t already)

Walnuts

Coarse, crunchy salt (like Fleur gris or Maldon) – (See NOTE)

Blue cheese

a few sprigs of fresh thyme

~ ~ ~

NOTE on salt – if you enjoy salt, you’ll much prefer the crunchy little bits of a coarser, slower-dissolving kind in a dish like this. It adds another element & a distinctive texture to this simple dish.

Read more

wednesday vegetables thursday

It was bound to happen.

Set an intention, make an appointment, pledge a promise, cross your heart.

But perhaps you’ve noticed –

life isn’t always a respecter of such things…and really, why should it be?

Life is bigger (& thankfully, more mysterious) than that.

But had I been able to keep my appointment with you to bring vegetables on Wednesday,

this is what I would have brought.

You would have really liked it I think…

Spinach with Chickpeas

serves 6

(more delicious by far than the photo can say)

2 pounds fresh spinach

Chickpeas (one 14 oz. can)

4 – 6 cloves garlic, chopped

1½ teaspoon ground coriander

3 Tablespoons extra-virgin olive oil

Sea salt

Pepper

Optional: Juice of 1 lemon

Optional, but wildly delicious: chopped preserved lemon

 Wash the spinach, removing only the thick long stems if there are any. Drain excess moisture from the leaves.

In the largest wok or sauté pan you have, add the olive oil.  Turn heat to medium. When oil begins to shimmer warm, drop in the chopped garlic and ground coriander. Stir until the aromas rise. Without adding any additional water, pack in the spinach leaves, place a lid on the pan and reduce temperature to low. Read more